Kustto
A marketplace where people design custom apparel and merchandise in the browser, from a single piece, and Mexican print workshops produce and ship it.
Context
Kustto connects buyers with Mexican screen-printing, embroidery, sublimation and laser workshops. Buyers design the product themselves, from a single piece, and a workshop produces and ships it.
Where It Started
It began as P&P Custom, a product configurator with a canvas editor. It then moved to AWS serverless so it could run almost for free before it had customers.
The Rebuild
As workshops, shipping and live notifications arrived, the serverless version turned into a set of workarounds. Kustto moved back to NestJS and Postgres while keeping every API response identical.
The Value
Buyers see what they will receive before they order, and workshops get orders with the side, color, sizes and a file ready for their machine instead of a JPG and a chat thread.
Design it,
then try it on.
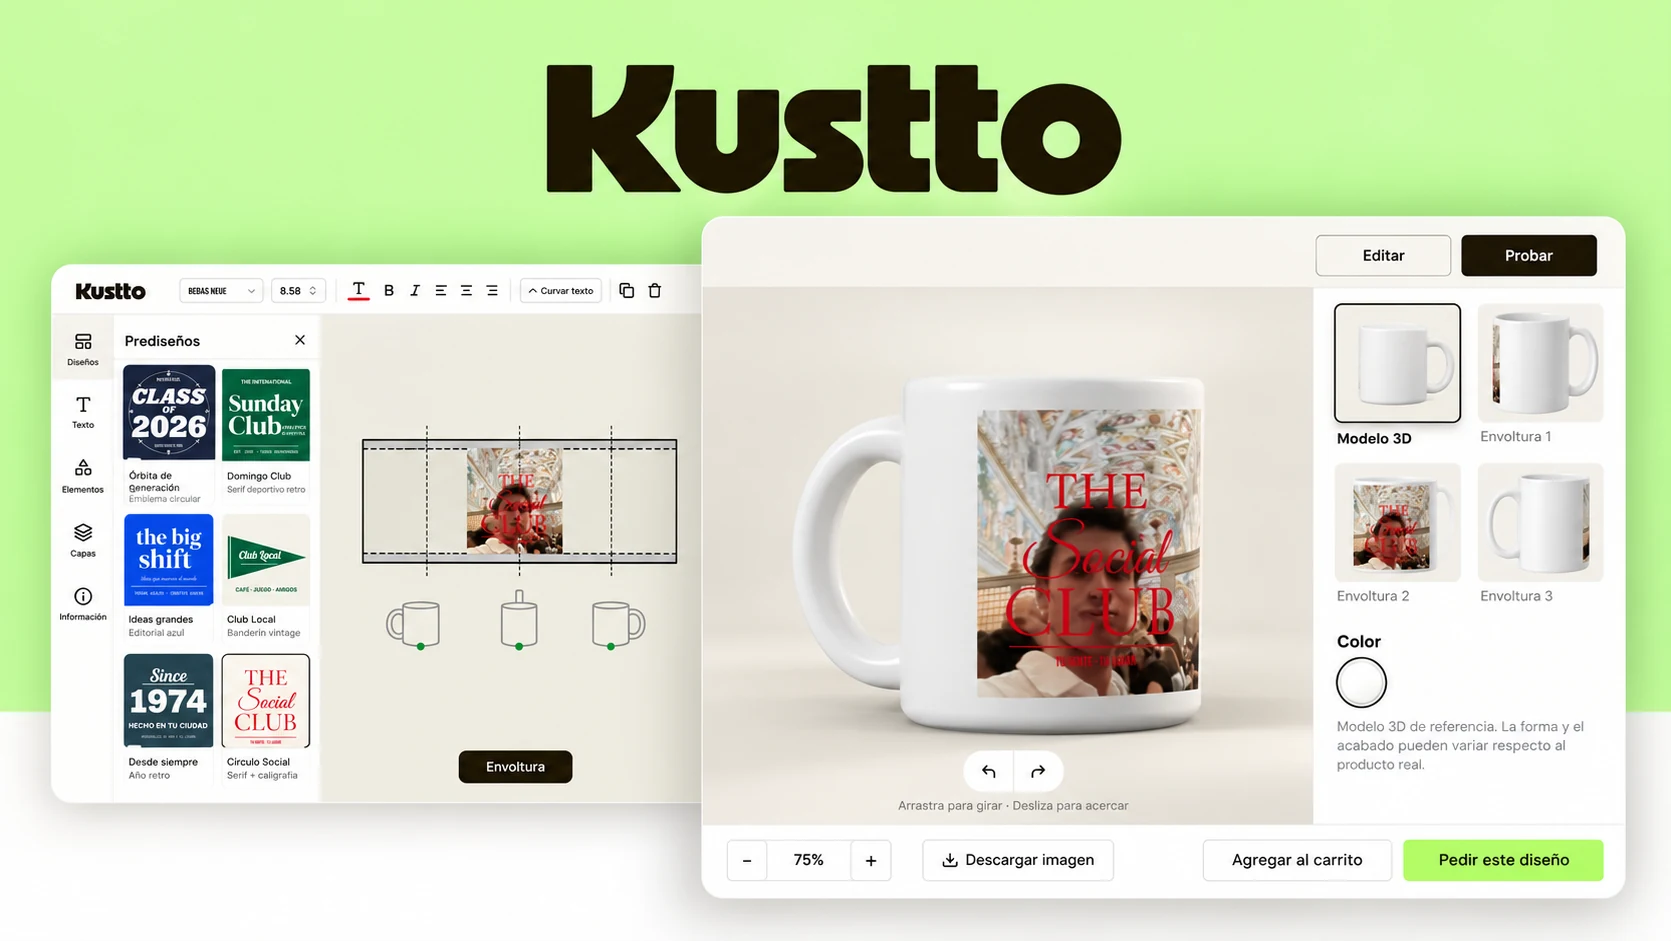
The editor is the product. It runs on Fabric.js with one canvas per printable side. Below are three real designs, from the editing screens to the preview the buyer sees before ordering.
Presets and graphics
Editable predesigns for common occasions, and an icon search across open collections that buyers can recolor.
Image studio
Crop, remove the background, adjust, or turn a photo into one or two flat inks.
Edit and Probar
Every product has two modes: Editar, the flat canvases, and Probar, the 3D model and the workshop's photos.
Rules per product
Sides, printable areas and the technique come from each product, so the editor only offers what can be made.
Two sides, one design
A shirt has four printable sides: front, back and both sleeves. Each one is its own canvas, limited to the area the workshop can print.
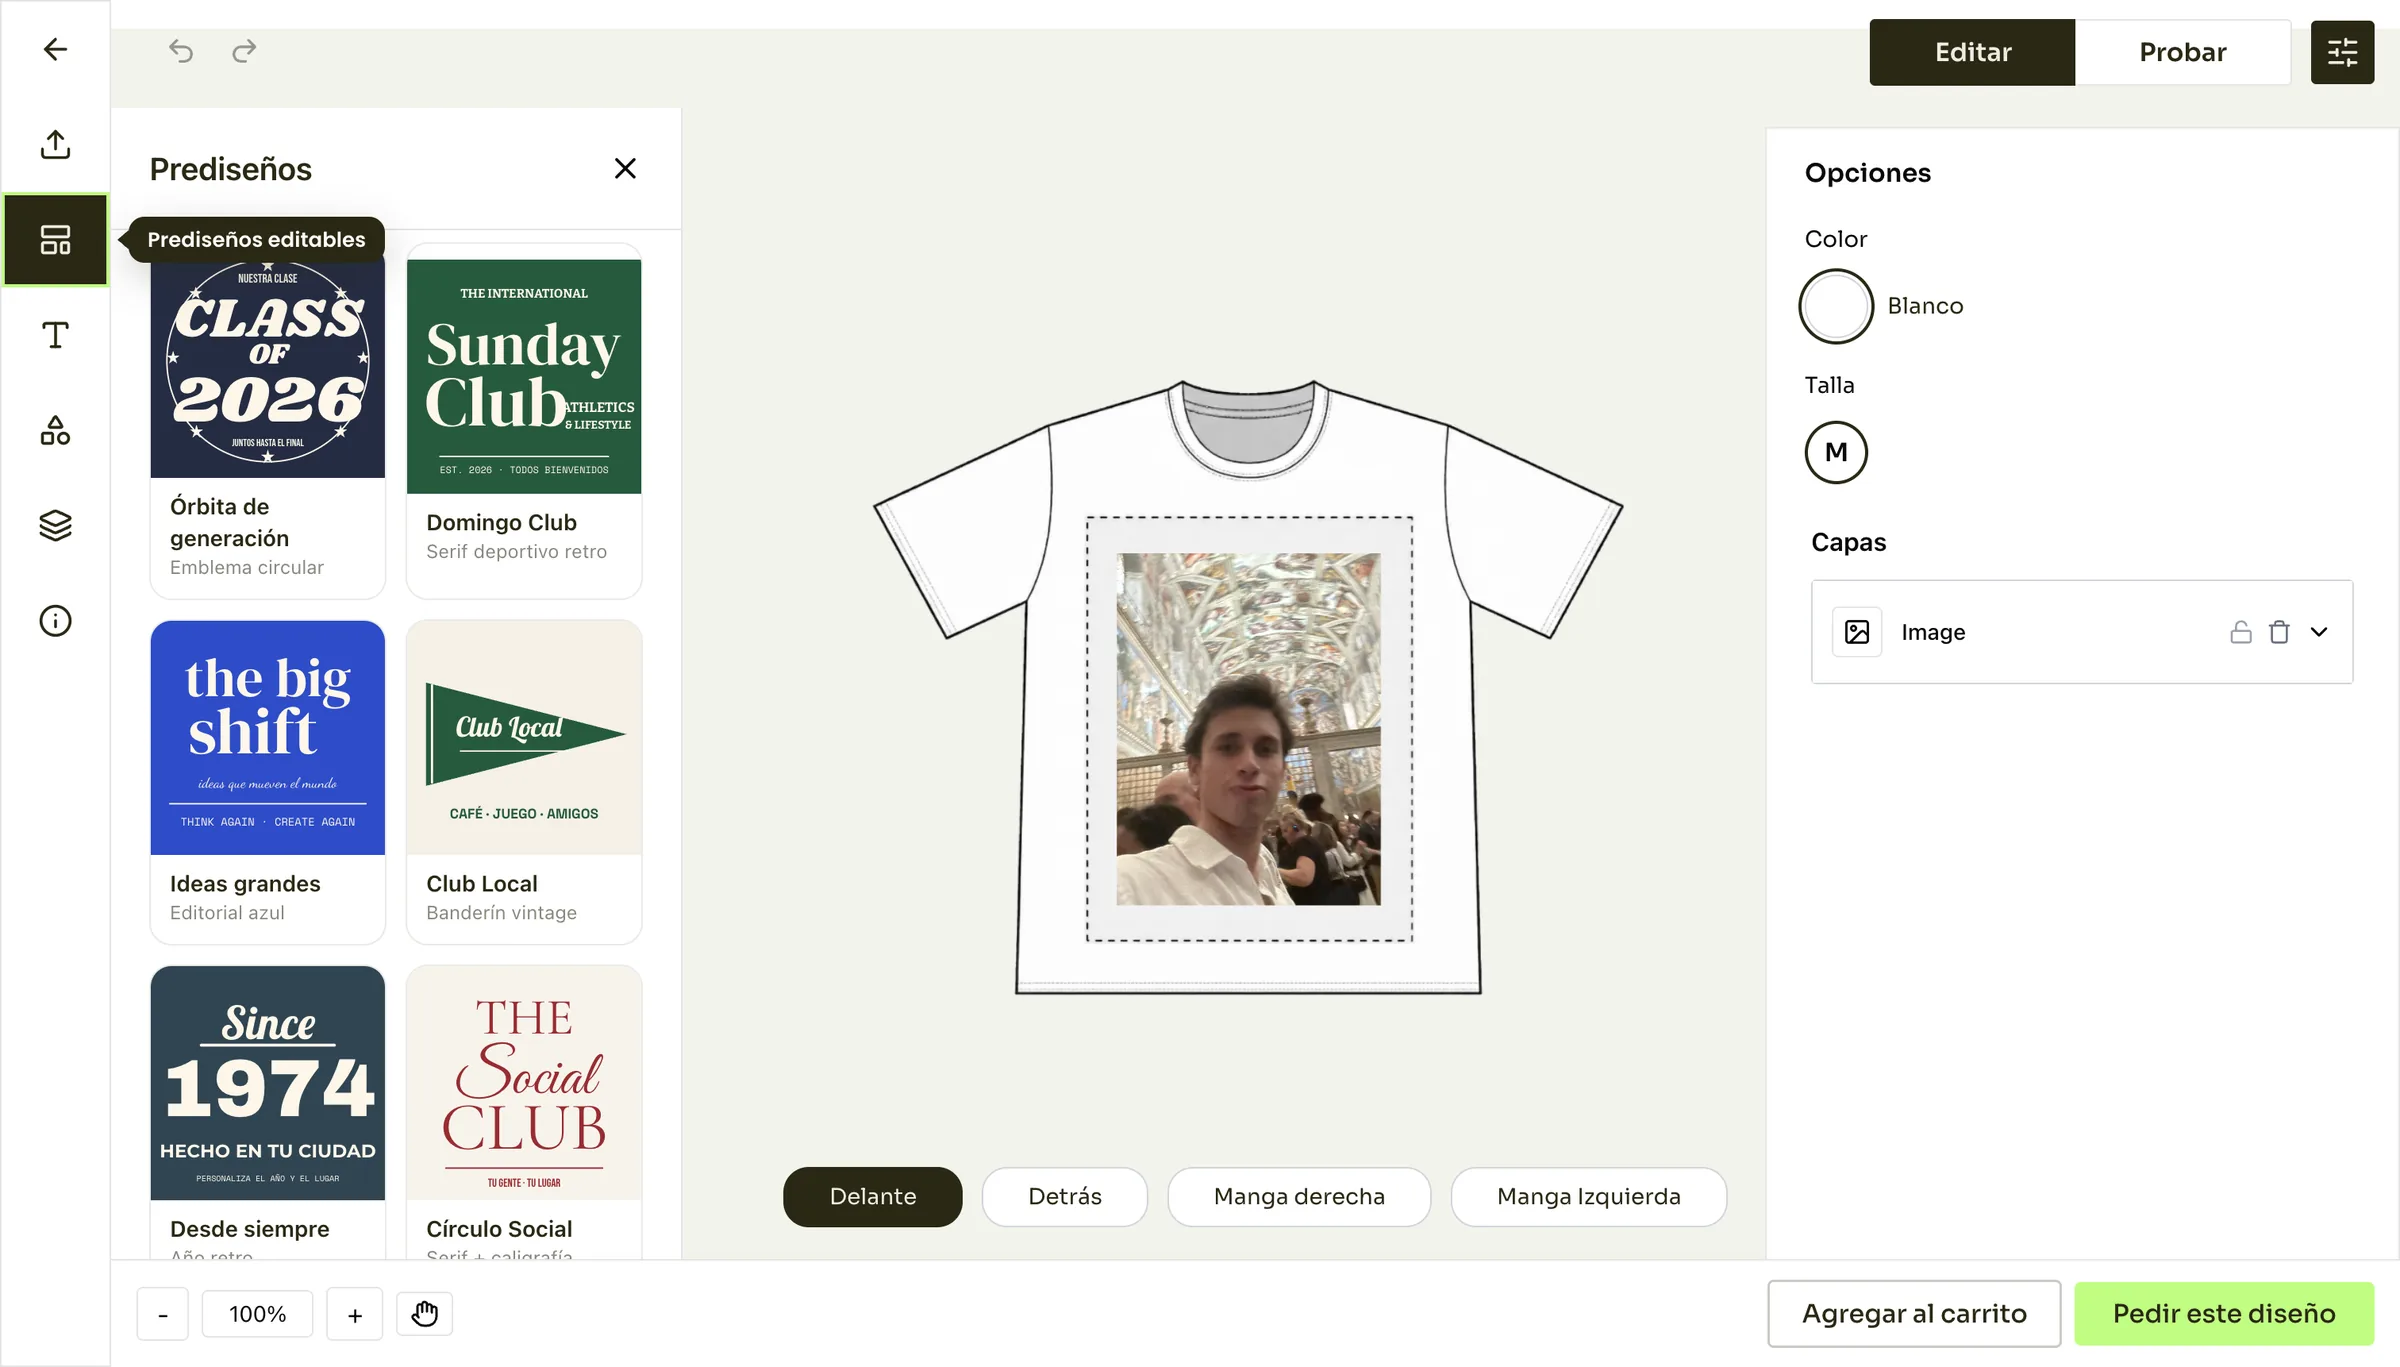
Front: a photo inside the print area
The dashed rectangle is the printable area from the garment template. The photo snaps to it and cannot be dragged outside.
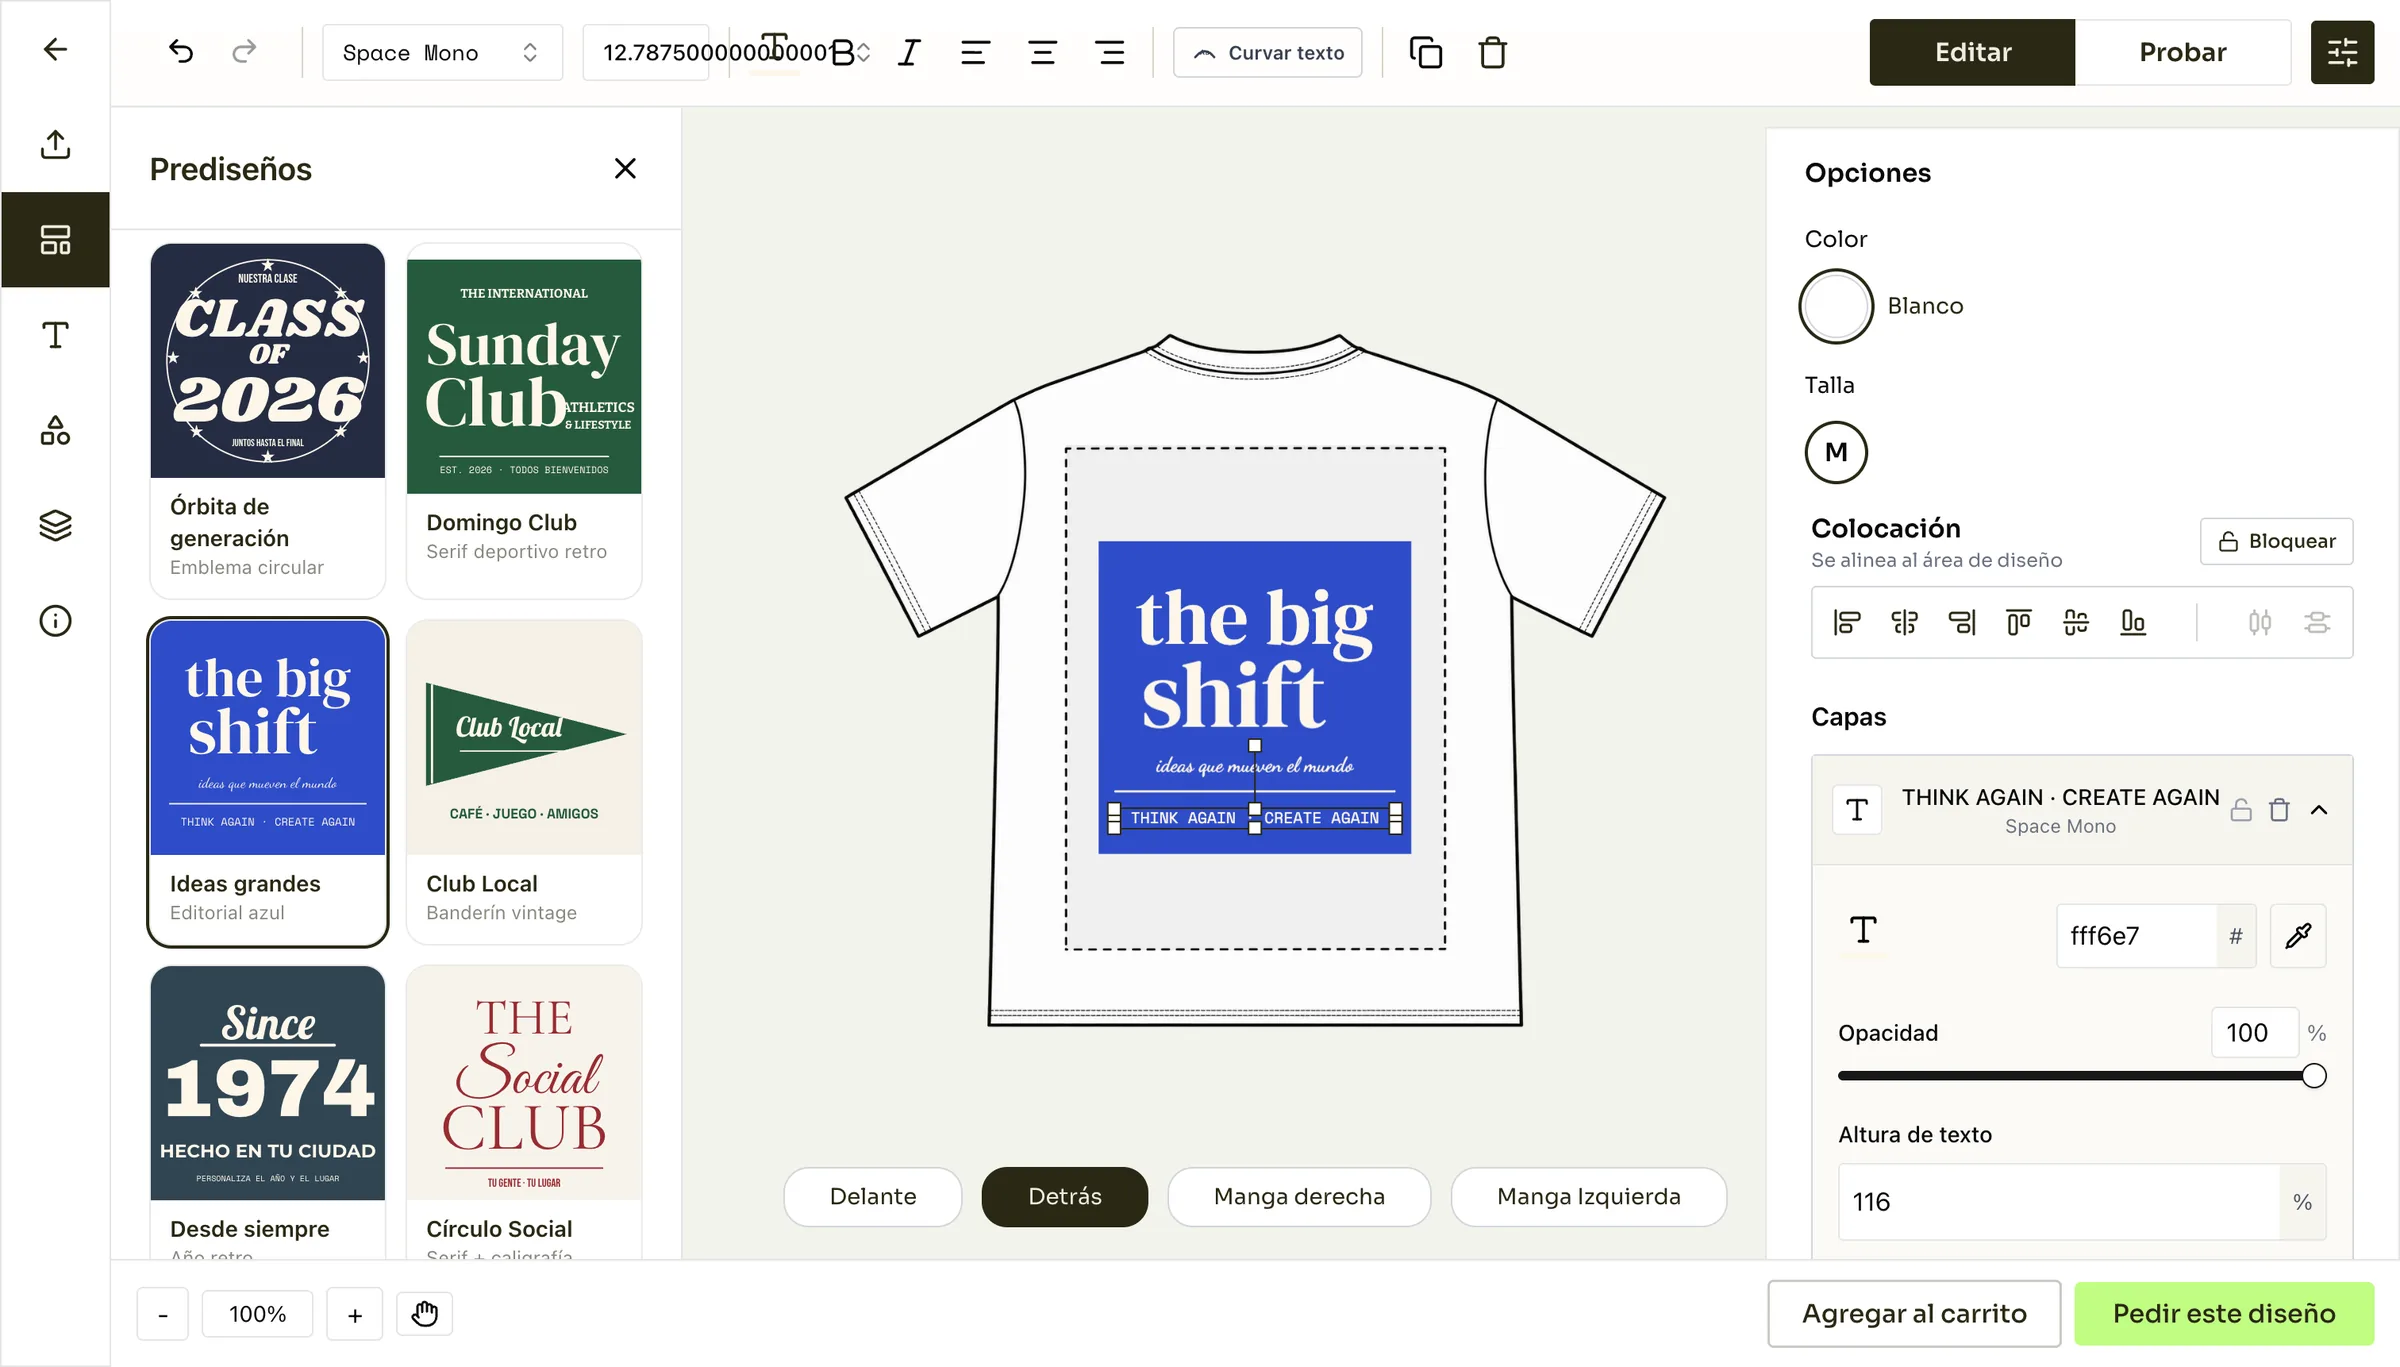
Back: an editable preset
Switching to Detrás opens a second canvas. The «the big shift» preset is plain text and shapes, so its words, fonts and colors can be changed from the Layers panel.
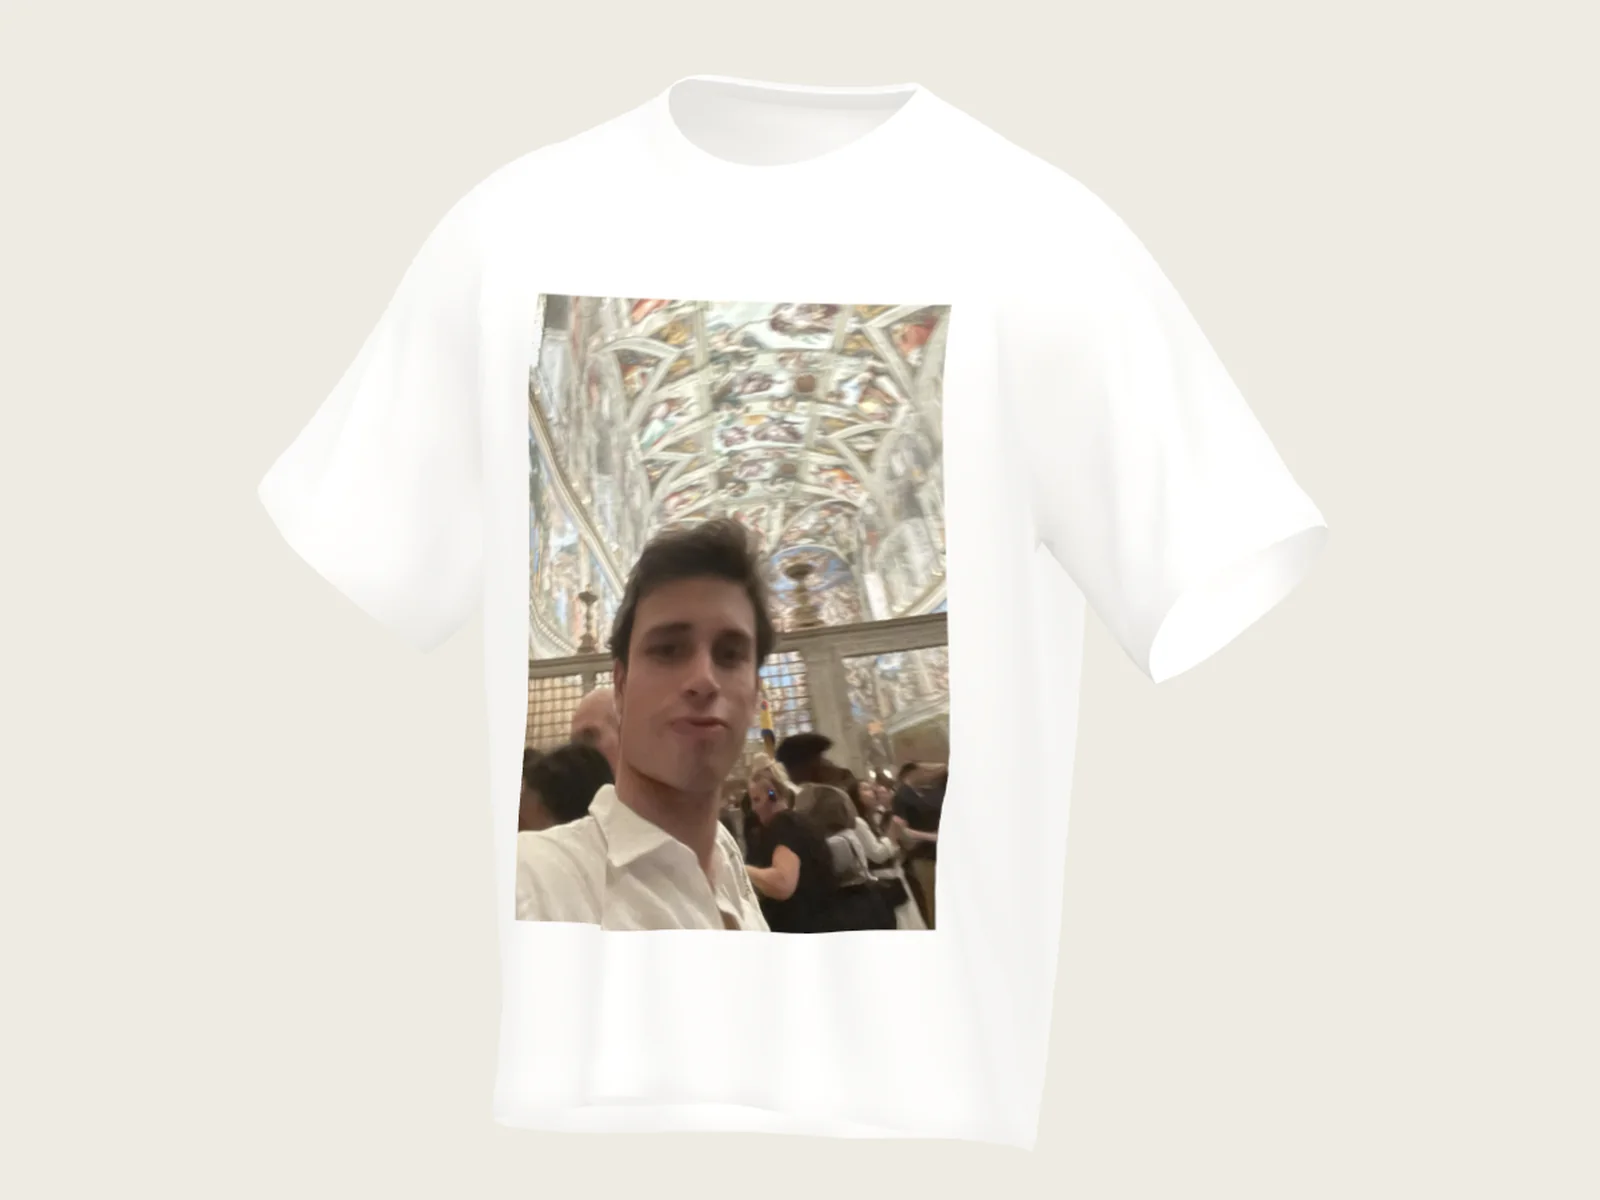
3D model, front
Both sides are mapped onto a three.js model that the buyer can rotate.
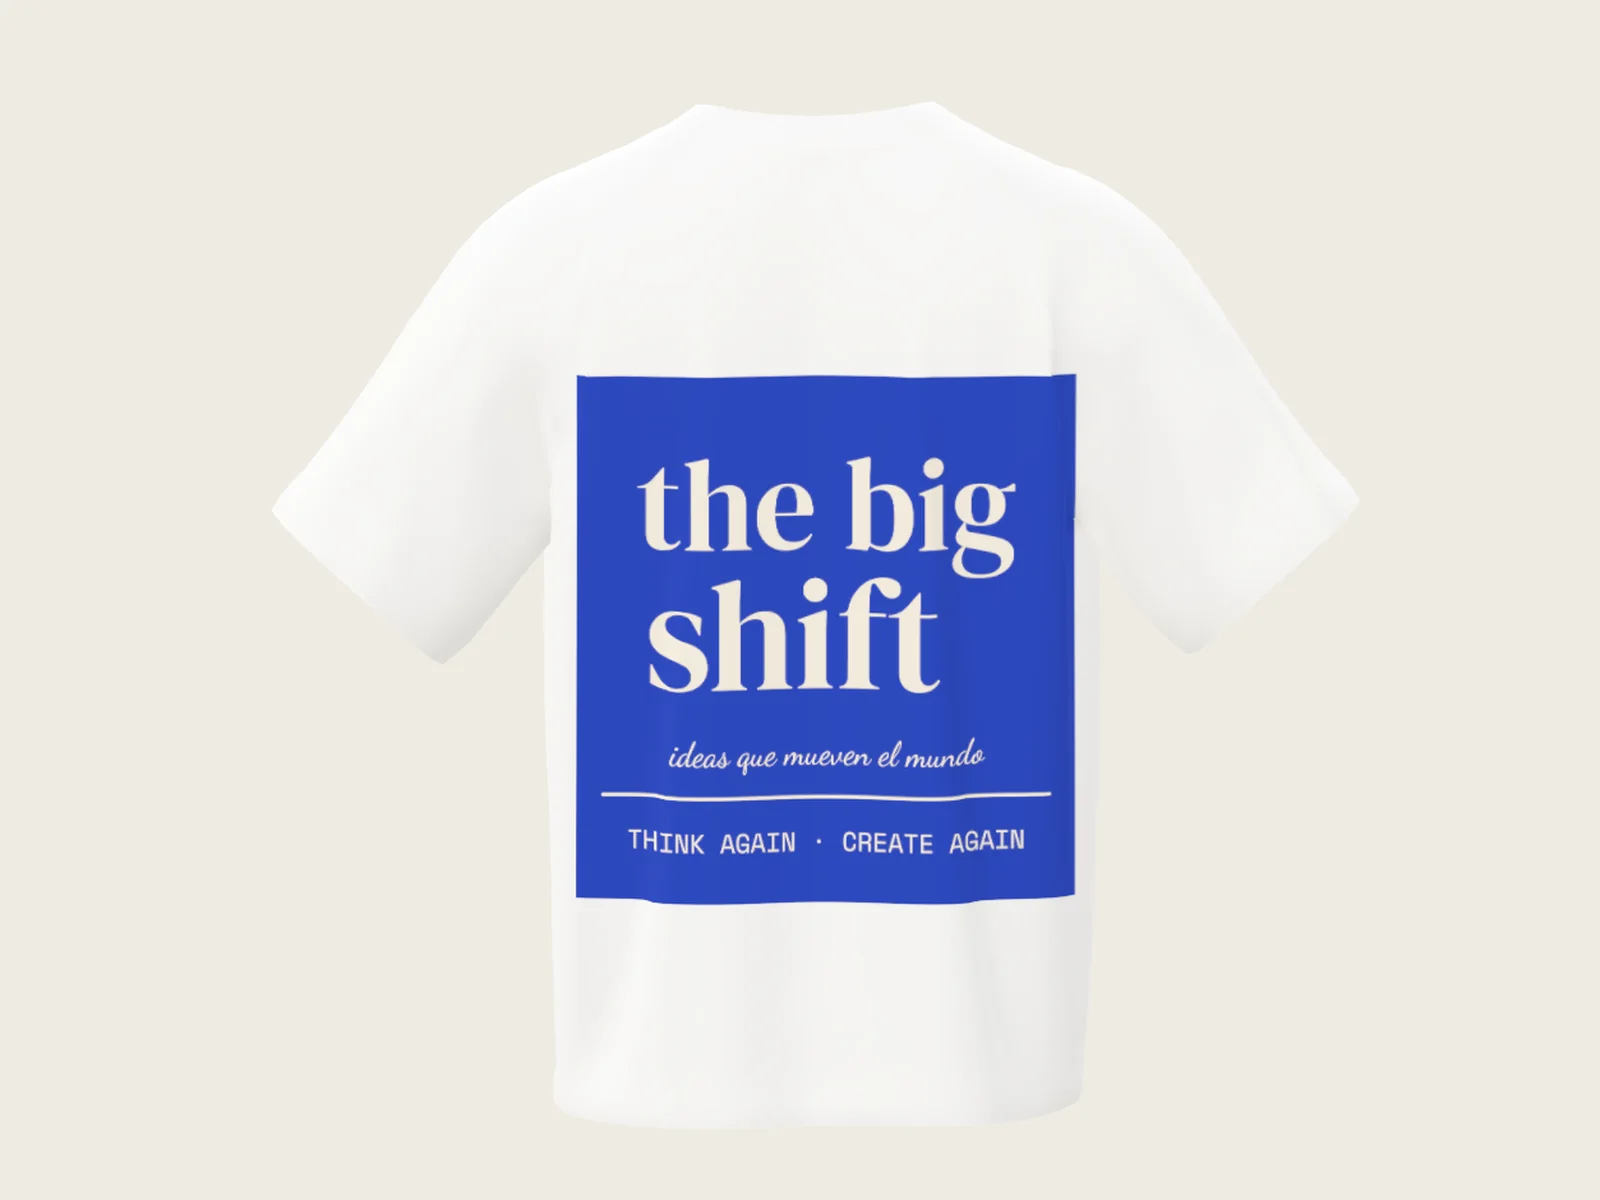
3D model, back
Turning the model shows the preset exactly where it was placed on the back canvas.
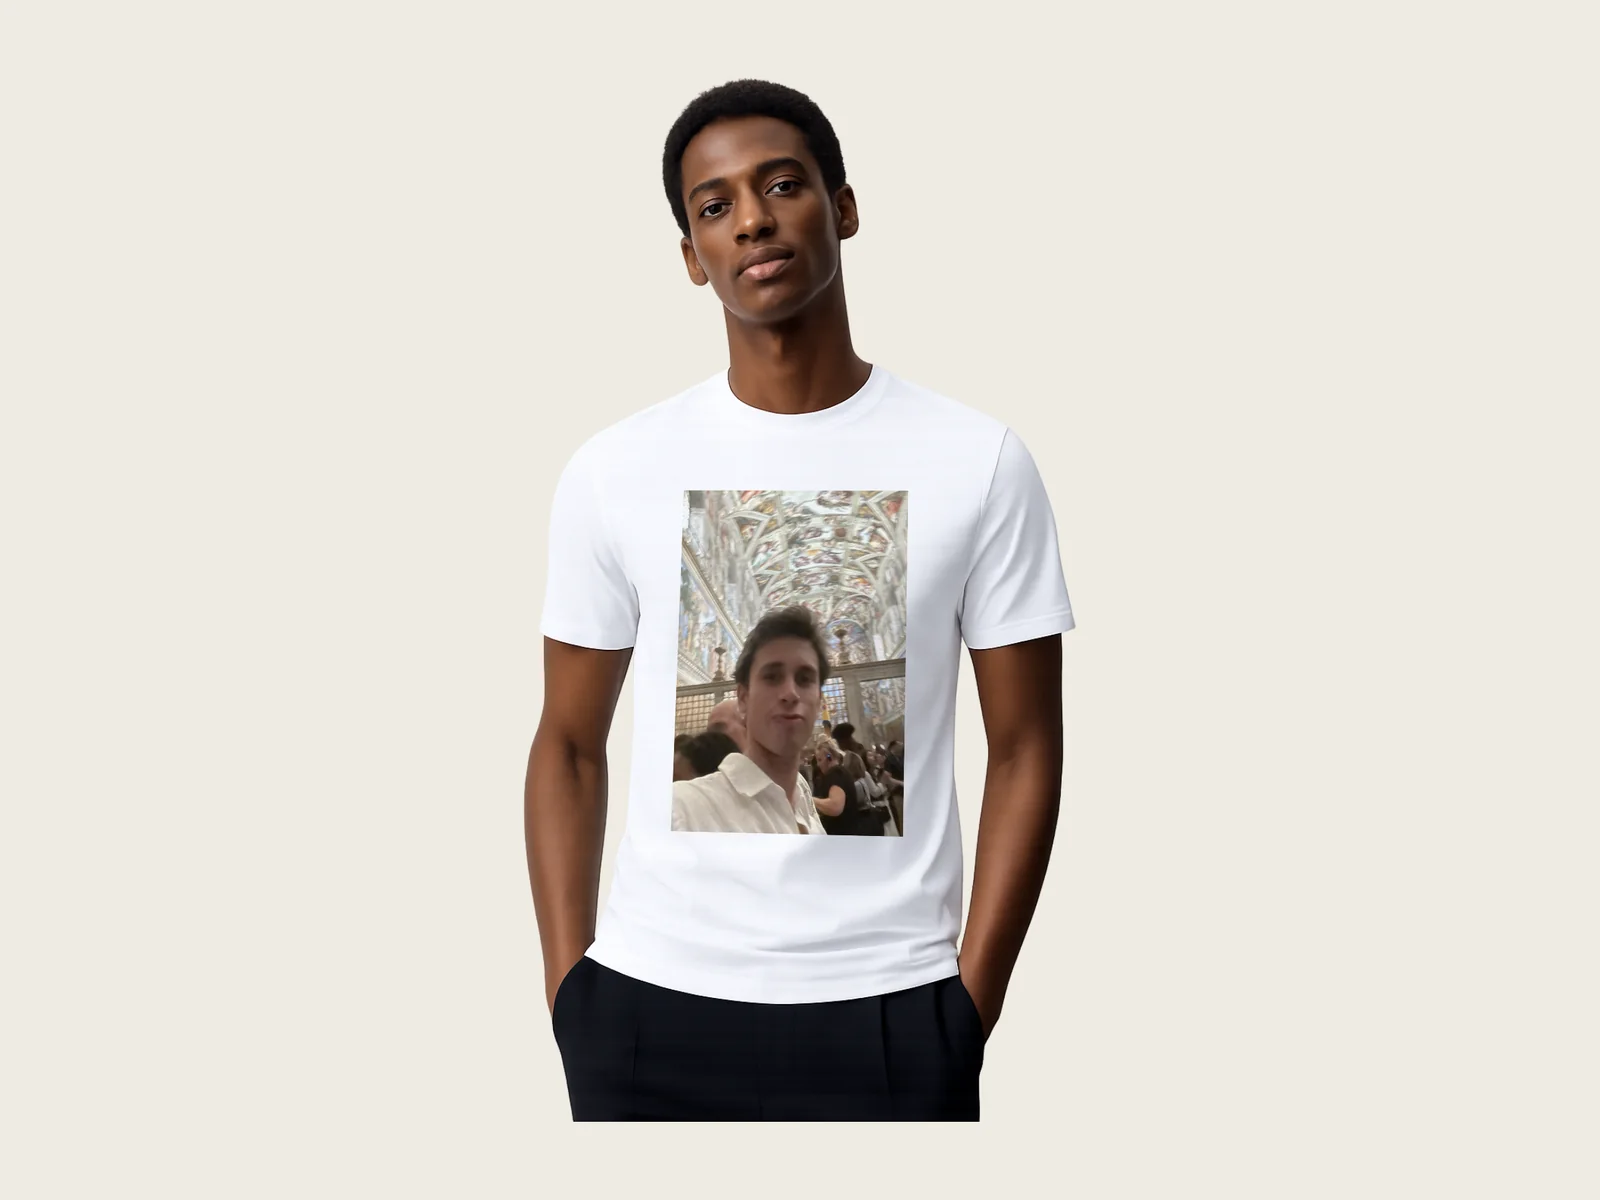
The workshop's own photo
The same front design projected onto a real photo the workshop uploaded, following the shirt's perspective.
A wrap, not a front
A mug has a single printable side: the wrap around it. The editor shows it flat, with three small mugs underneath marking where the handle and the front fall.
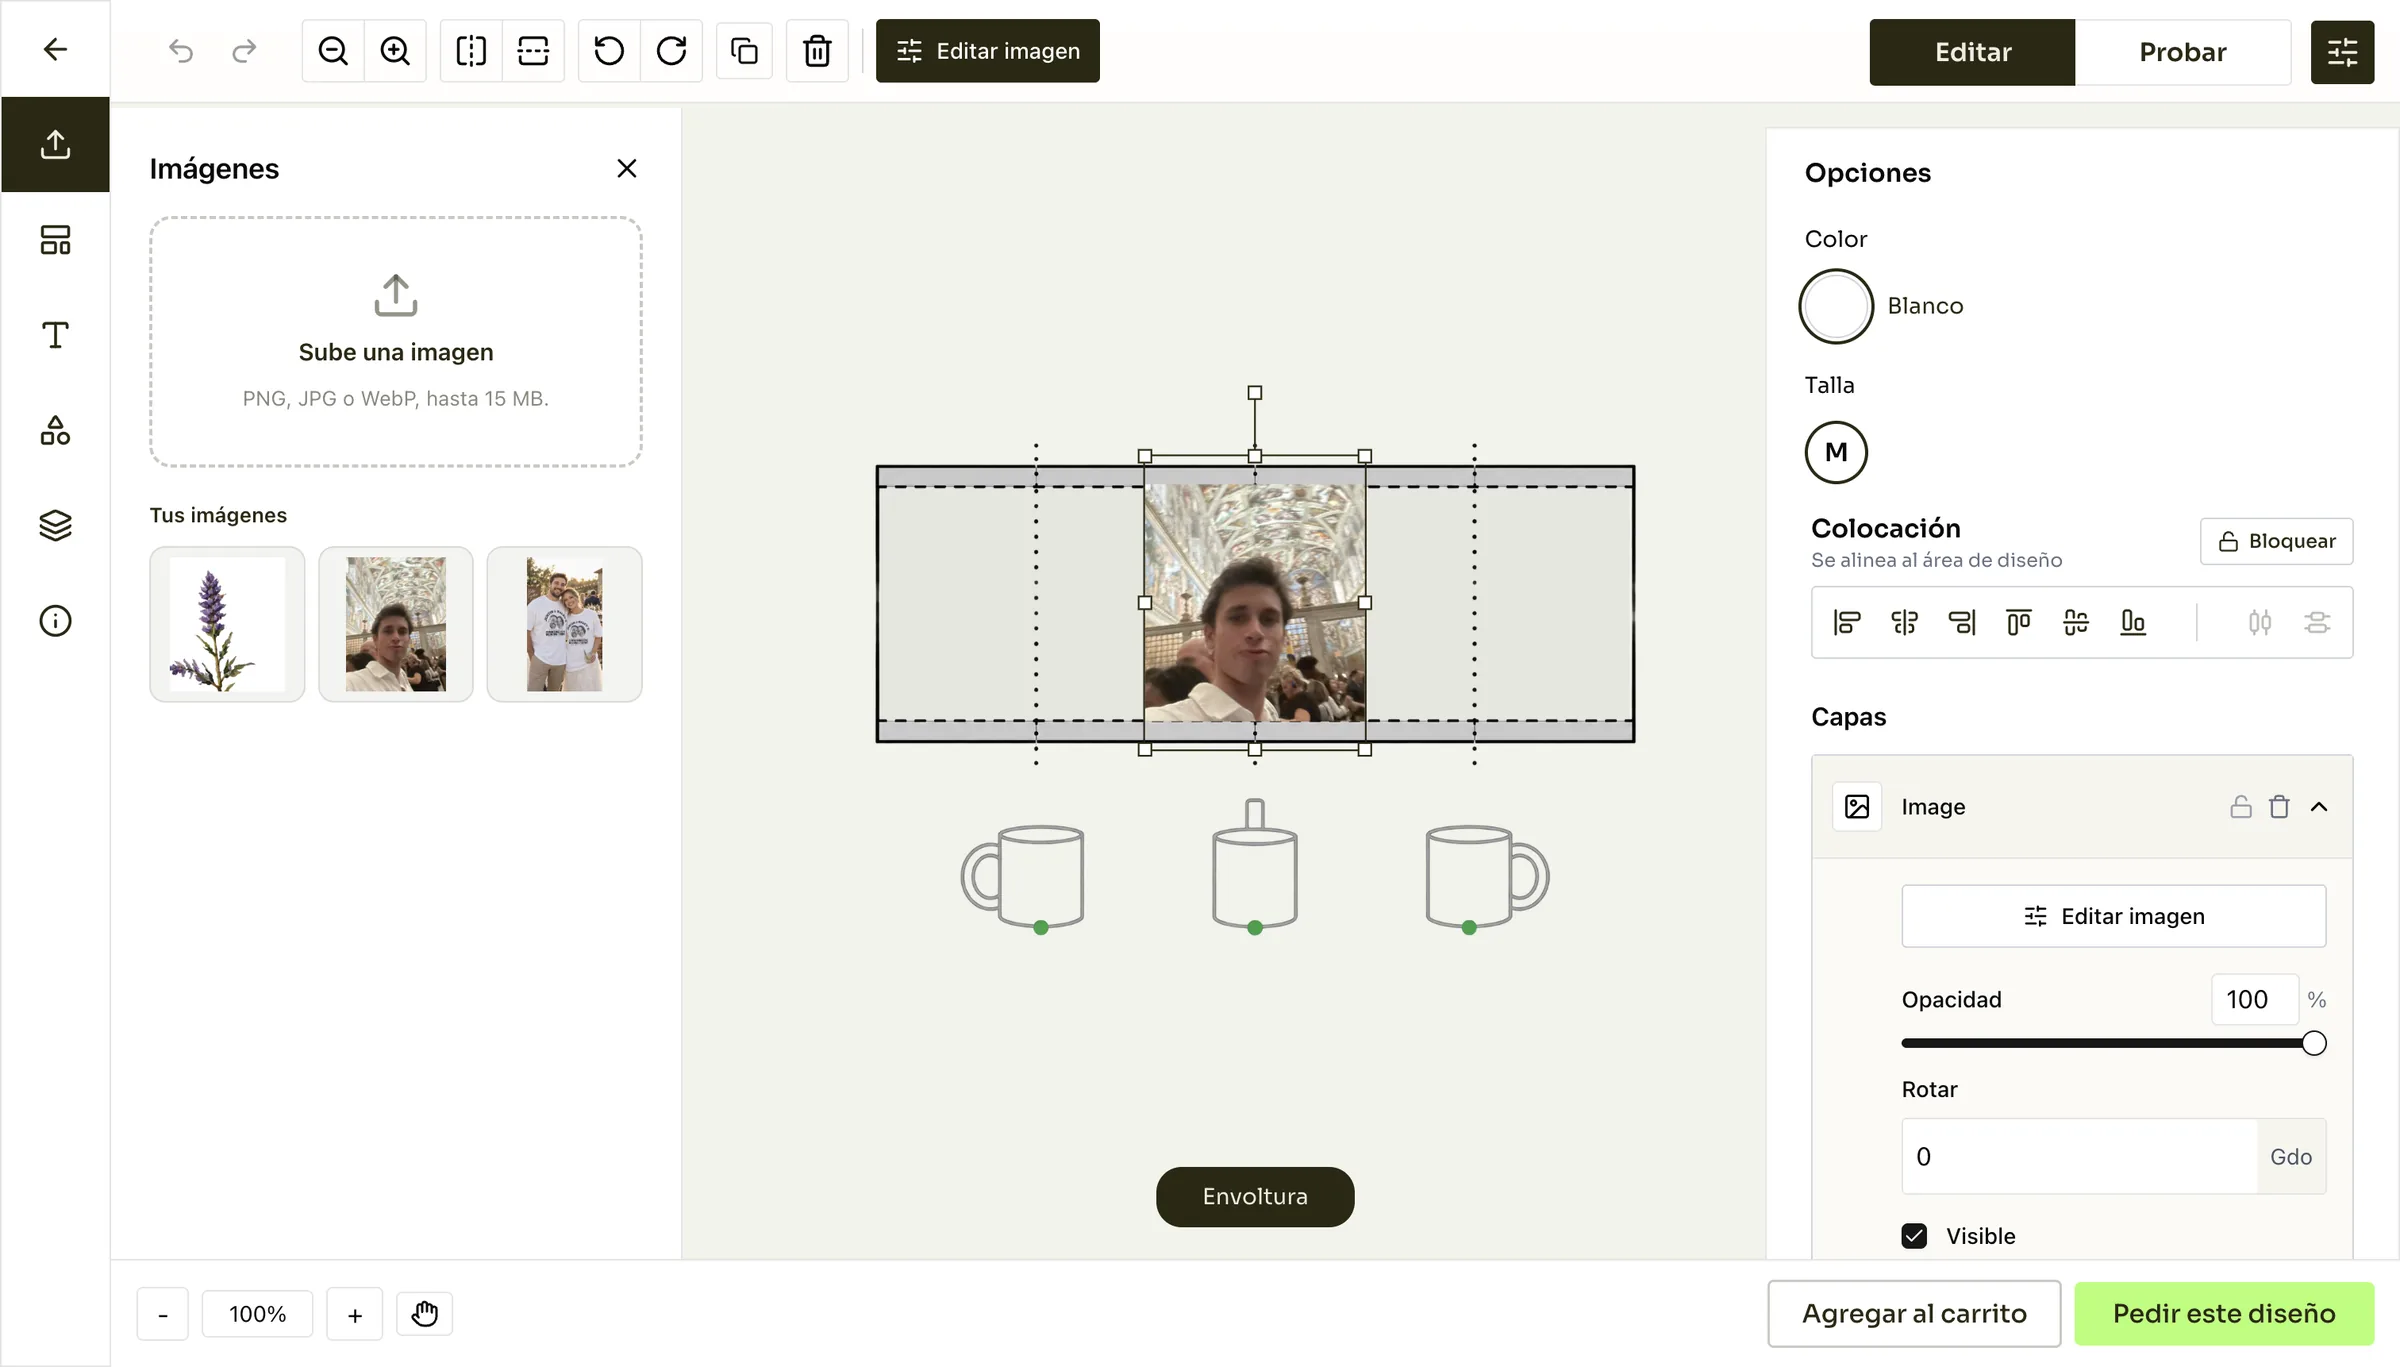
Upload a photo
Photos go to the buyer's library and are placed on the wrap. The dotted lines split the wrap into the parts that face left, front and right.
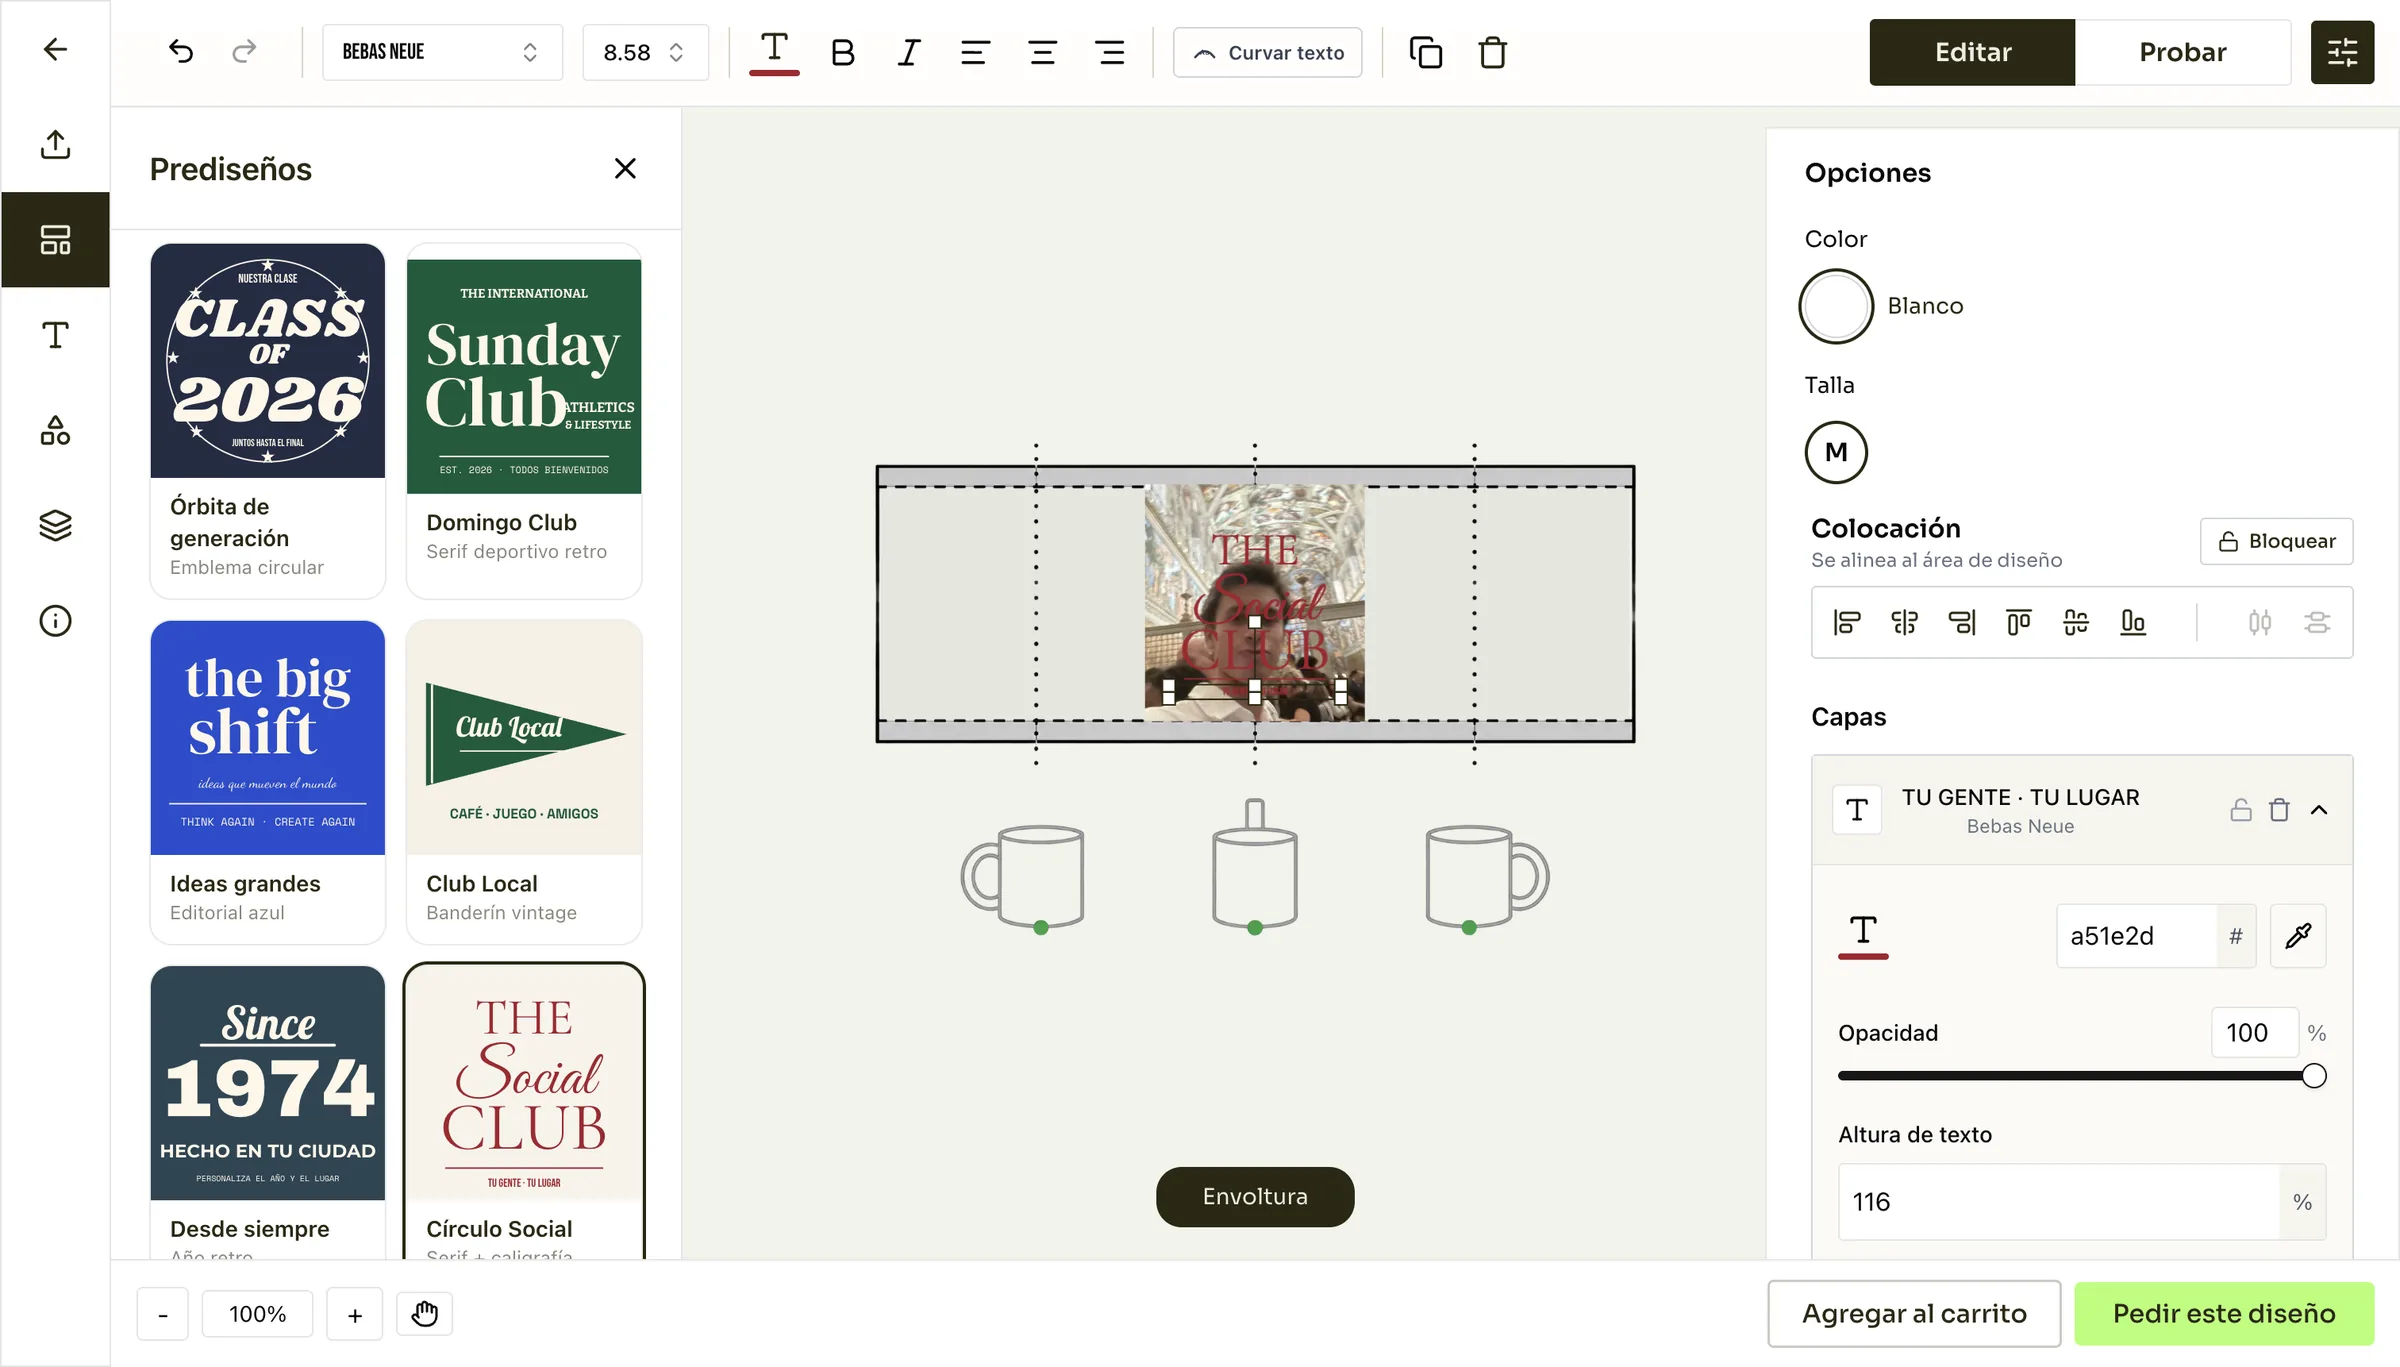
Add «The Social Club» on top
A preset from the Predesigns panel lands as editable text over the photo, centered on the part of the wrap that faces forward.
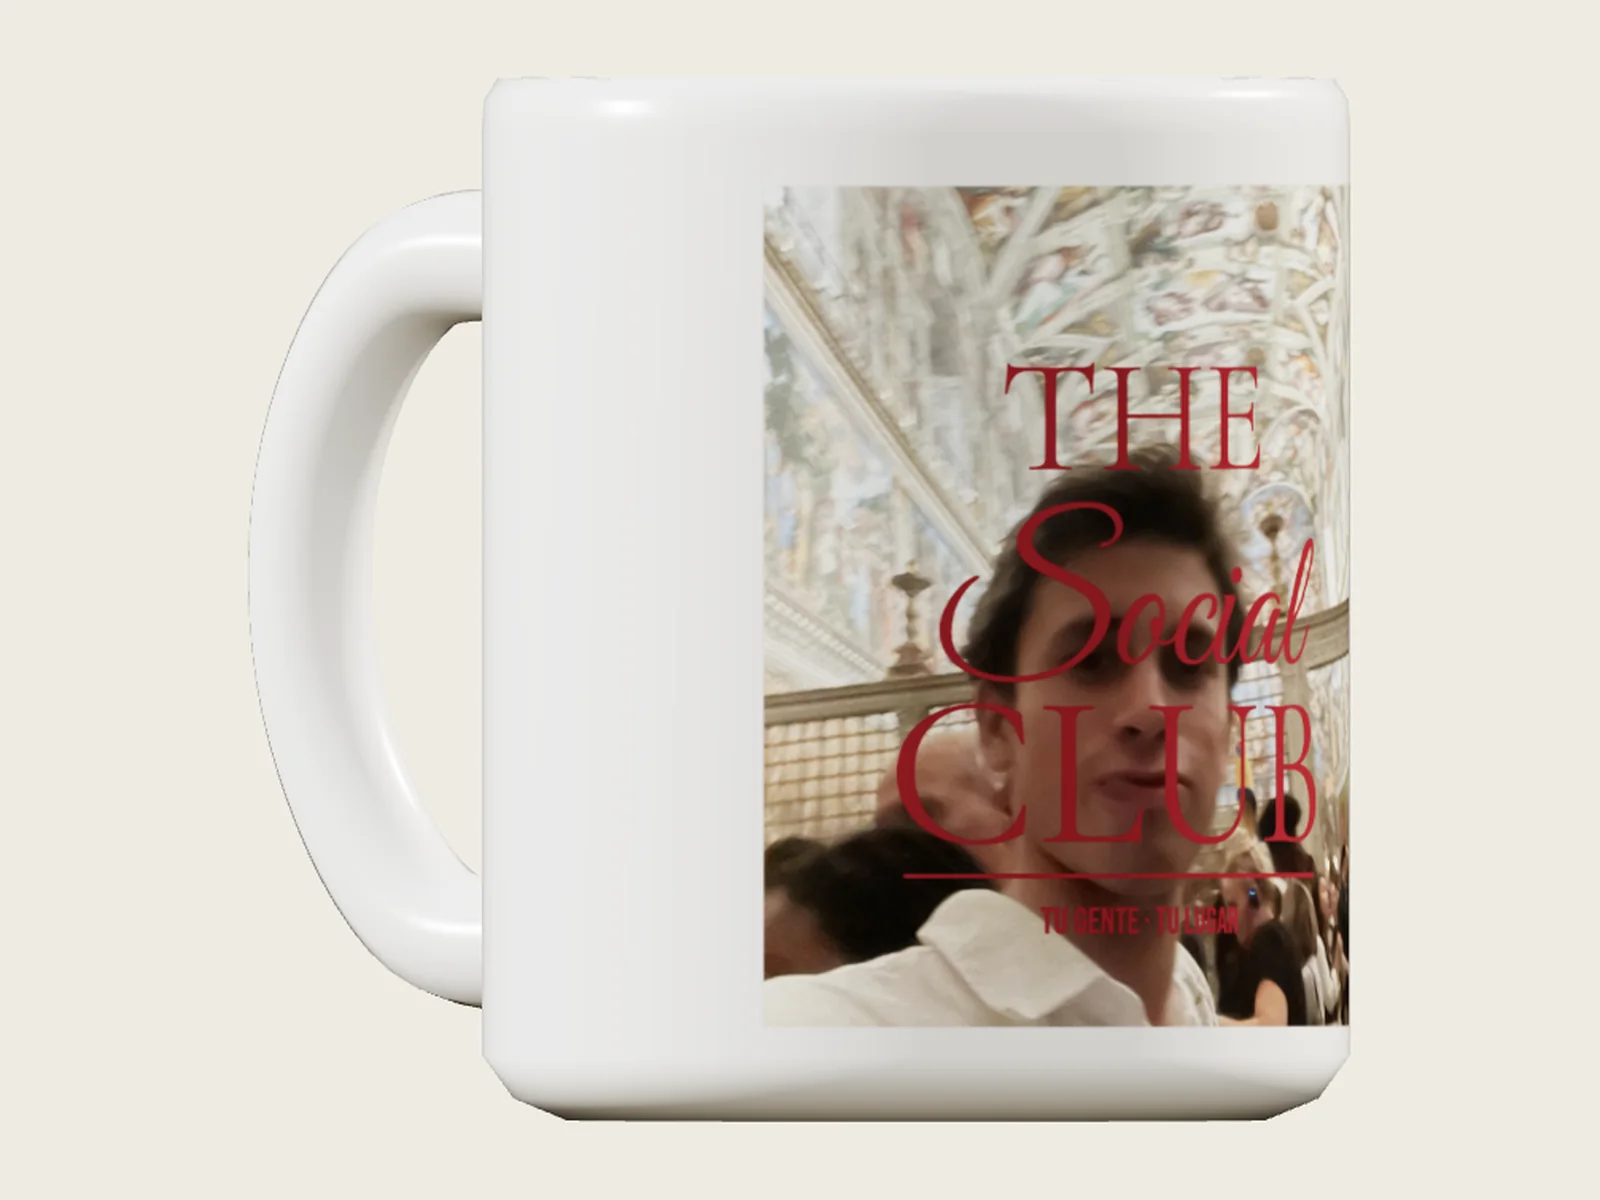
The wrap on a 3D mug
The flat wrap is bent around a cylinder, so the design curves away toward the edges the way it would on the real mug.
This is why a mug is never previewed as a flat image: a design that looks centered on a flat wrap can end up half hidden behind the handle once it is printed.
What a laser can actually do
A laser does not print color, it burns the coating away and leaves the metal underneath. The editor shows every element in silver from the start, so nobody orders colors that cannot be made.
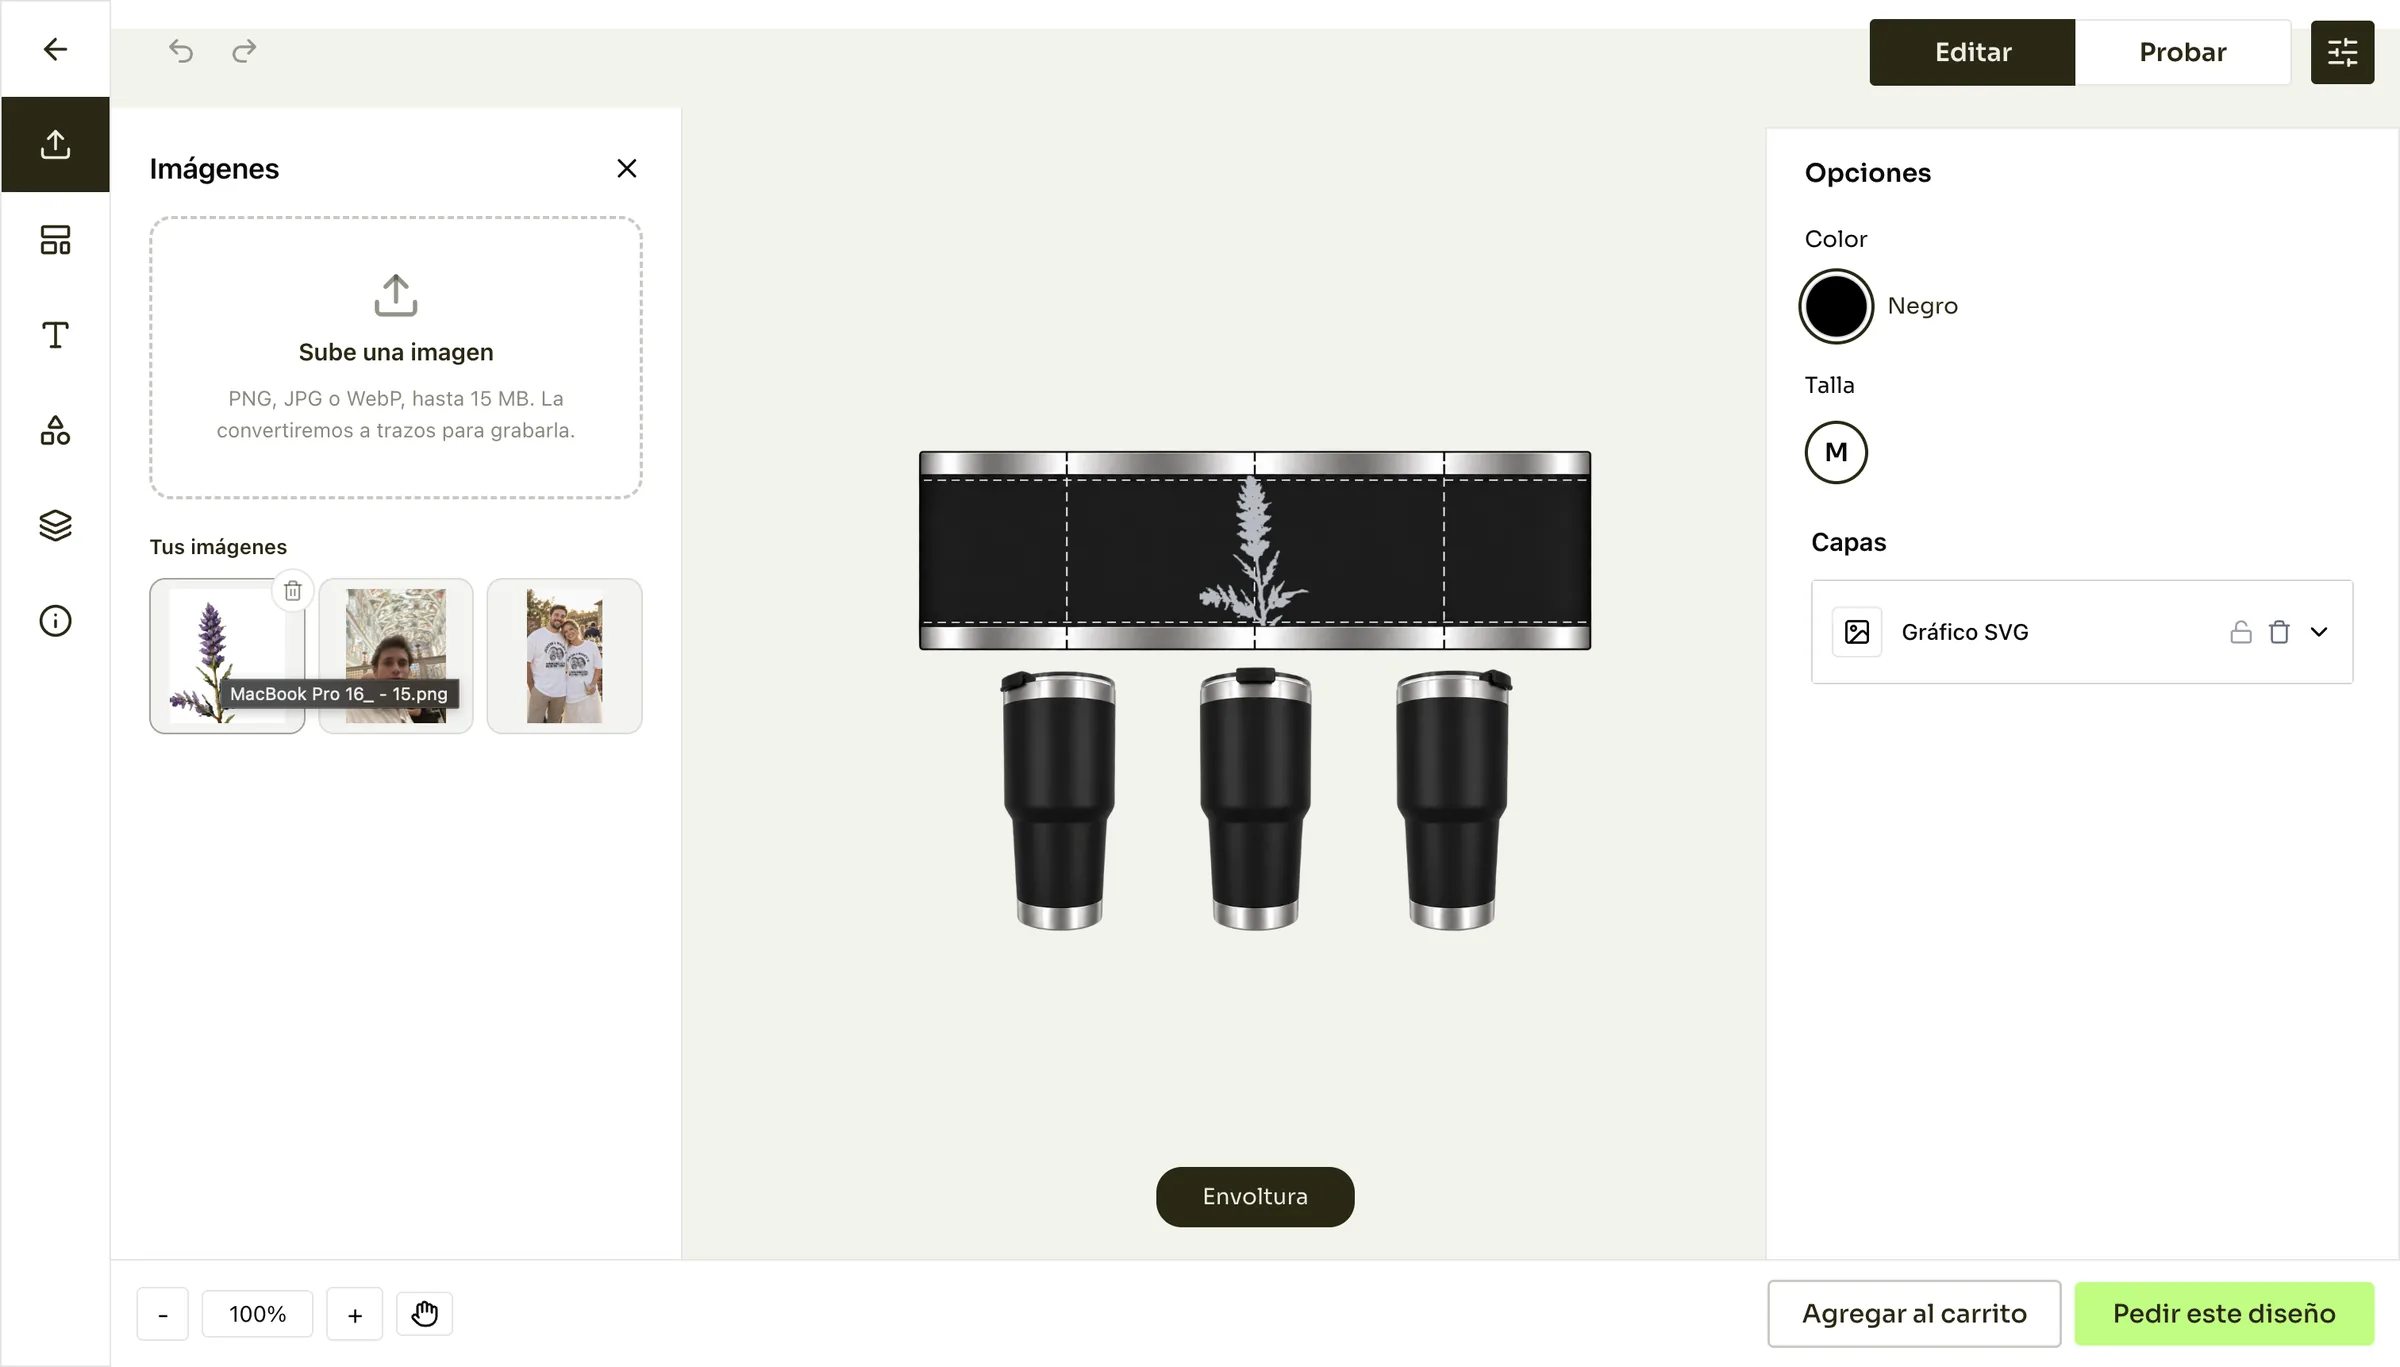
Upload artwork, get paths
An uploaded image is converted to vector paths, because a laser follows a route instead of printing pixels. The plant illustration is already engraving-ready.
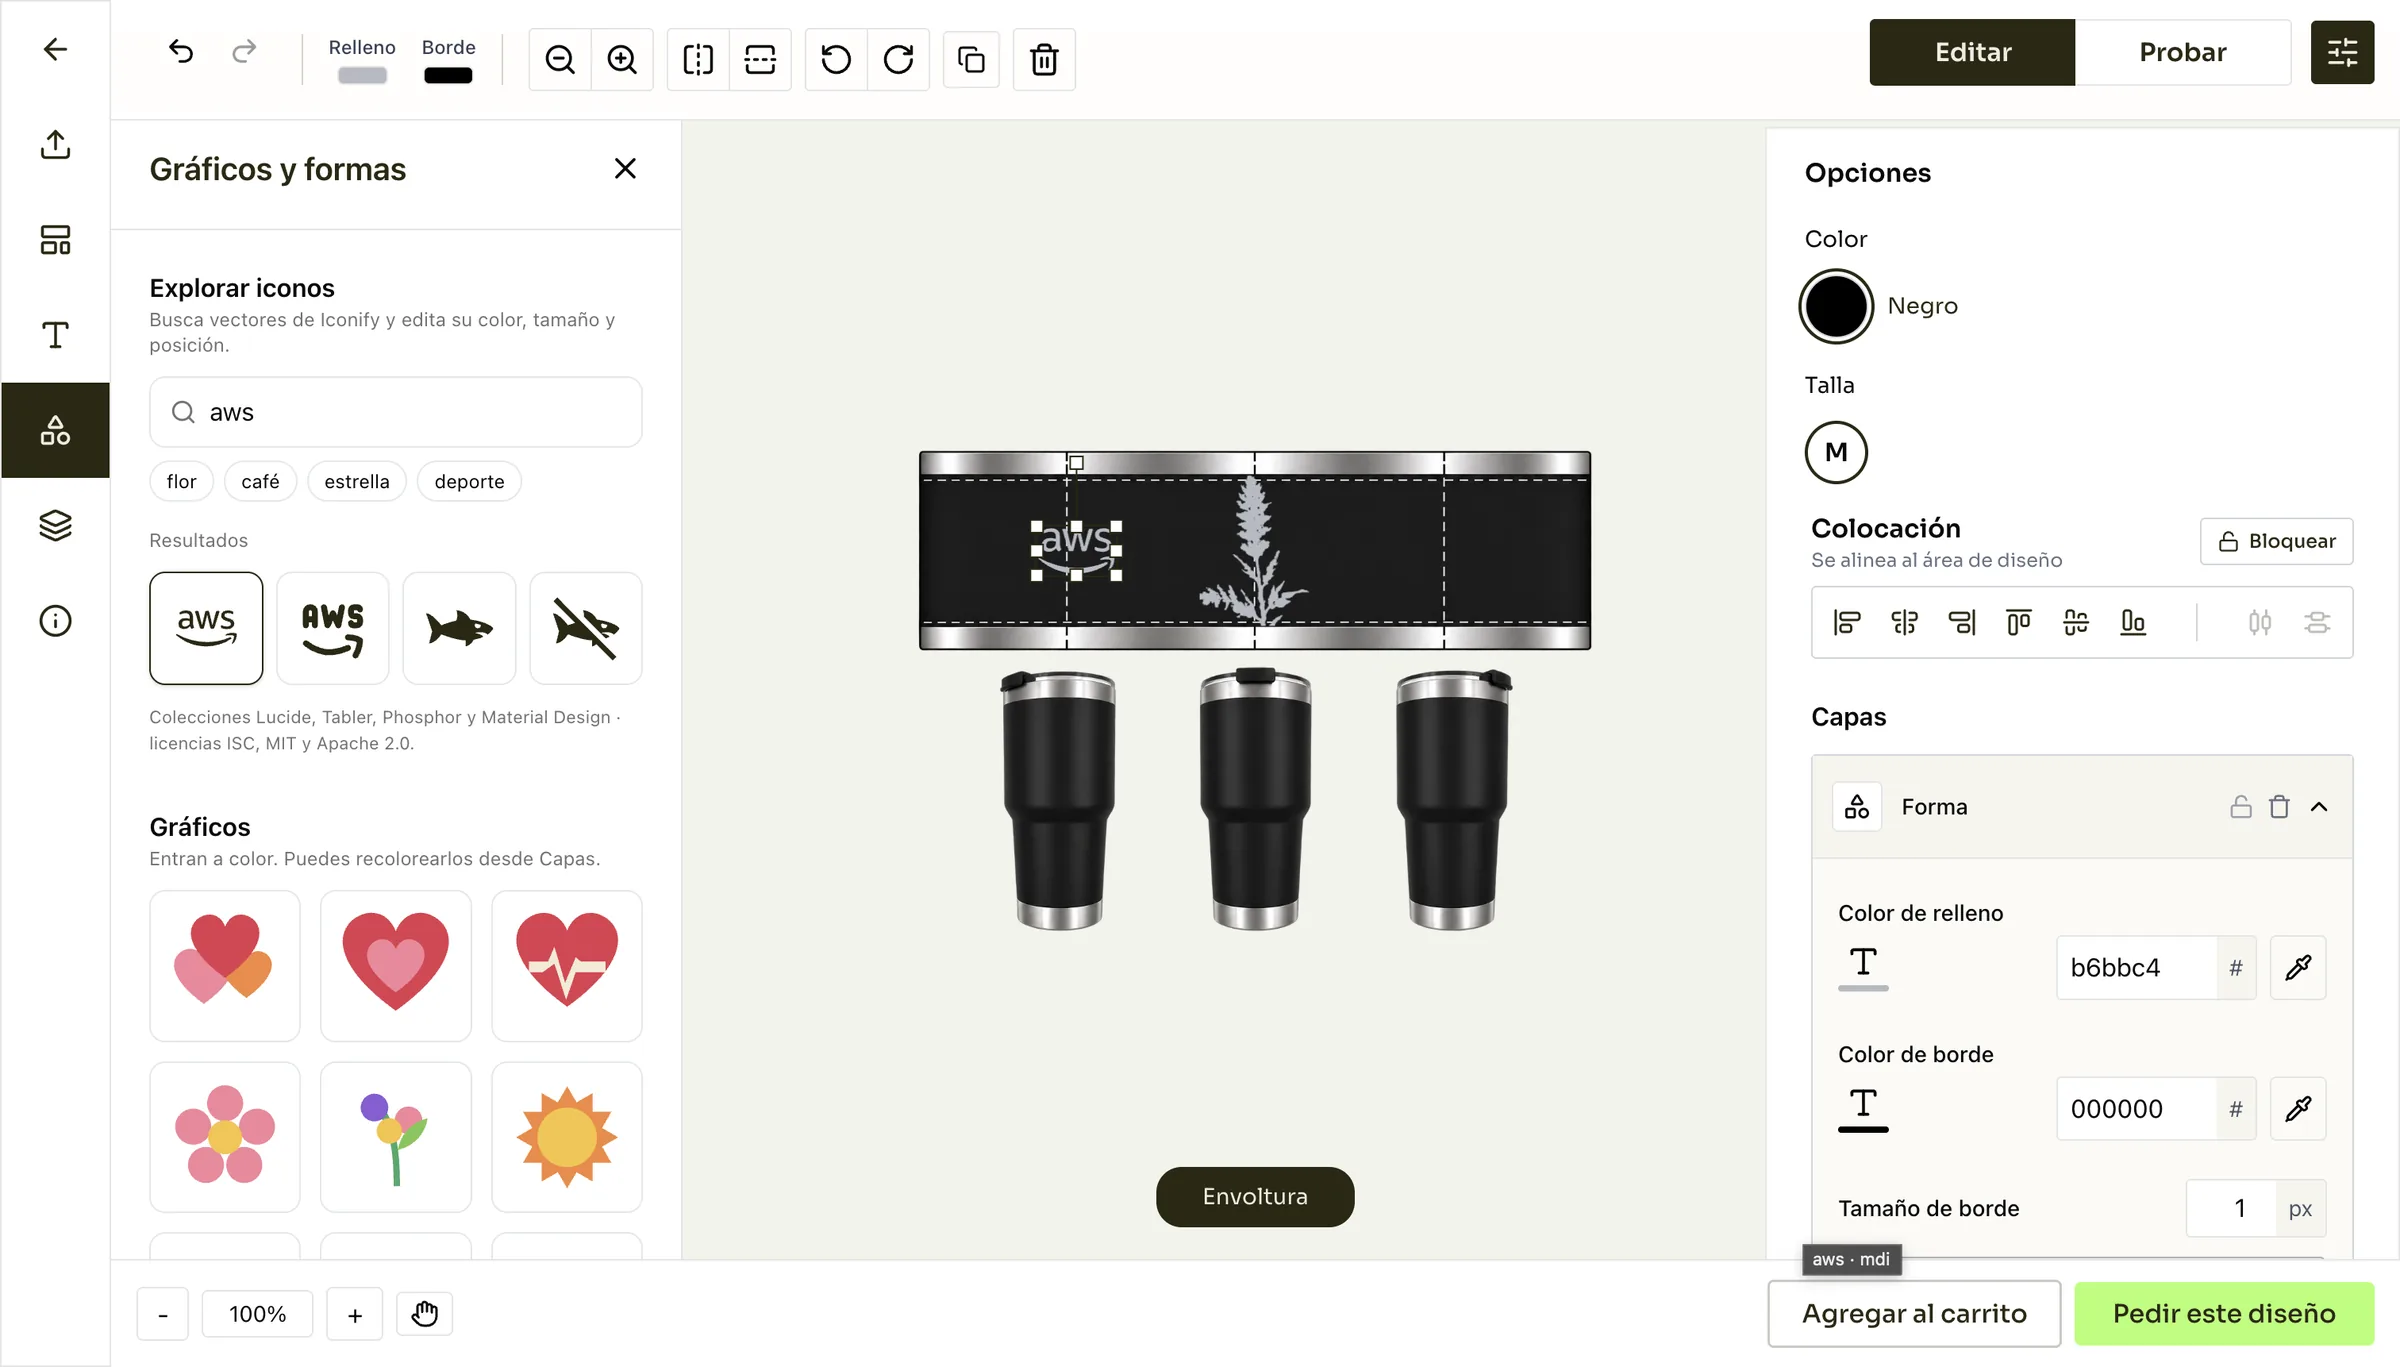
Add a logo from the icon search
Searching «aws» returns vectors from open icon collections. Once added, the logo turns silver like everything else on a laser product.
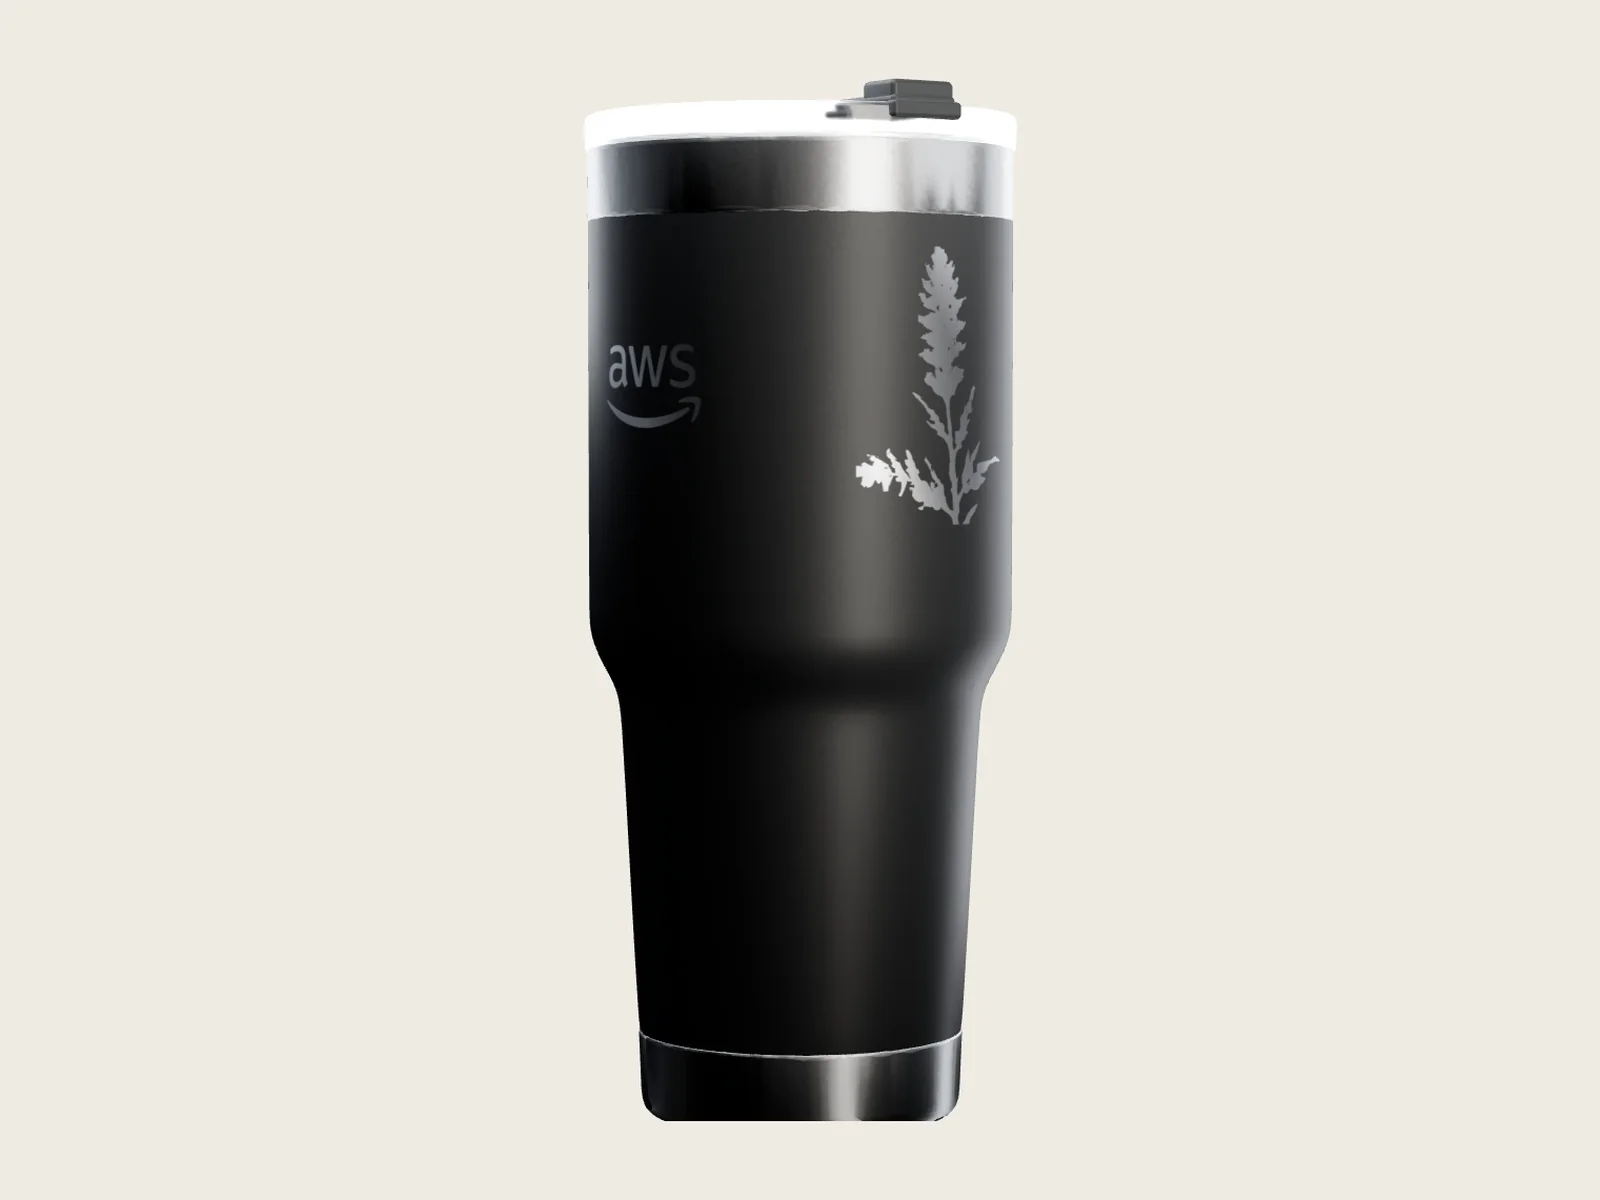
3D model
The logo sits further along the wrap than the plant, so it curves away at the edge and comes into view as the buyer rotates the tumbler.
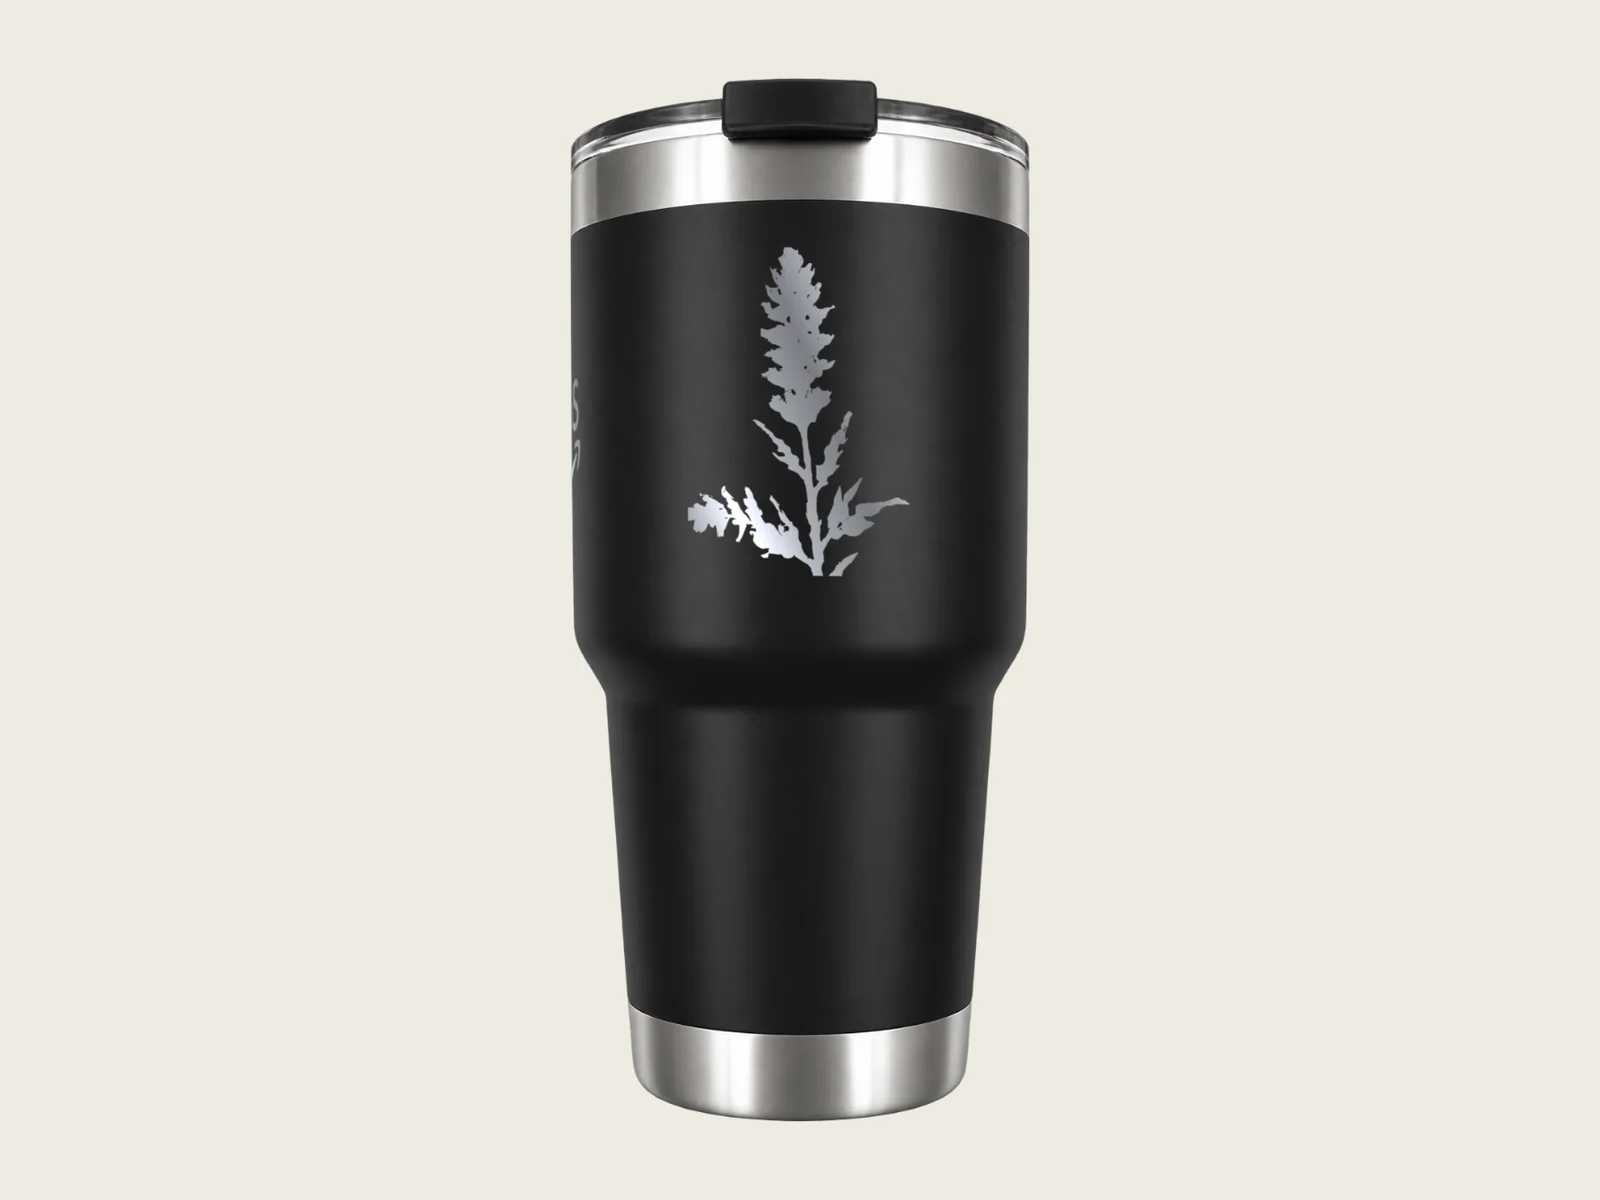
The workshop's own photo
On a real photo the engraving keeps the metal's silver, which is what the buyer will actually receive.
One photo, three results
Buyers rarely upload print-ready images. The studio fixes the common cases without leaving the editor, and the strip at the bottom of each screen shows how the result will look on the chosen garment before applying it.
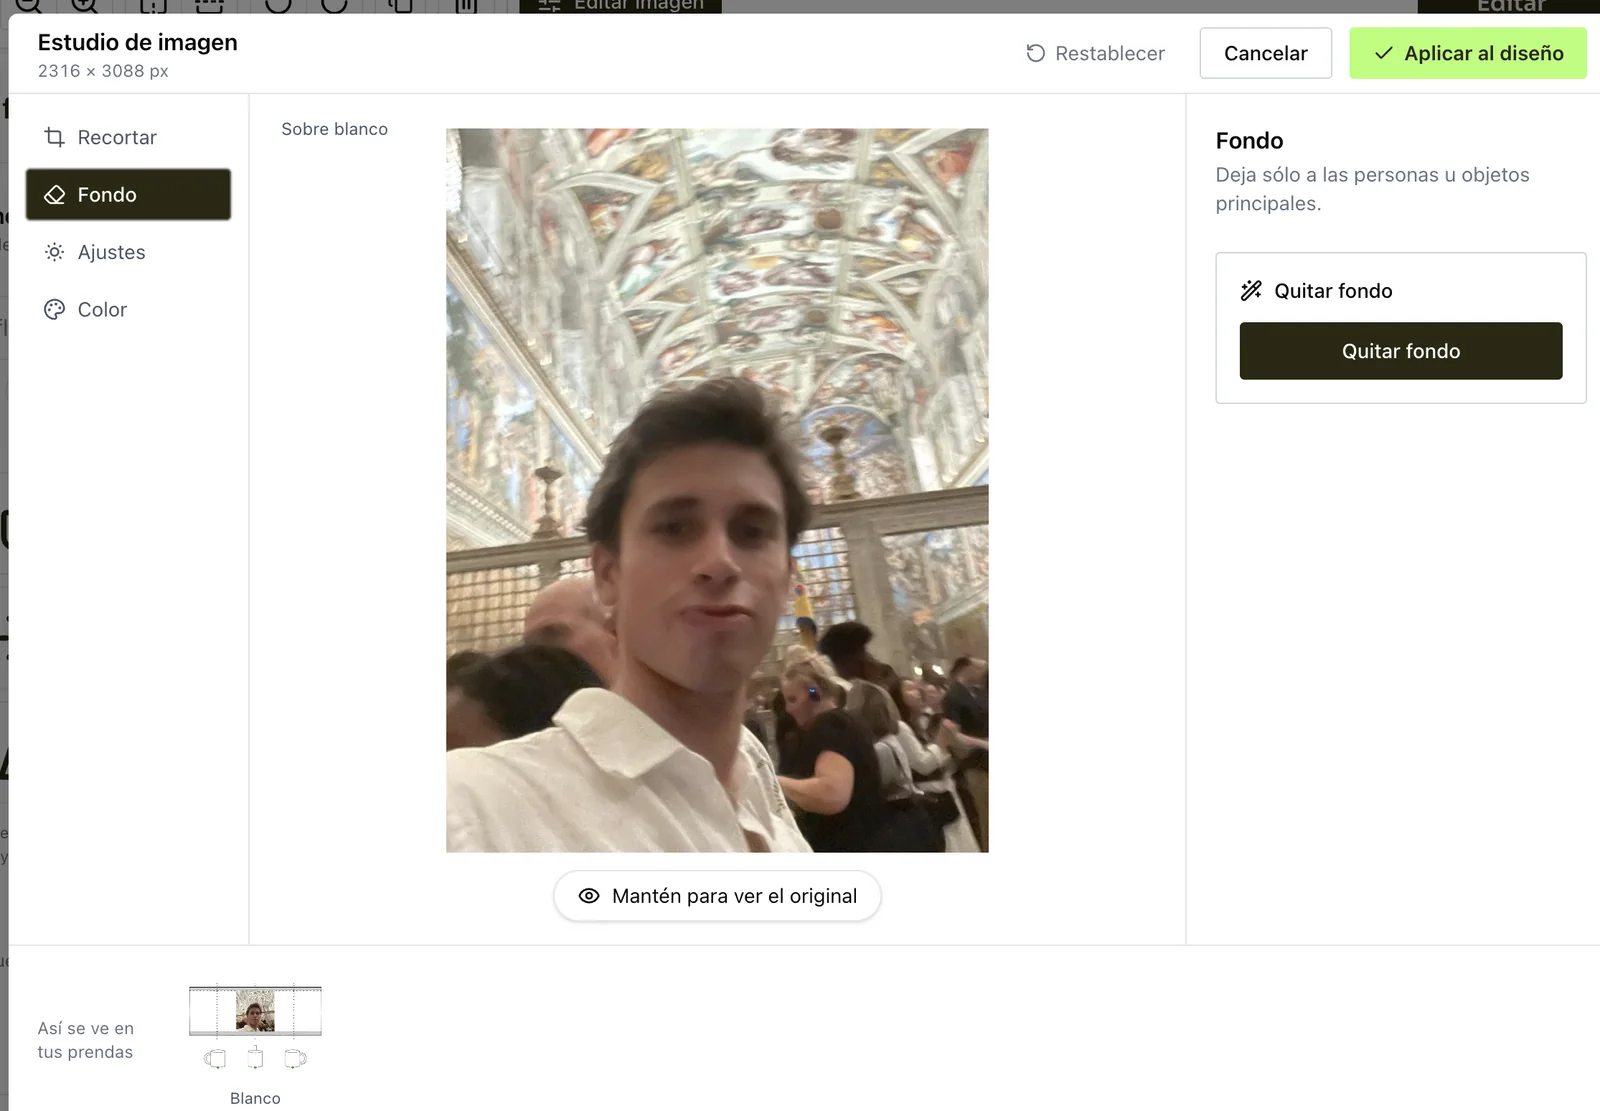
Original
A phone photo with a busy background, opened in the Image studio from the layer's Edit image button.
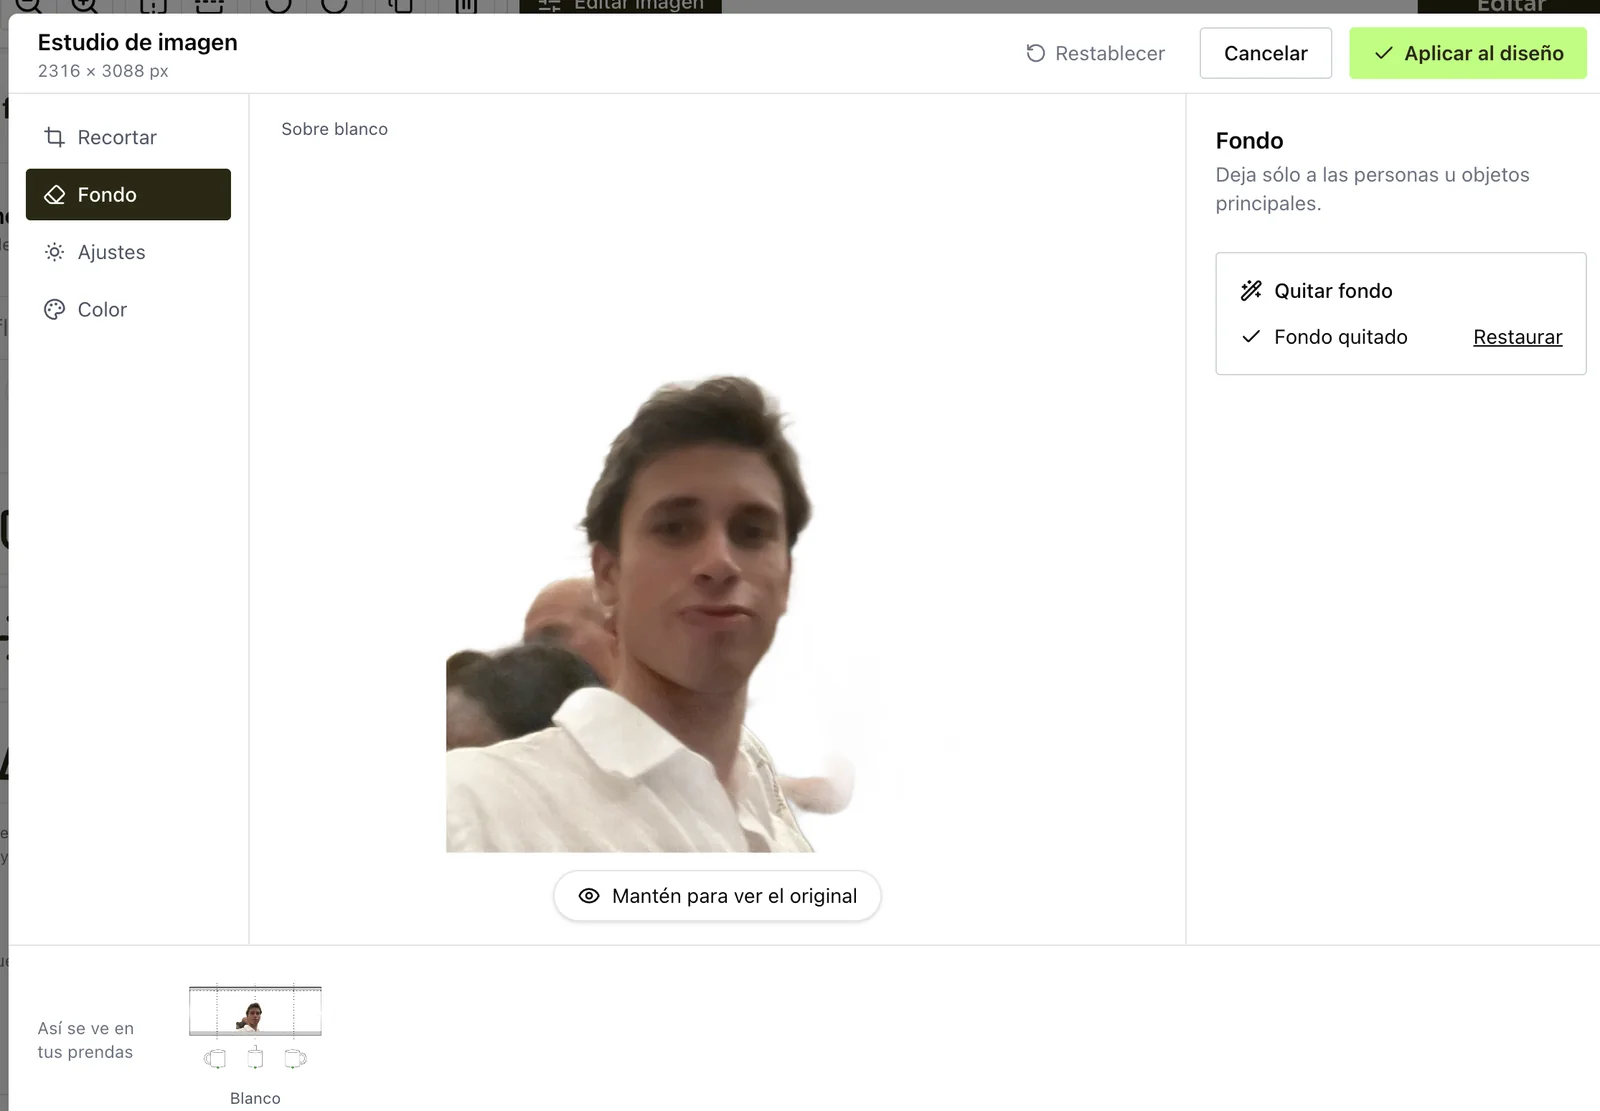
Background removed
An ISNet model keeps only the people. The result is used as a mask over the original, so the photo keeps its full resolution.
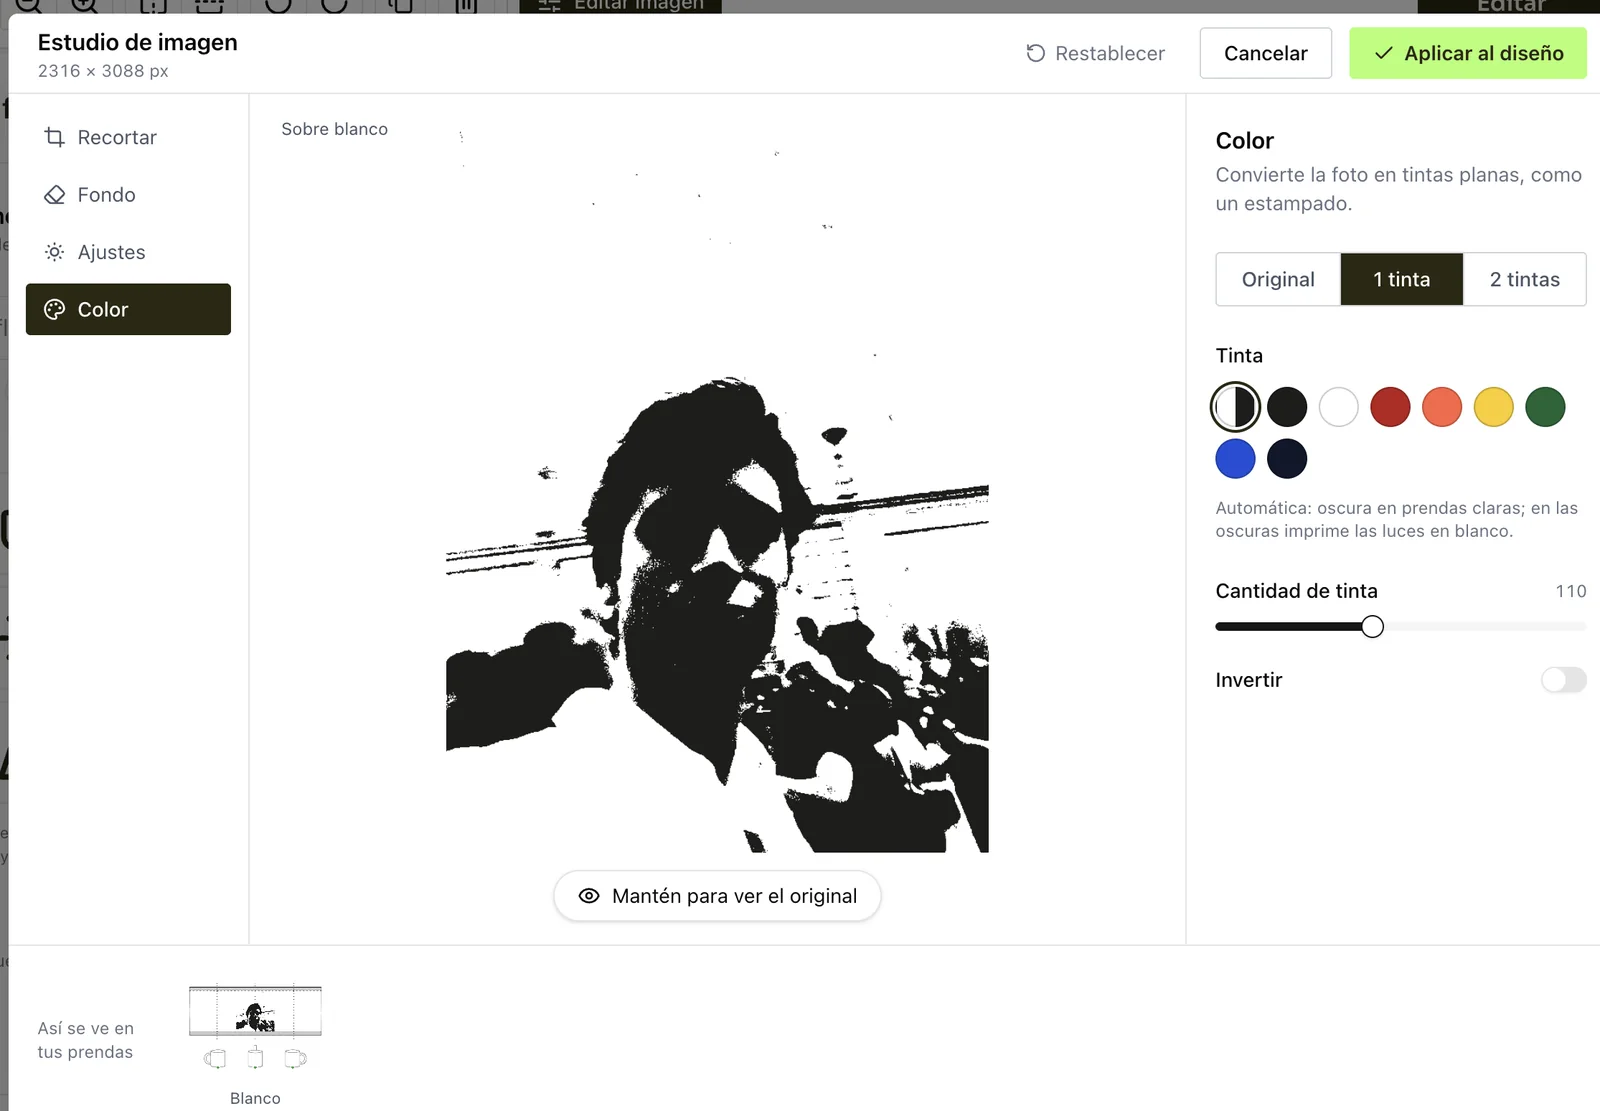
One ink
The Color tab turns the photo into flat inks, the way screen printing reproduces it, with a live preview on the garment at the bottom.
Built for buyers,
workshops and groups.
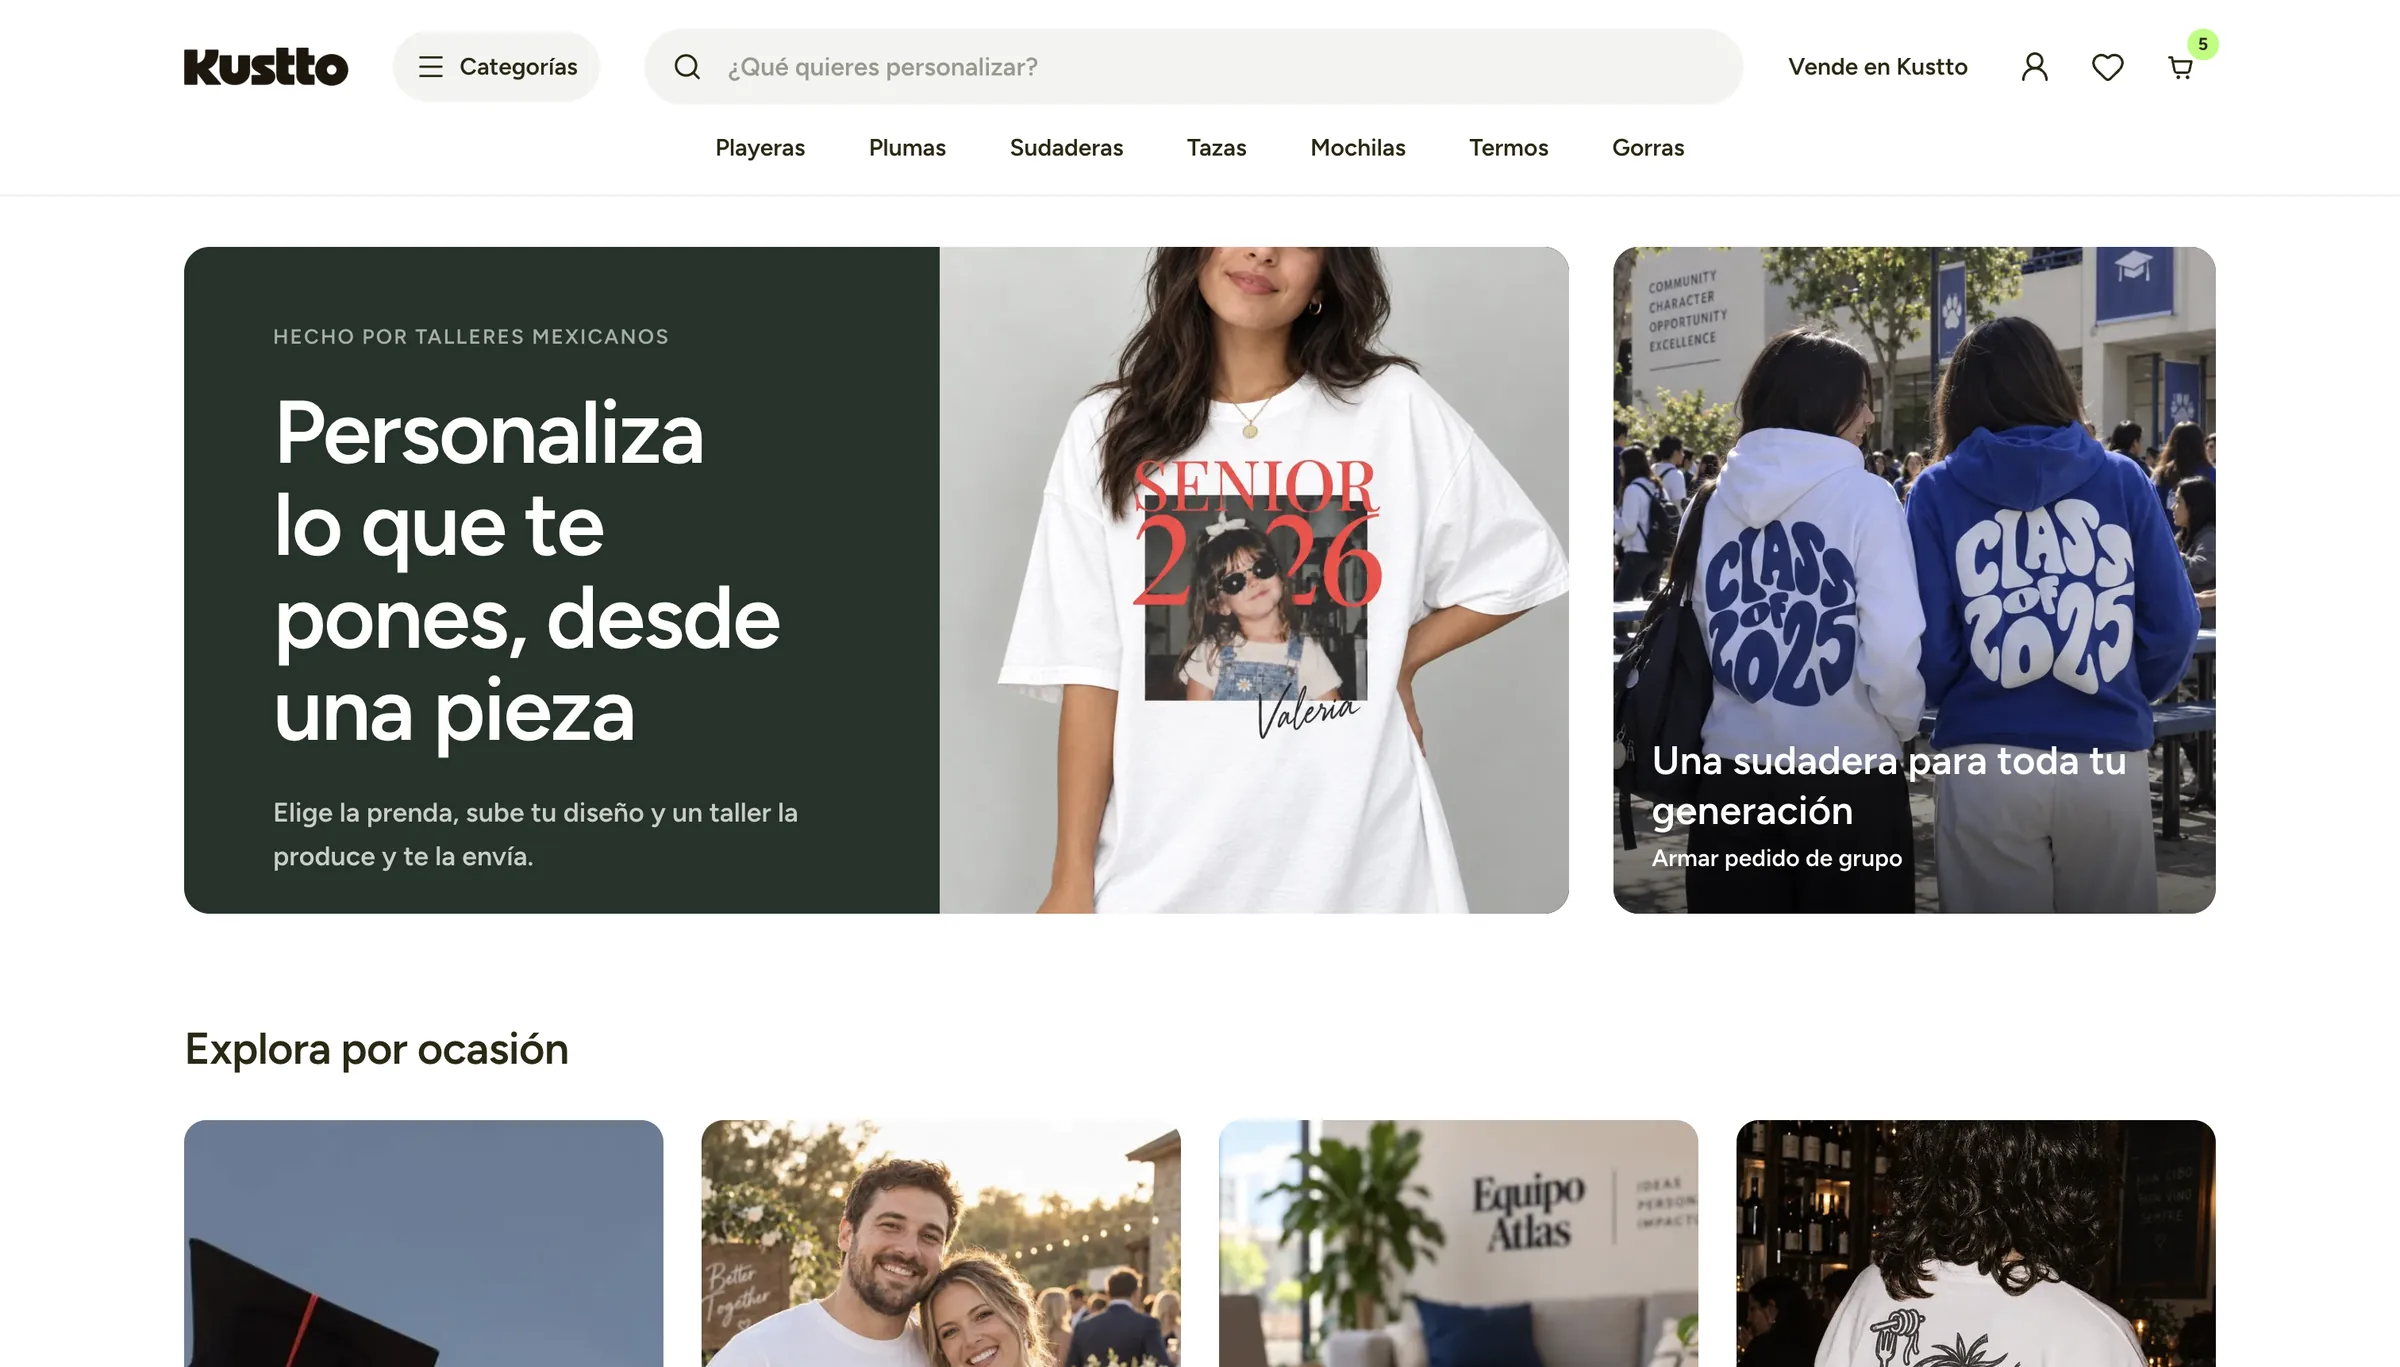
Around the editor sits a full marketplace with three kinds of account: buyers who design and order, workshops that produce, and an admin who curates the catalog.
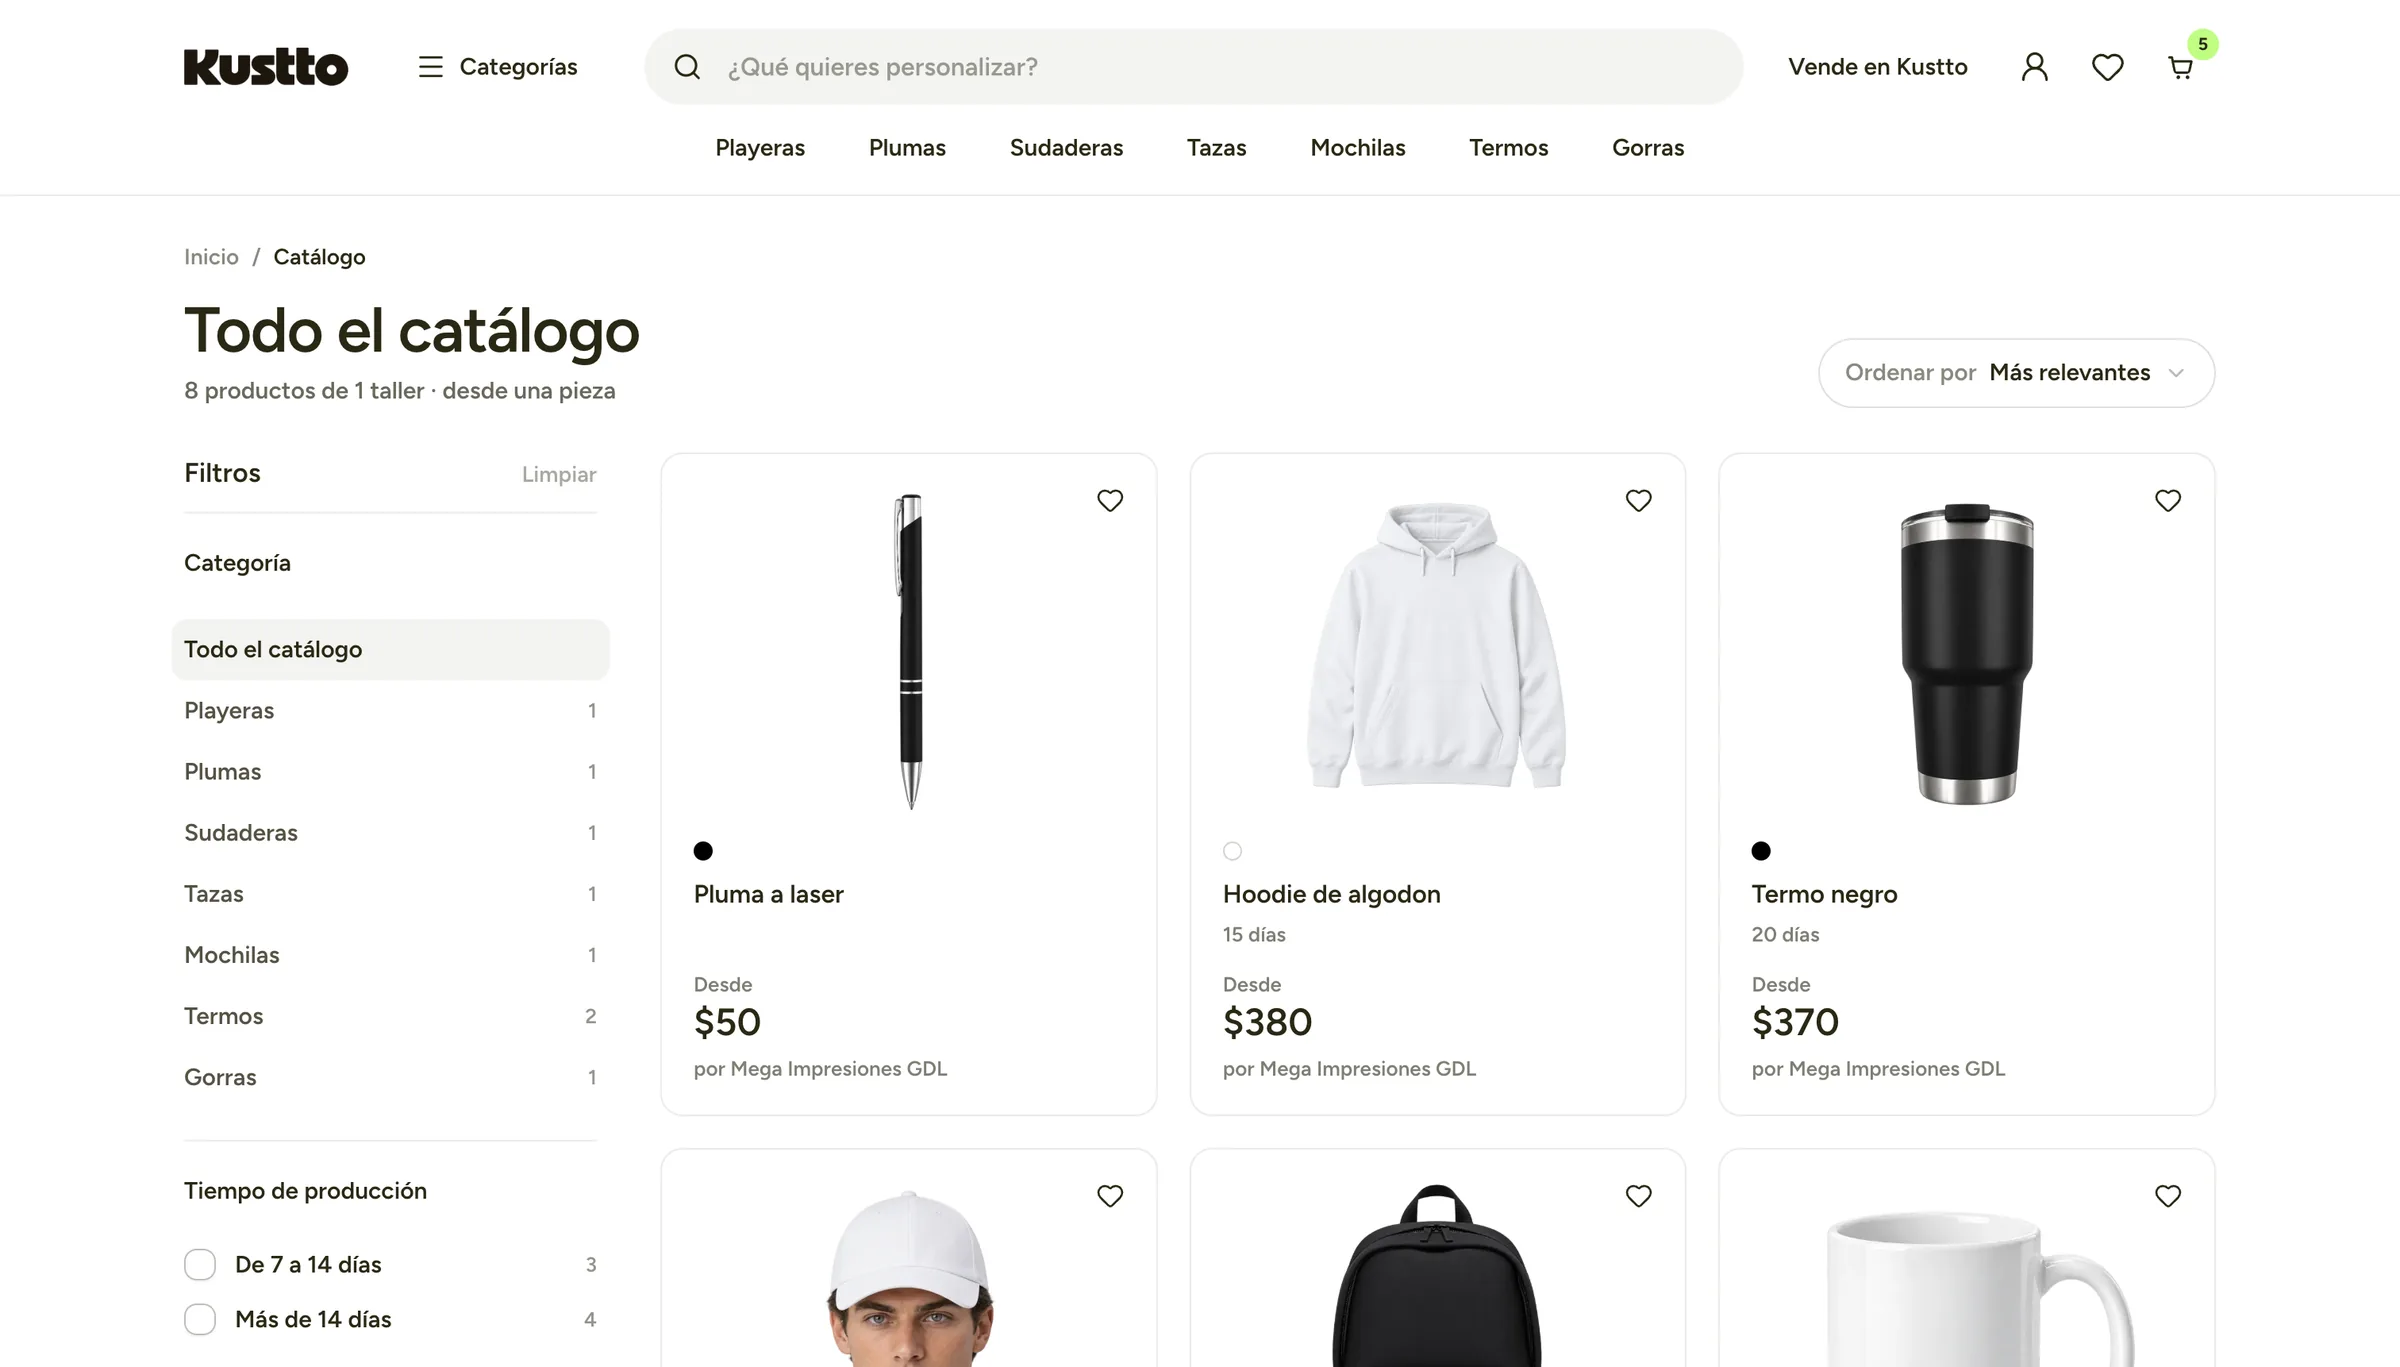
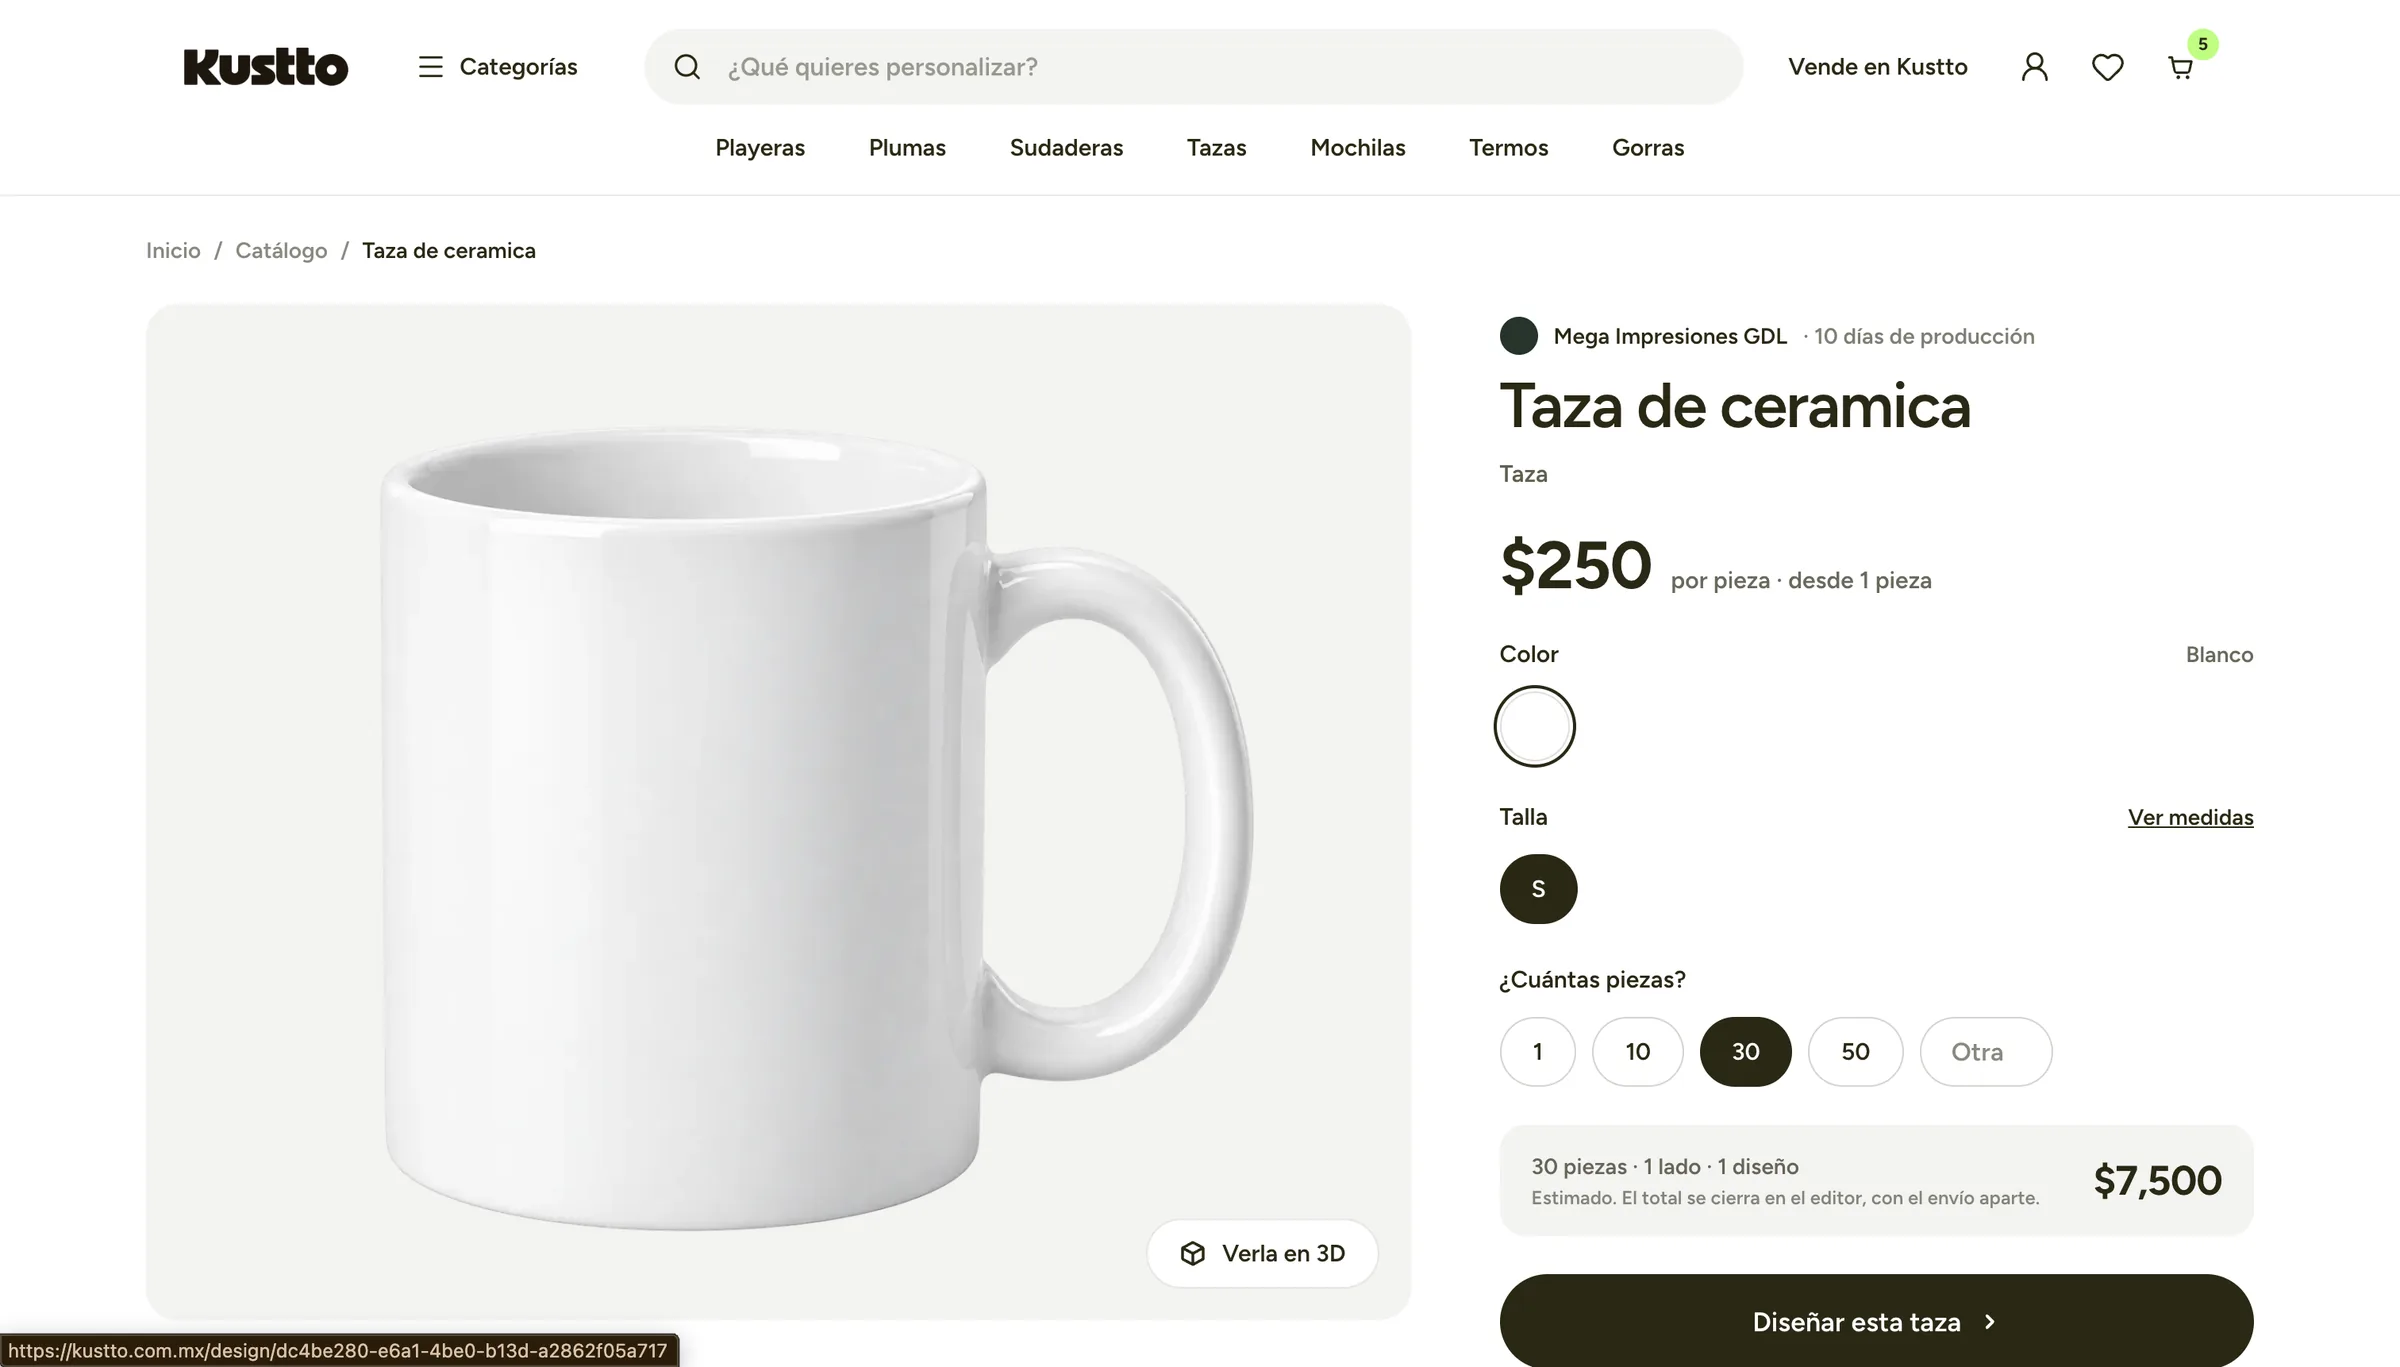
From a single piece
Buyers browse by category or occasion, filter by production time and see the price for their quantity before opening the editor. Every product belongs to a workshop and shows how long it takes to make.
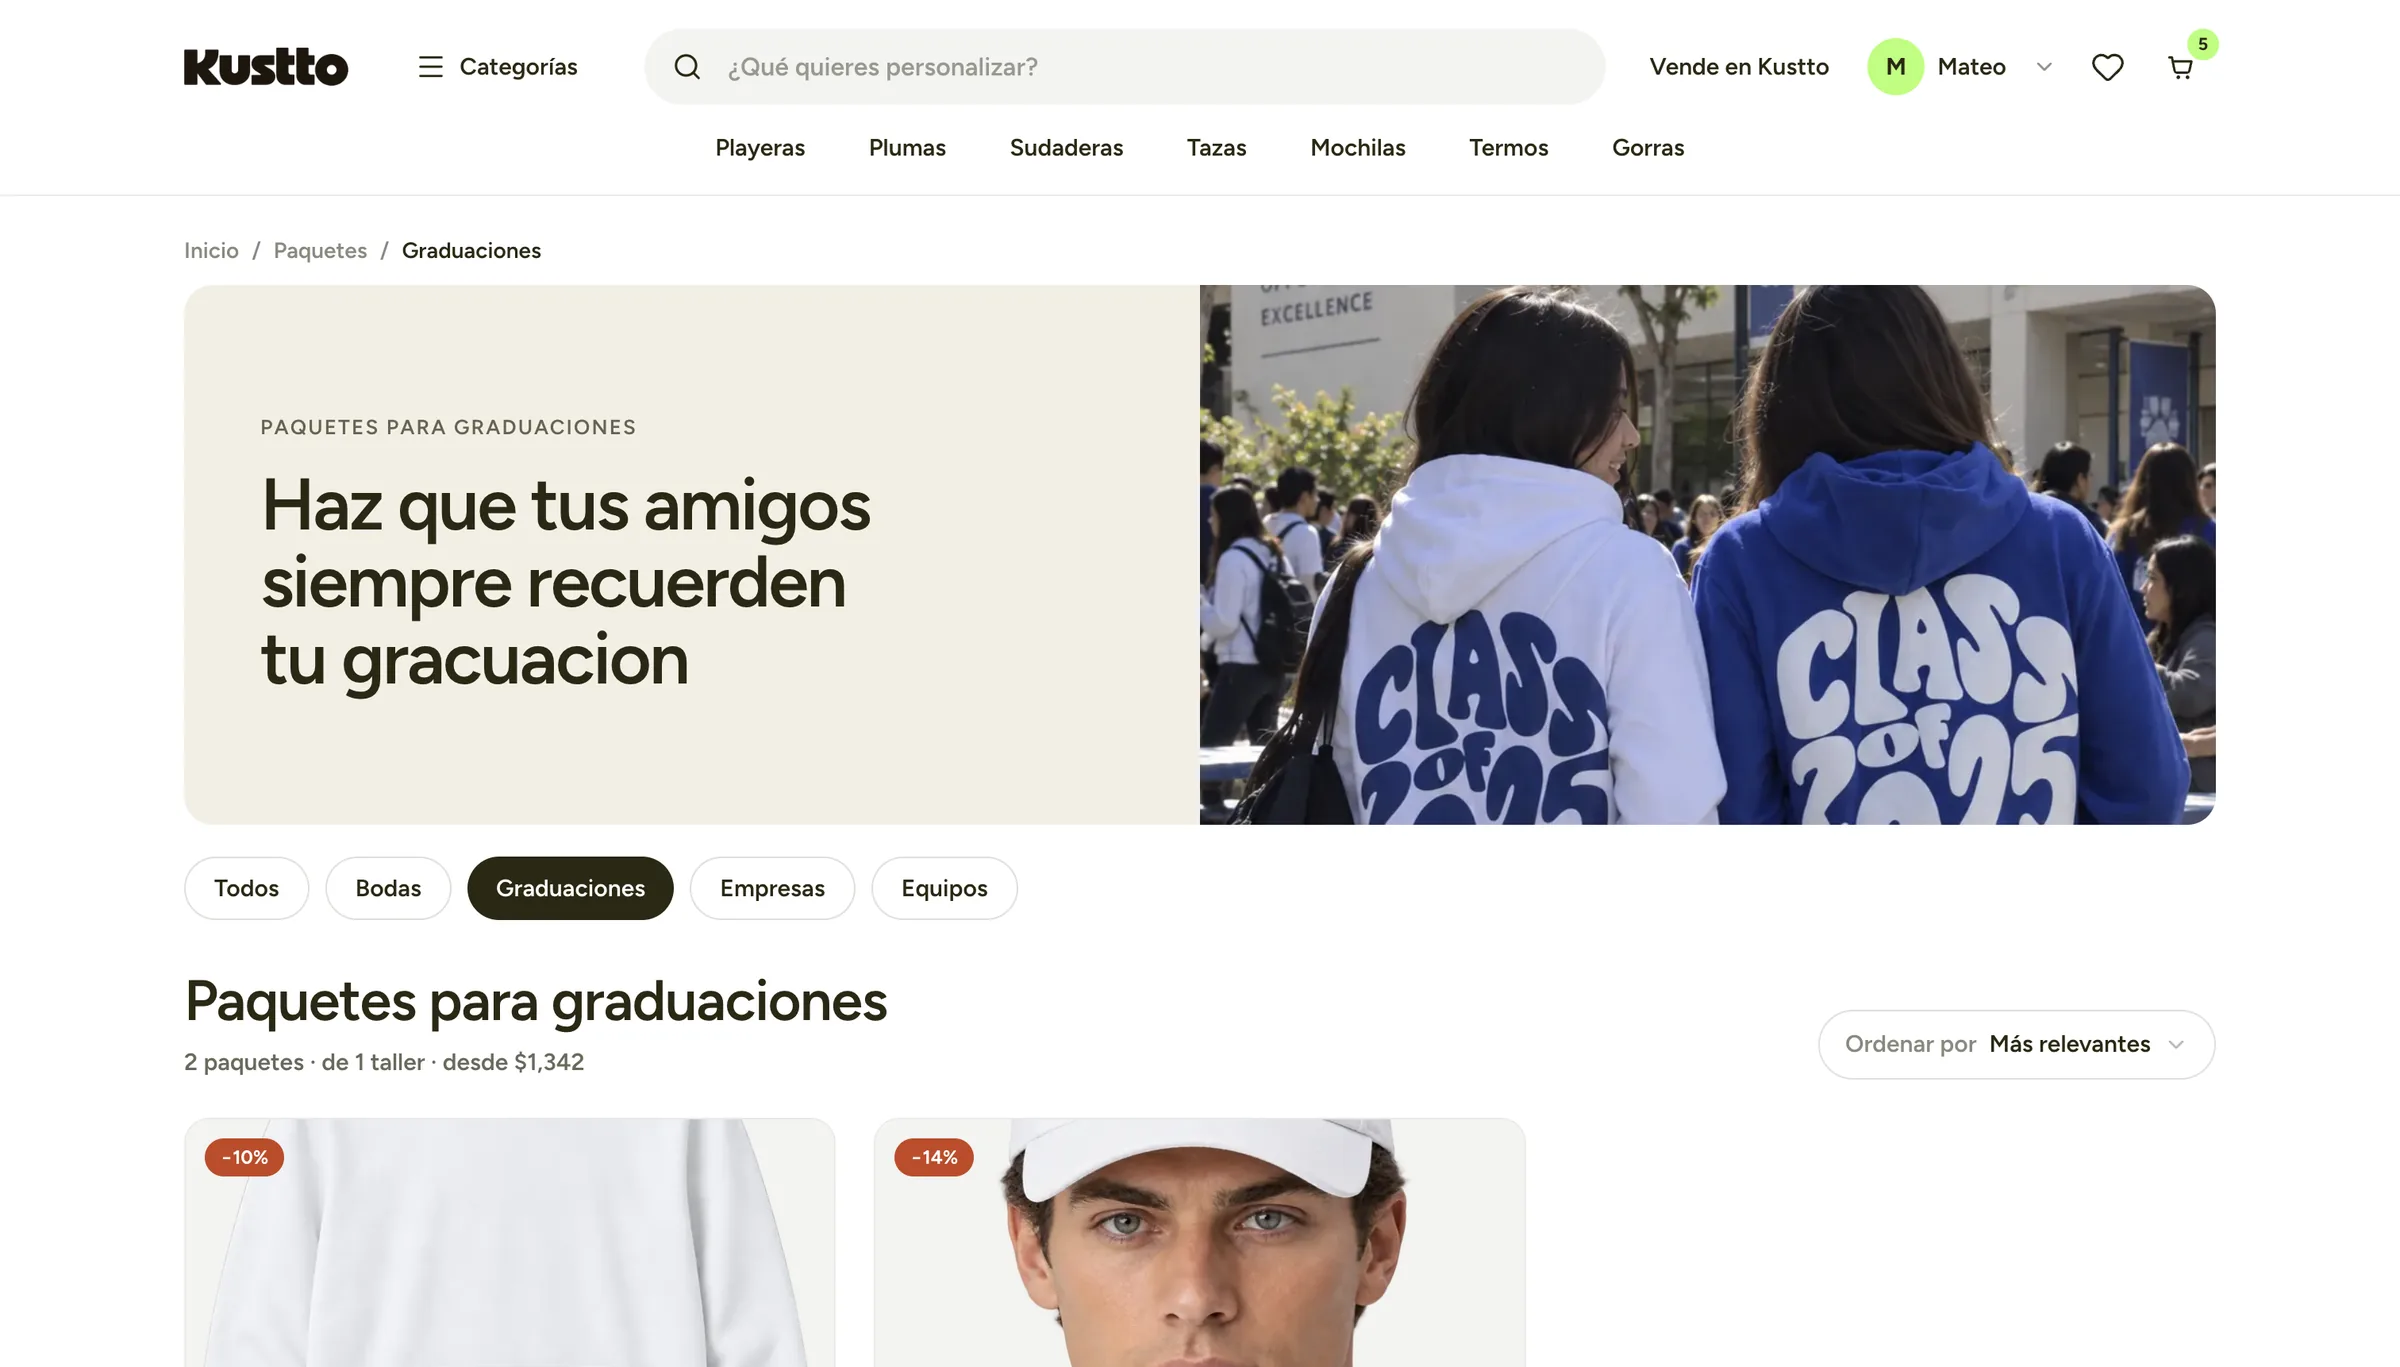
Bundles for groups
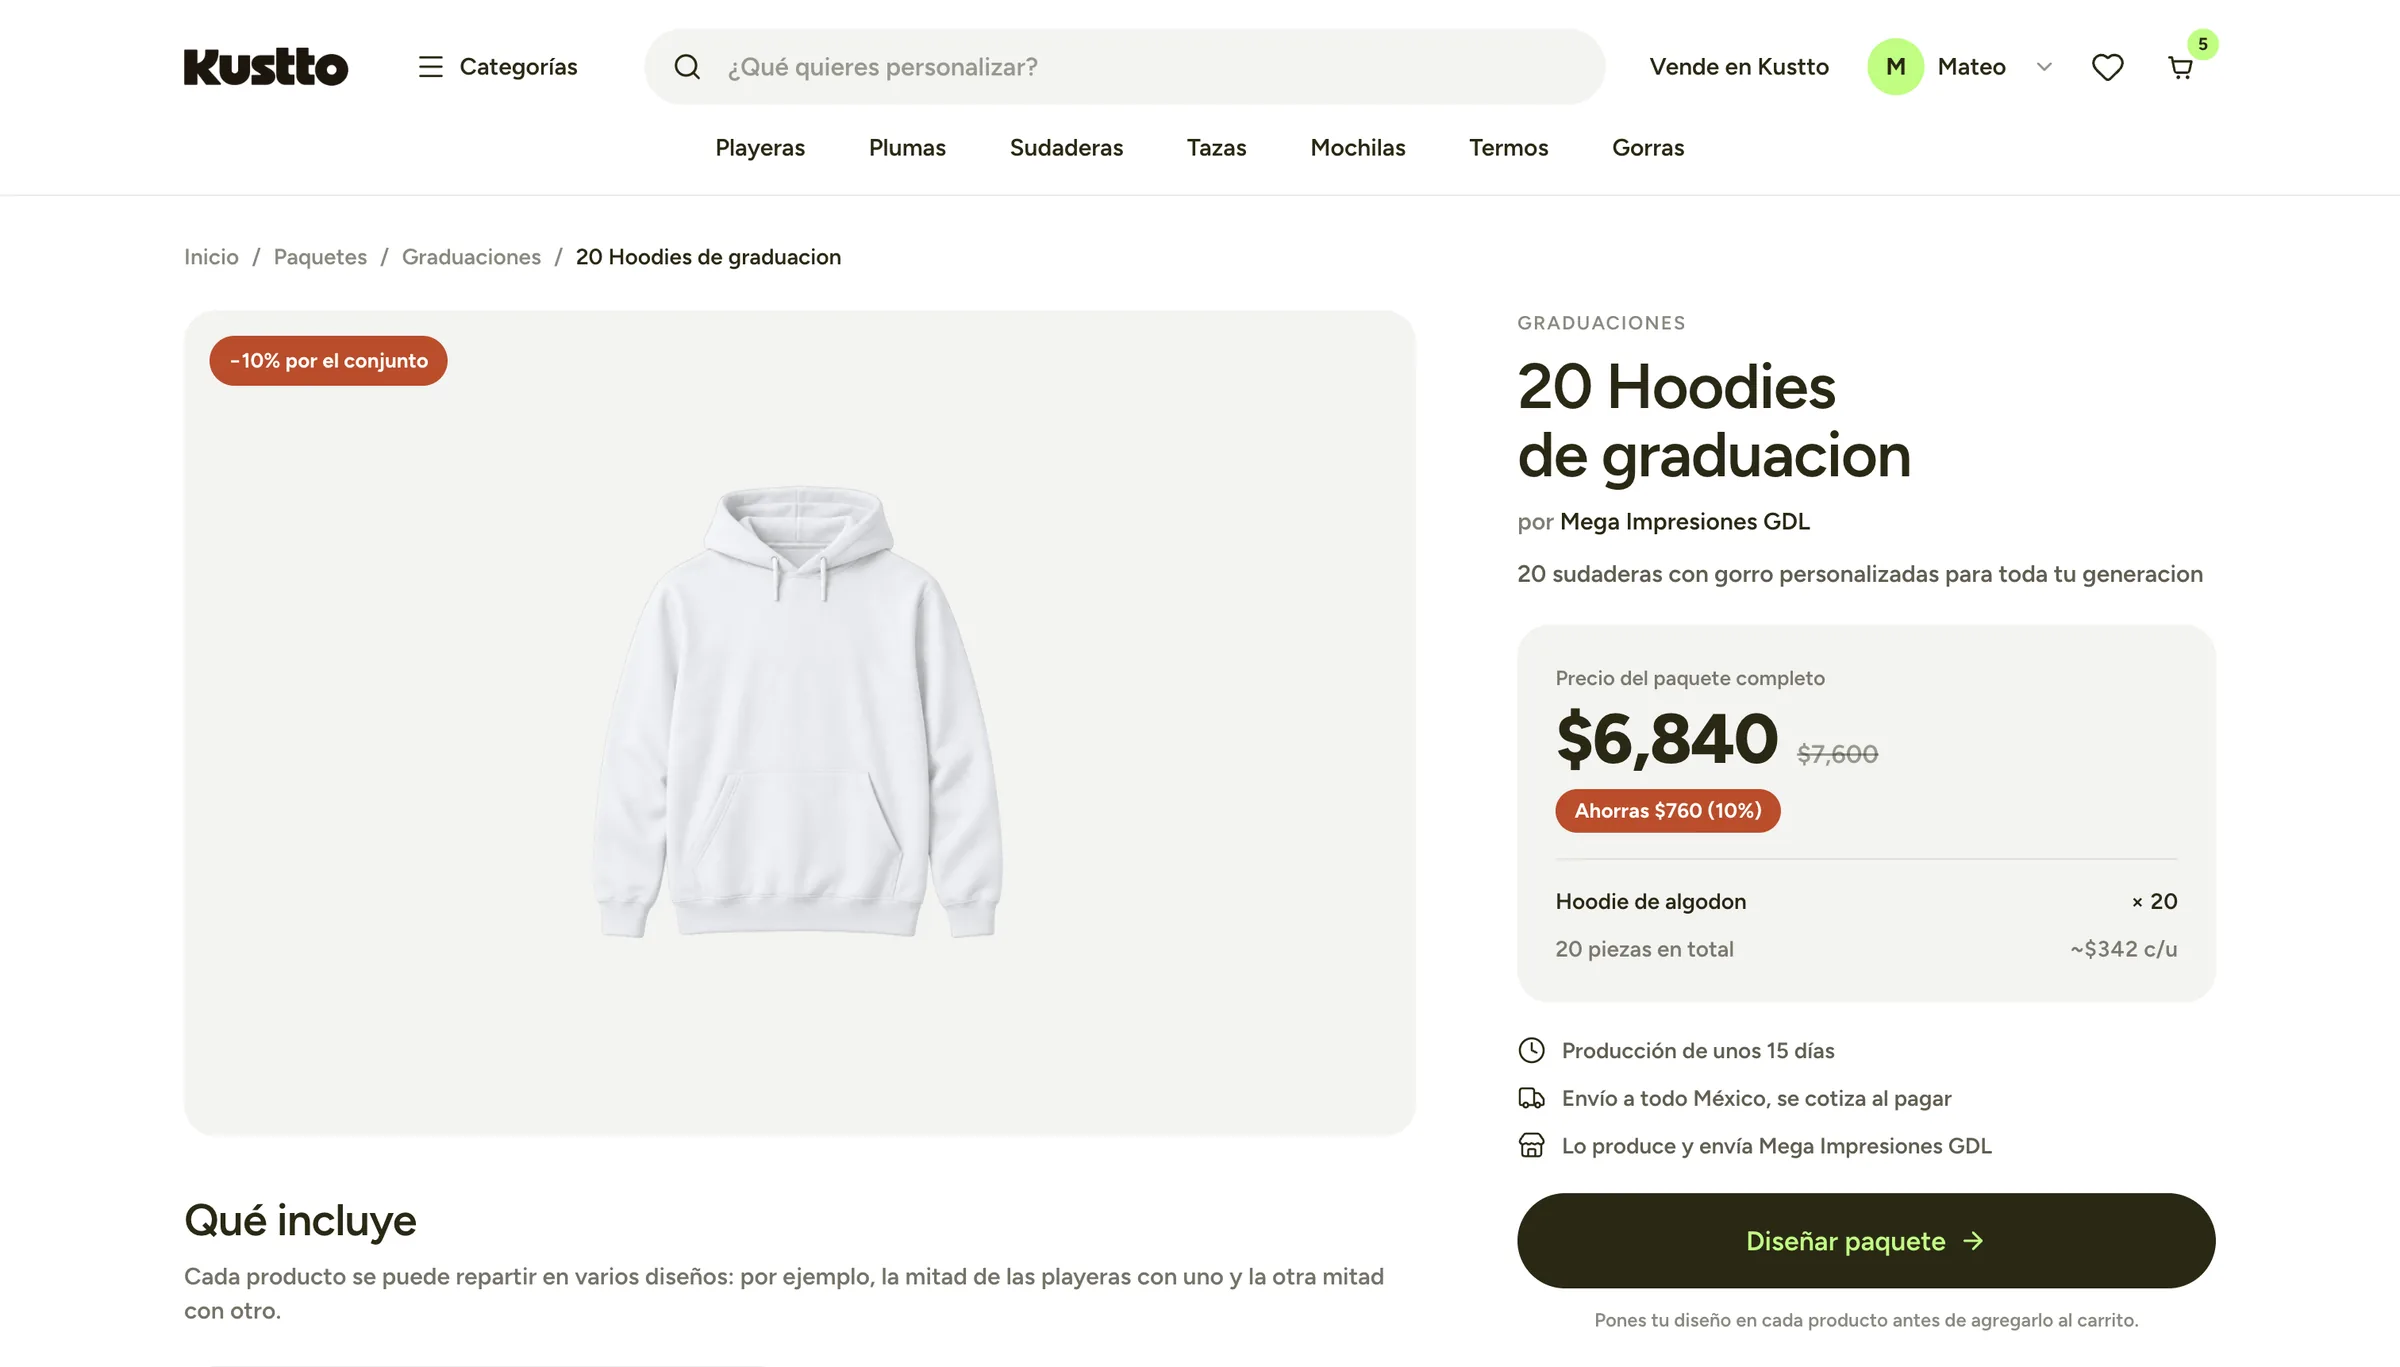
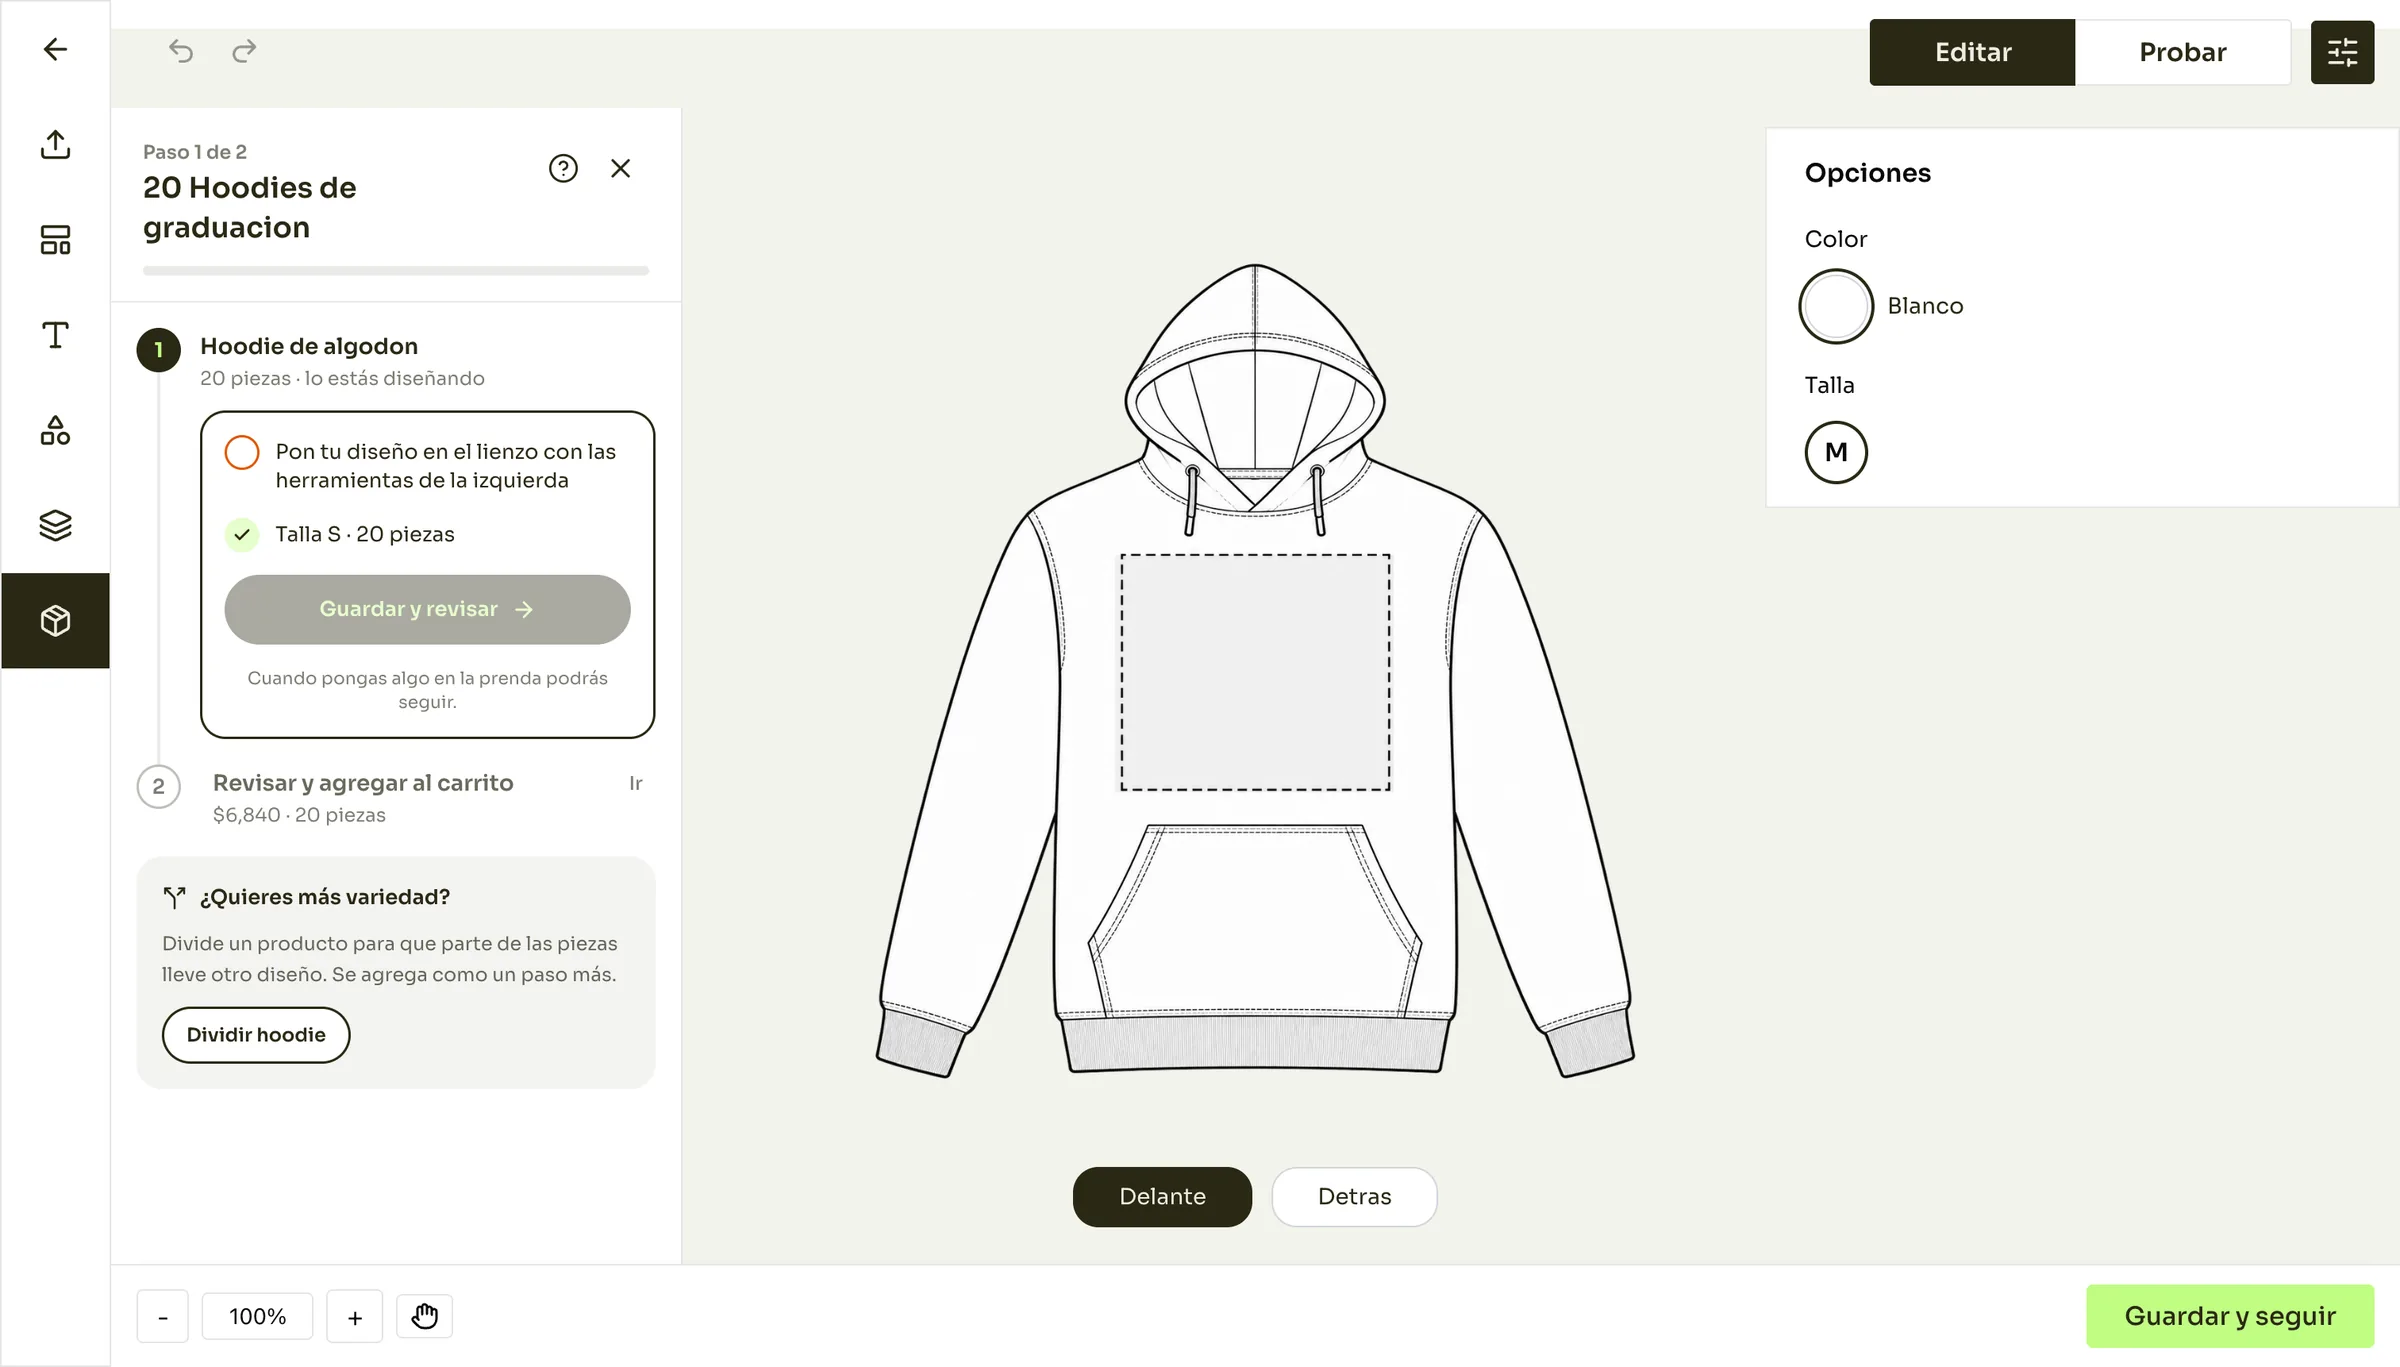
Packages for graduations, weddings, companies and teams come with a bundle discount. A package can split one product across several designs, and the editor walks the buyer through each one step by step.
One link for everyone
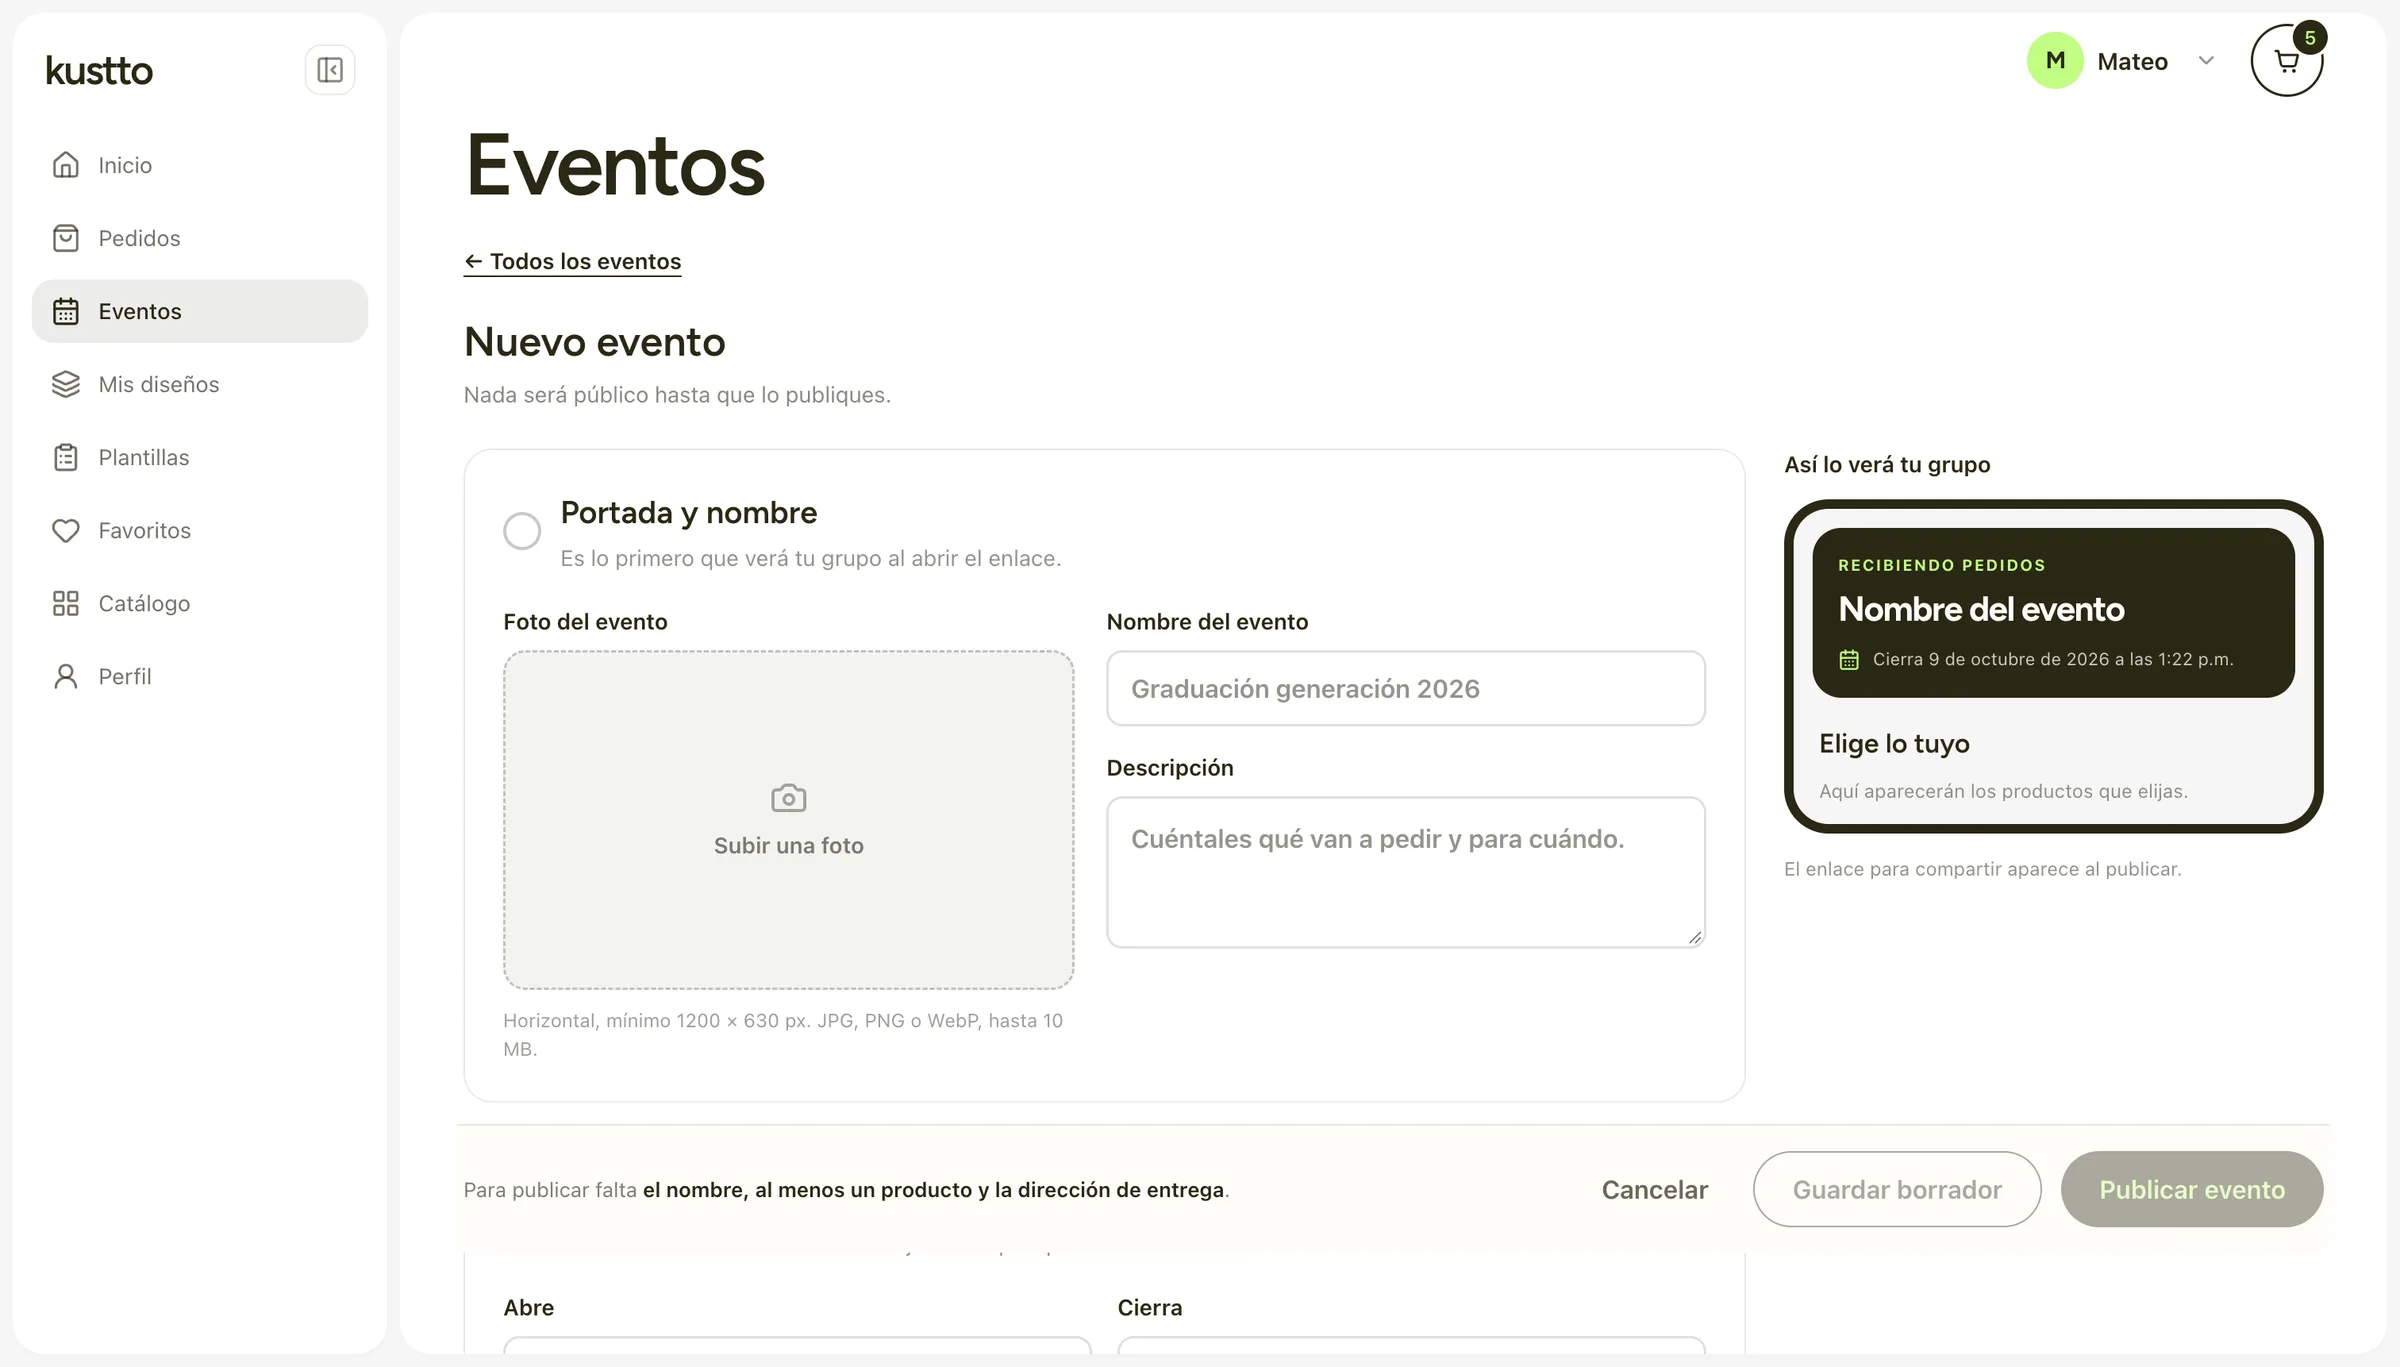
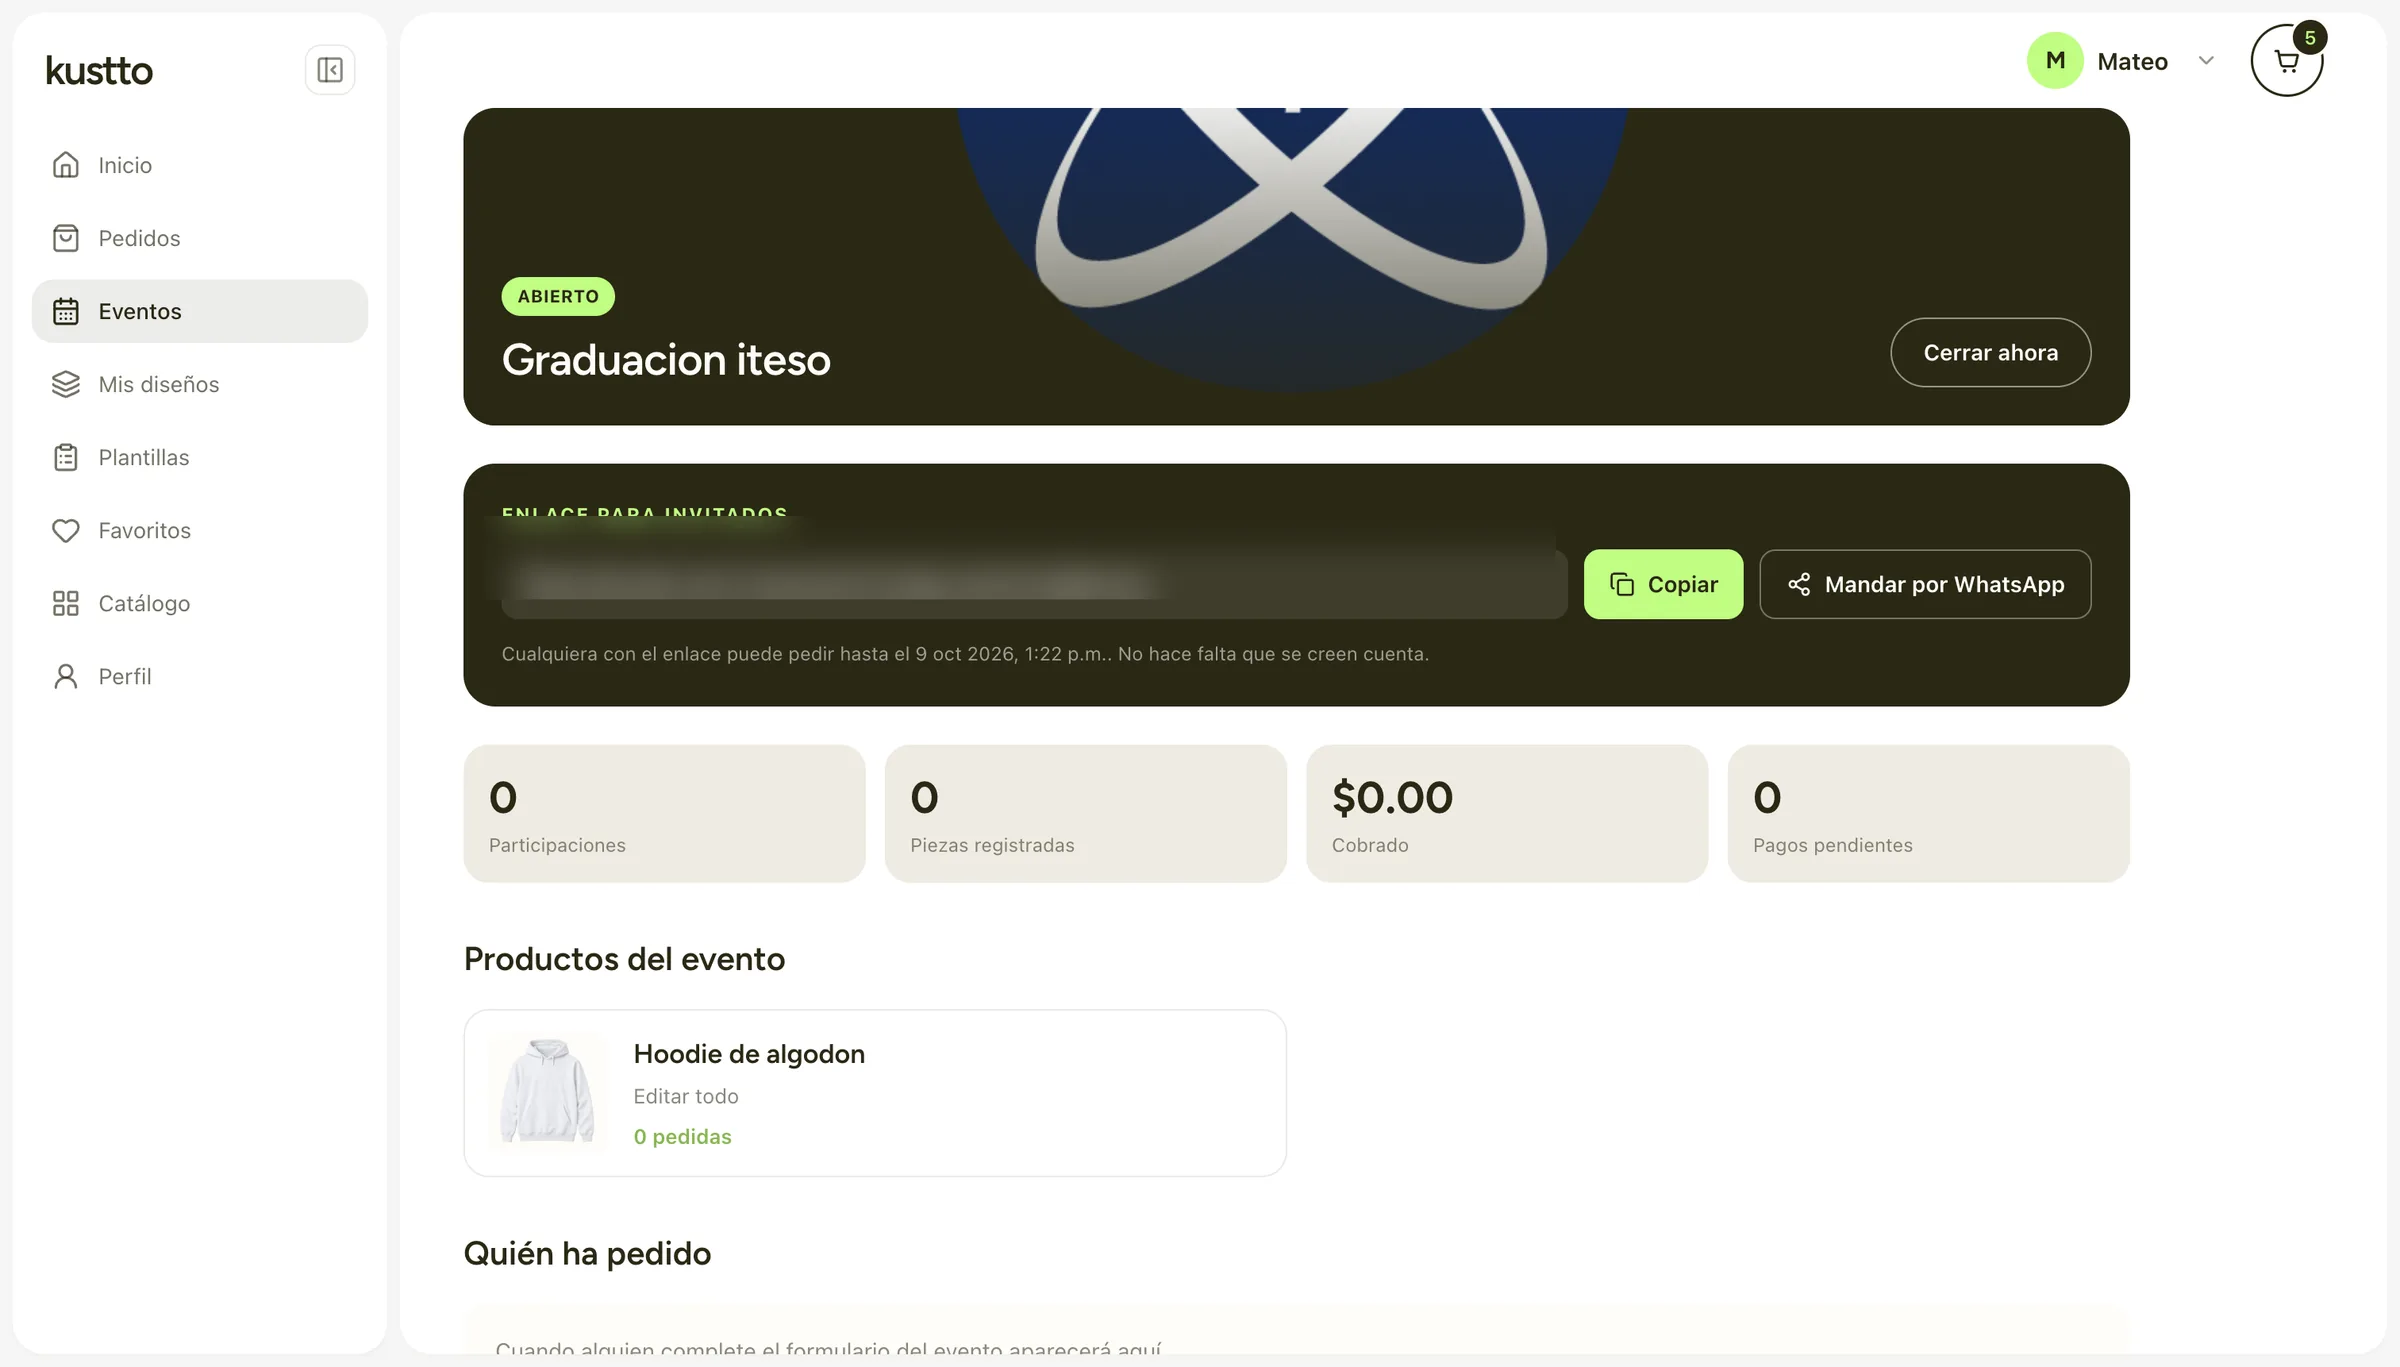
An organizer opens an event with a deadline and a set of products, then shares a link or sends it over WhatsApp. Guests order their own piece without creating an account, and the organizer sees who ordered and what is still unpaid.
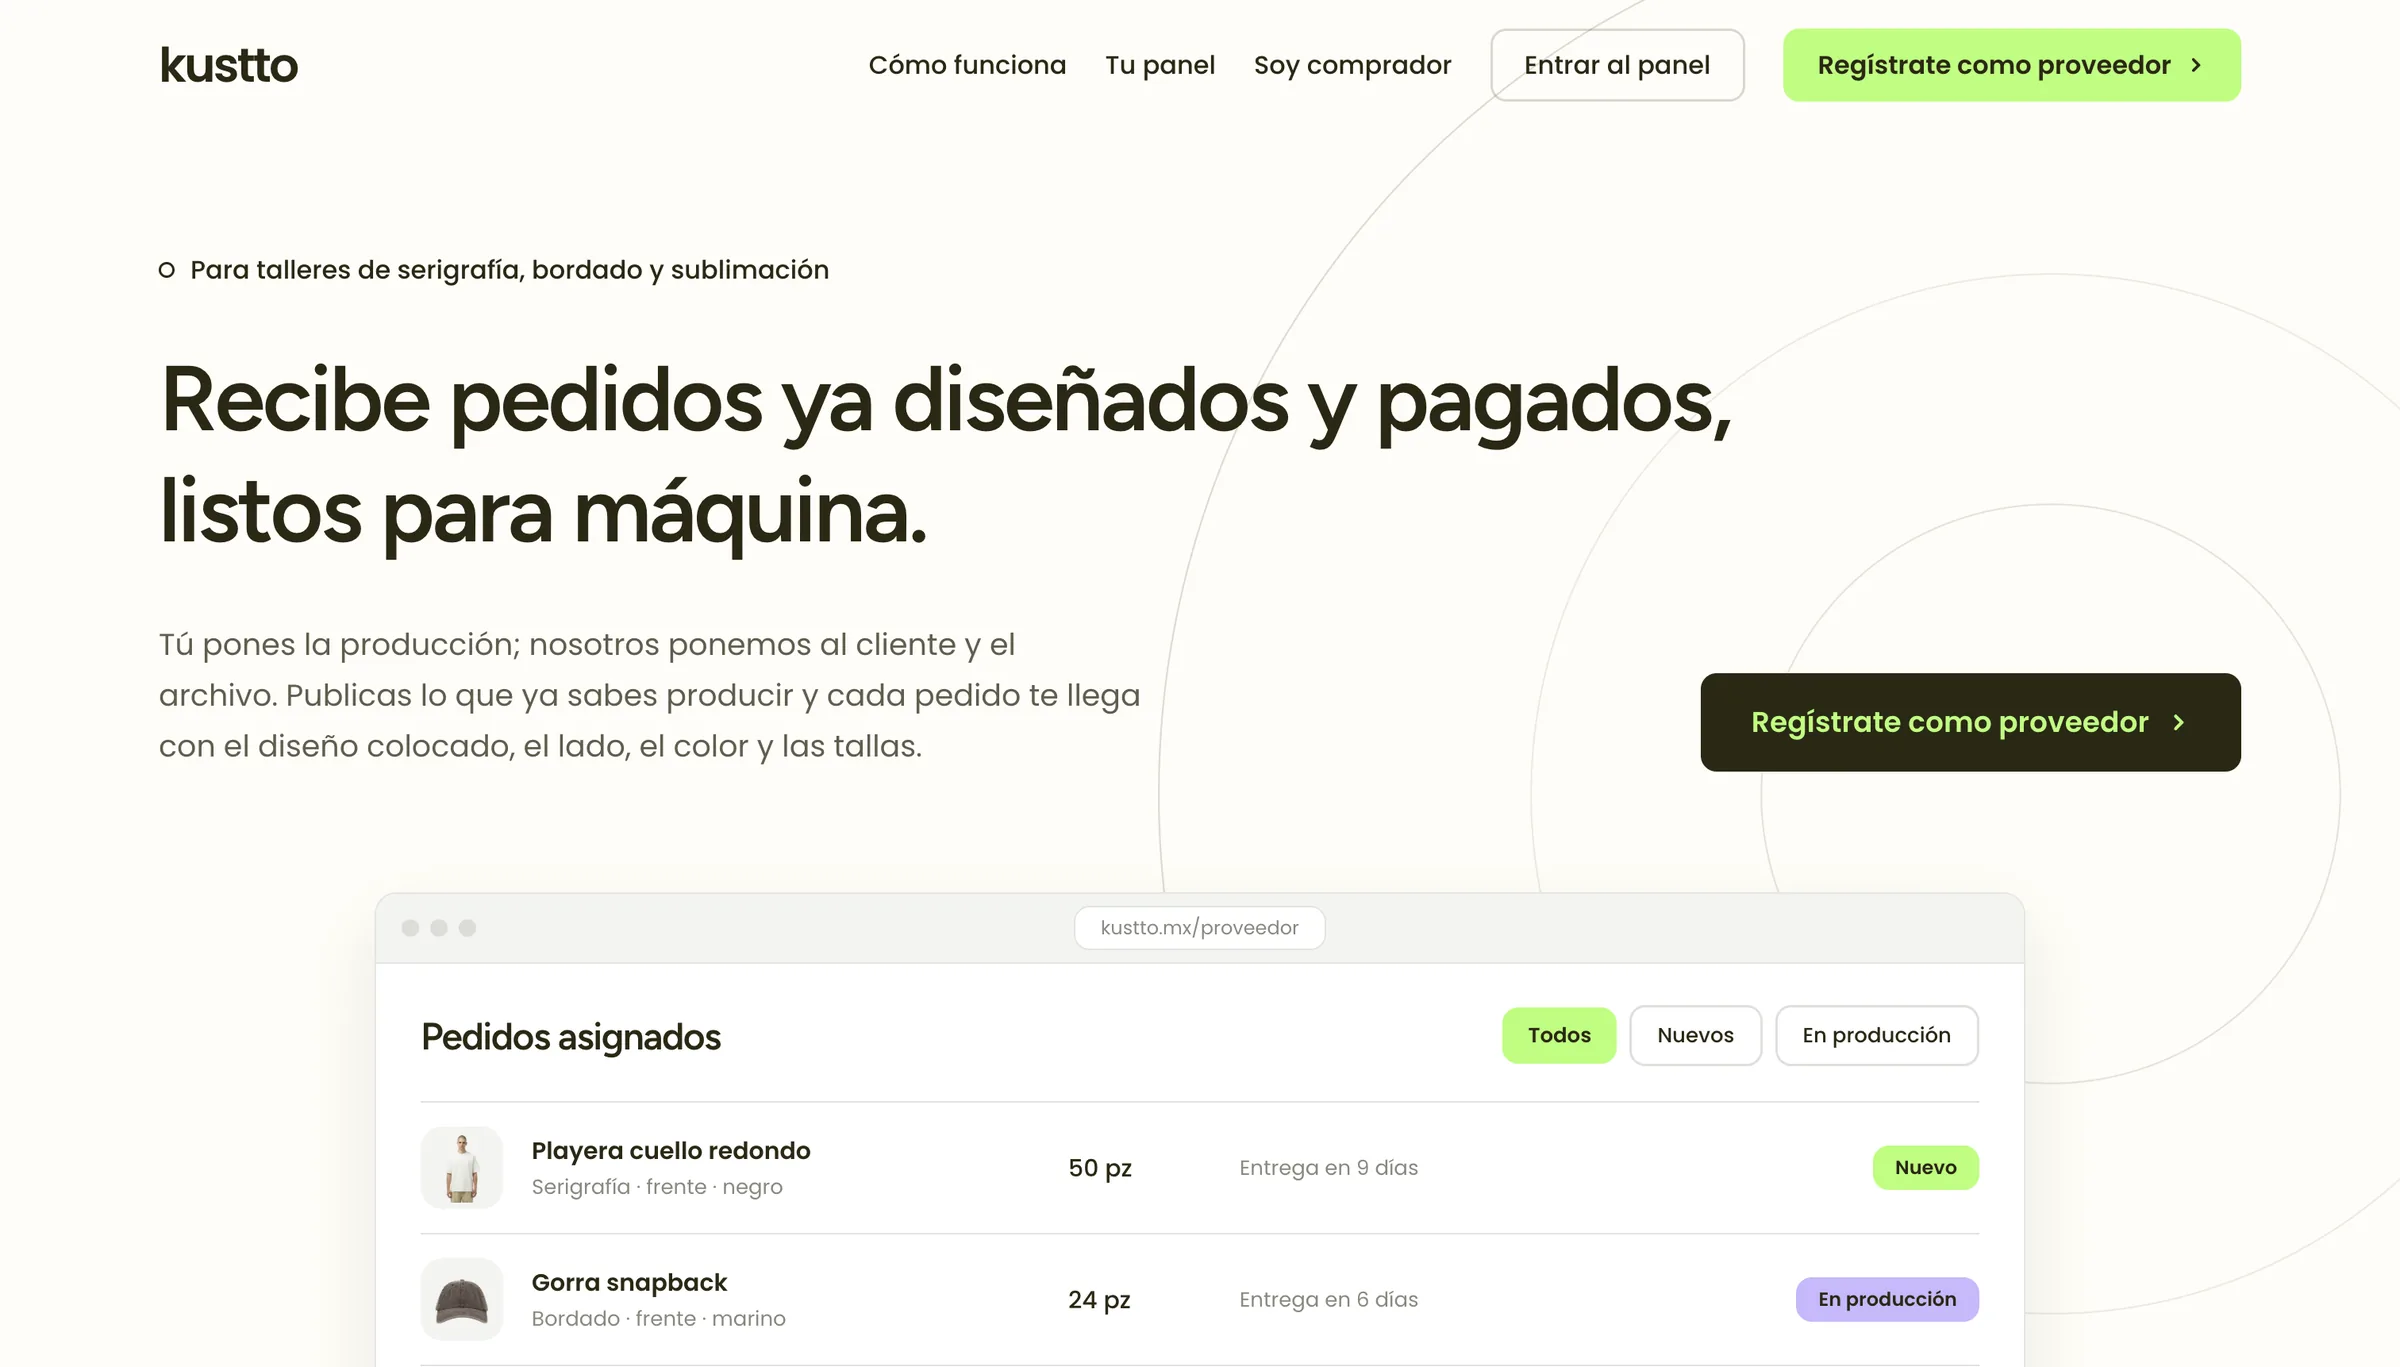
Orders ready for the machine
Workshops sign up by invitation and get a panel with their assigned orders, products and stock, plus a live notice the moment an order arrives. An admin reviews every product before it reaches the catalog.
Saved designs, honest checkout
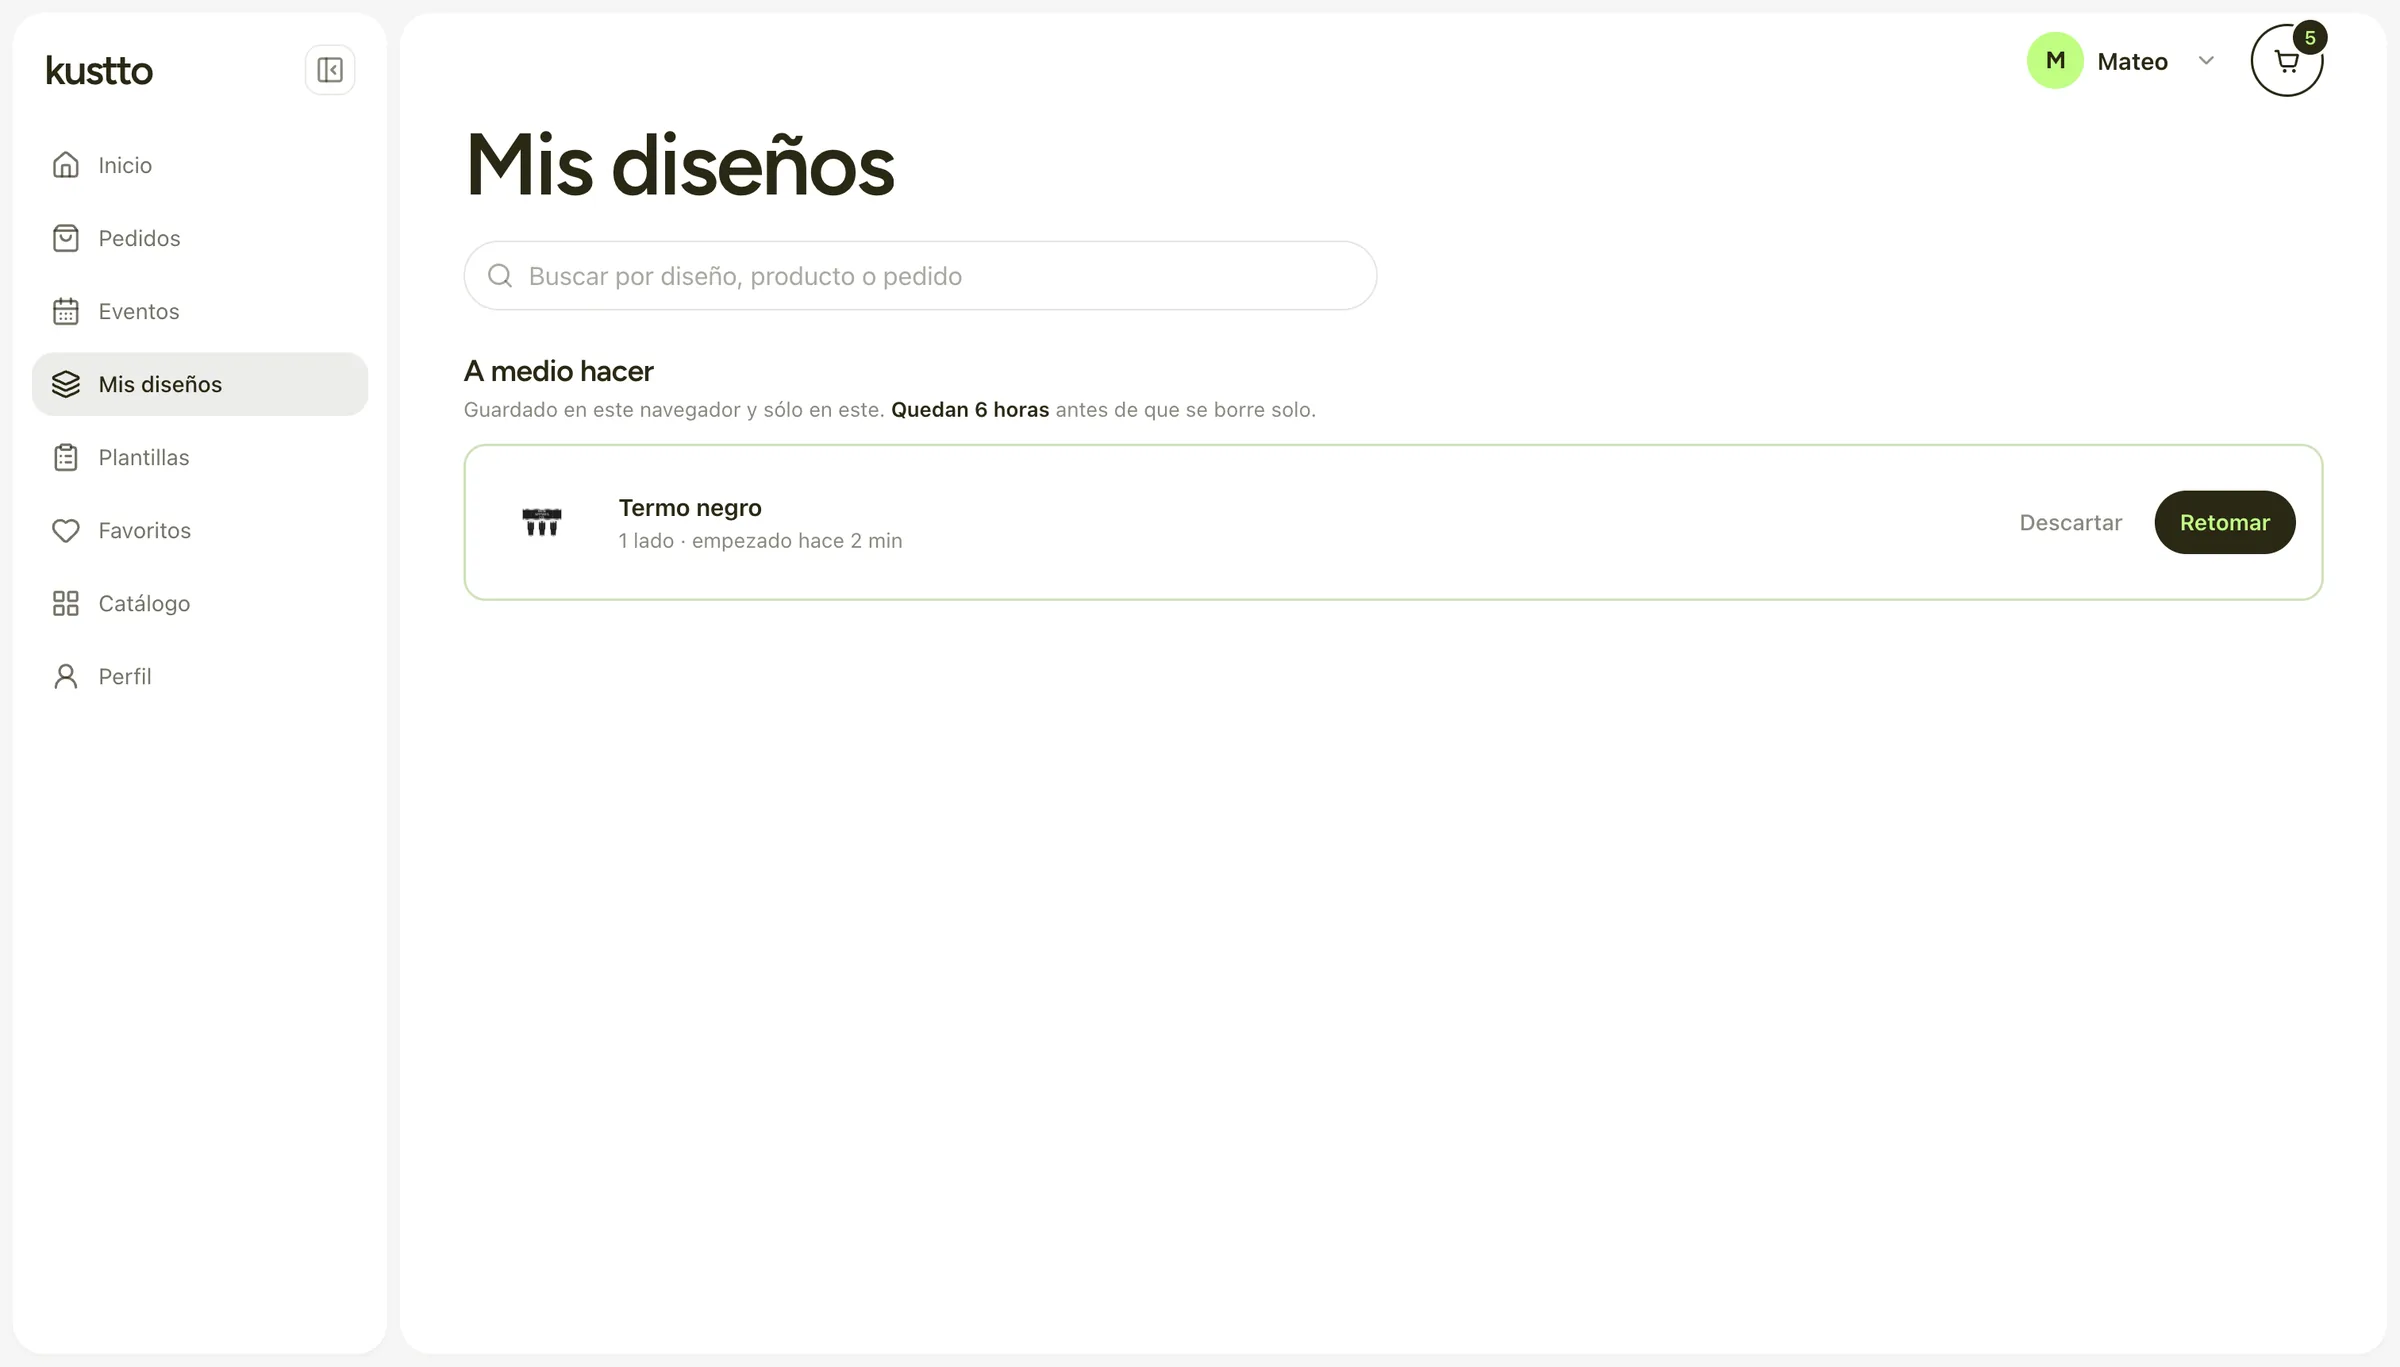
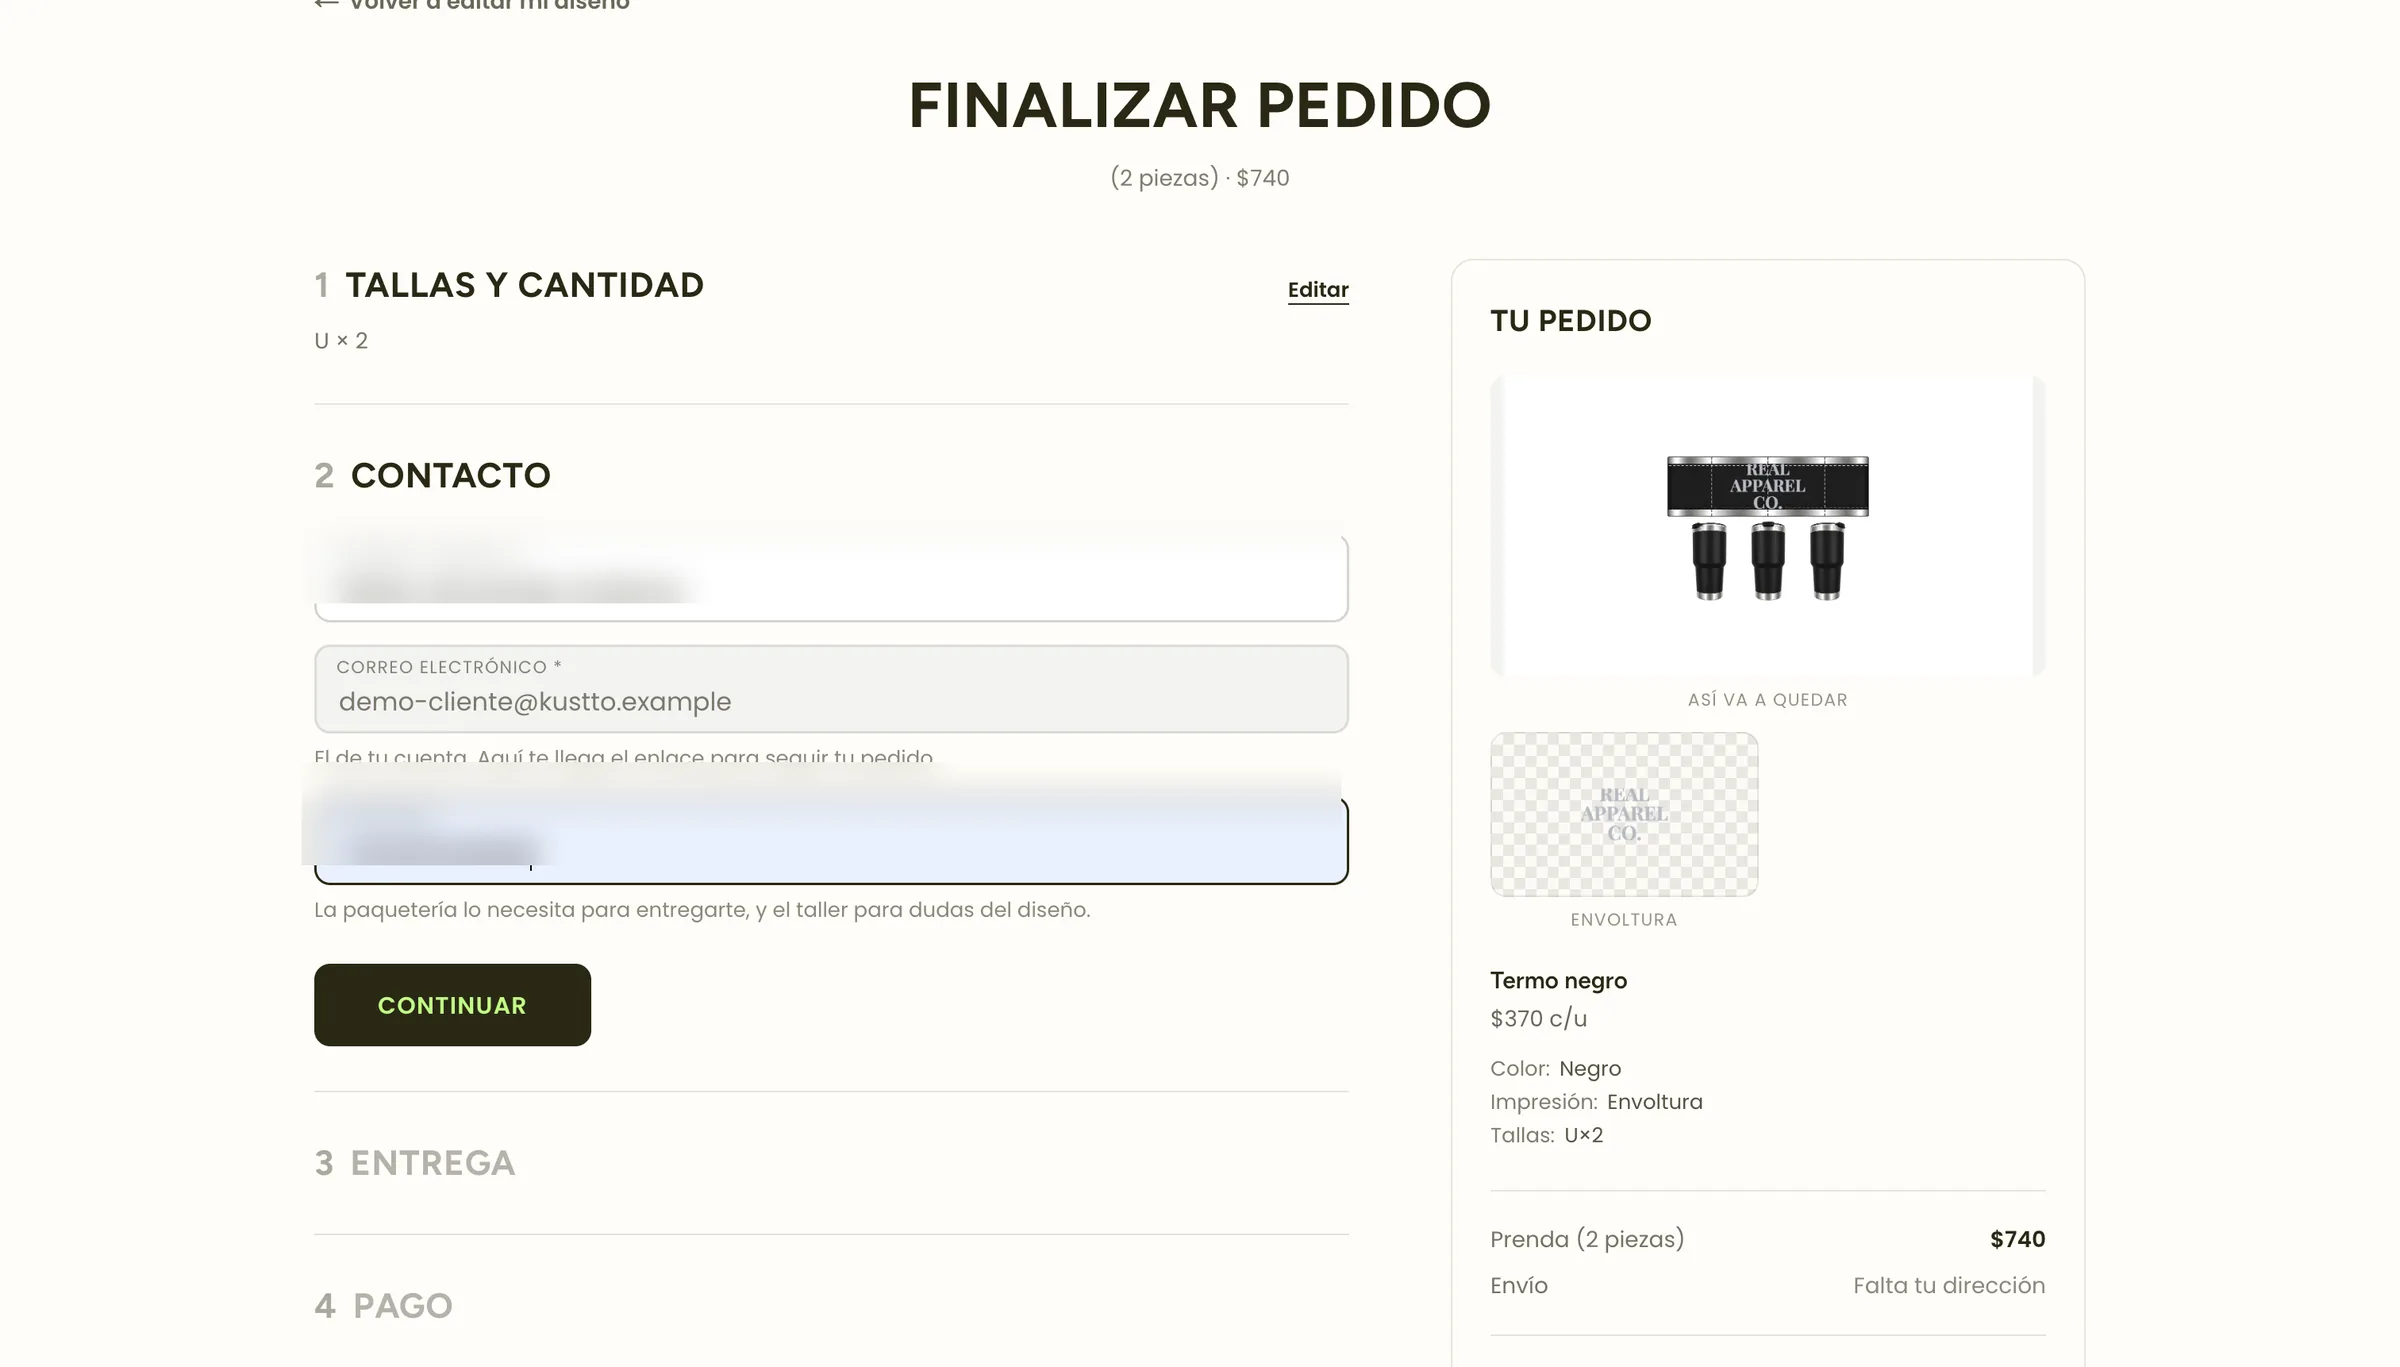
Buyers keep unfinished designs, favorites and past orders to repeat. The checkout splits a purchase into one order per workshop and quotes shipping with Skydropx. Payment is agreed with the workshop once it confirms the final price, and the checkout says so instead of pretending to charge.
Files a machine
can actually use.
Every printable side declares the technique it is made with, and the technique decides which file the workshop downloads. The buyer never thinks about it; the workshop never has to redo the design.
- DTF · screen print · sublimation · UV
- PNG at the side's DPI, clipped to the printable area, with bleed.
- Laser engraving
- SVG paths, with text converted to curves and images vectorized.
- Mugs and tumblers
- One wrap side, previewed bent around the cylinder.
- Embroidery
- Ink/Stitch in its own image, behind a flag until it is test-sewn.
Text leaves as curves
A laser follows paths, and a workshop rarely has the buyer's font. Exporting live text meant the machine would cut something else, or nothing.
Separate by color, not brightness
Vectorizing by luminance erased real logo colors: a yellow at 188 out of 255 counted as background. The mask now separates design from background by color.
A mug is a cylinder
A flat projection made the design look like a sticker. The preview compresses the wrap toward the edges, the way a real mug shows it.
Back to a server,
on purpose.
Kustto first ran on AWS serverless: six Lambdas, DynamoDB, Cognito and SQS. As the marketplace grew, each new feature needed a workaround, so the backend moved to NestJS and Postgres on one EC2 instance, while S3, CloudFront, SES and a single Lambda stayed on AWS. The diagrams below were checked against the live account.
Two CloudFront distributions, with AWS WAF in front of the store, reach the VPC through its Internet Gateway. The EC2 instance sits in the public subnet and runs Nginx, the Next.js app, the NestJS API, BullMQ workers and Redis. Postgres runs on RDS in private subnets that have no route to the internet, so only the app can reach it. Files live in closed S3 buckets that the instance reaches through a gateway endpoint, without leaving the AWS network, and background removal runs in a container Lambda fed by SQS, outside the VPC.
Three kinds of session, kept apart
Buyers, workshops and admins each have their own cookie and token audience, so a workshop session can never open a buyer's account, and signing into one does not sign out of another.
- Access tokens are Ed25519 JWTs that live 15 minutes. Refresh tokens are random, stored only as a hash and rotated on every use.
- A spent refresh token that comes back after a 30-second grace window is treated as theft and revokes the whole session.
- Logging out takes effect immediately: the session id goes into a Redis blocklist that every request checks.
The database never faces the internet
RDS lives in private subnets whose route table only knows the VPC, is not publicly accessible, and accepts port 5432 only from the app's security group.
A server where it pays off
Rate limits shared across processes, long-lived sockets and streamed files are natural on a server and awkward on Lambda.
Lambda where it fits
Background removal is heavy and occasional, so it stays serverless and costs nothing between jobs.
Closed buckets, same origin
Files are never public. The API streams them, which keeps the editor's canvas readable and the files private.
The server owns the price
Nothing that decides what is charged is accepted from the browser. It was verified by tampering with the request body.
Kustto grew from a product configurator into a marketplace that buyers, workshops and group organizers use end to end.
Buyers see the real result before ordering: on a 3D model, on the workshop's own photos, and with the limits of each technique shown honestly instead of promised away. Workshops receive orders already designed, with the side, color and sizes, and a file ready for their machine.
Groups, the hardest customers for a small workshop, get packages and event links: one person sets it up, everyone orders their own piece through the same link, and the organizer can see who has ordered and what is still pending.
For me, building the backend twice was the real lesson. Serverless was the right call while there were no customers; a server became the right call once there were workshops, shipping and live updates. Moving between them was only safe because the contract with the frontend never changed, and because every module was checked against the system that was still running.